Do you have a question about the Korg Nu:Tekt TR-S and is the answer not in the manual?
Using the unit in specific locations can cause malfunction.
Connect the designated AC adapter to the correct voltage outlet.
Avoid excessive force and use a dry cloth for cleaning.
Keep manual for reference and prevent foreign matter entry.
Proper disposal of product, batteries, and packaging to protect health and environment.
Verify product suitability for your region and retain proof of purchase.
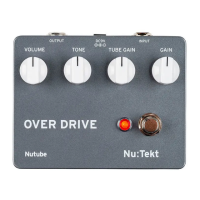
Highlights Nutube effect, Sag simulation, easy assembly, and customization.
Explanation of Nutube technology and its characteristics.
Verify all parts are present and undamaged before assembly.
Use caution with sharp parts, wear gloves, and wash hands after work.
Tighten screws perpendicularly and use tools carefully to avoid injury/scratches.
Handle screws carefully to prevent loss and use only included screws.
Connect the battery and place it in the battery space. Batteries are not included.
Close the lower case and secure with case screws using the provided tool.
Attach the rubber feet to the lower case as shown in the diagram.
Mount the volume knobs onto their spindles, aligning the groove.
Contact support for missing, damaged, or broken parts during assembly.
Check for loose screws or parts inside the unit if abnormal sounds occur.
Tighten nuts for footswitch, rear jacks, and volume controls.
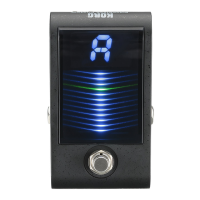
Detailed explanation of each knob, switch, and indicator on the unit.
Recommended starting settings for all controls.
Steps to adjust POWER SAG and THRESHOLD for desired sag and compression.
Use MIX for direct sound and TONE for attack feel adjustment.
Settings for single-coil pickups, connecting with overdrive.
Settings for humbucking pickups, suitable for jazz backing.
Important instructions to prevent harm, damage, fire, or electric shock.
Explains symbols for general warning, prohibition, and mandatory actions.
Proper AC adapter use, plug handling, and safe operating environment.
Avoid extreme temperatures, humidity, dust, liquids, and foreign objects.
Details on warranty period, exclusions, and repair conditions.
Contact information for customer support and service center.
| Brand | Korg |
|---|---|
| Model | Nu:Tekt TR-S |
| Category | Music Pedal |
| Language | English |