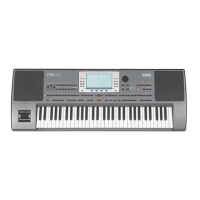
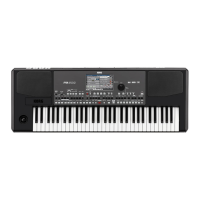
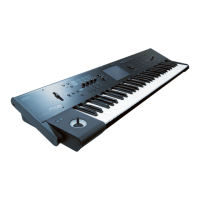
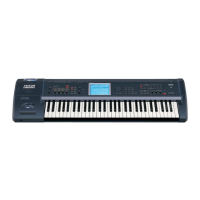
PA60 EasyStart
3. Try playing different STYLES and using the STS buttons to call up new sounds. Play with both hands to hear these parts.
4. To turn a part on or off, press BOTH of the VALUE/VOLUME buttons adjacent to that part on the DISPLAY.
5. To adjust the volume of a part; highlight the part by pressing the appropriate button (UPPER 1, UPPER 2, UPPER 3,
LOWER 1). Pressing the left hand VOLUME/VALUE button lowers the volume of that part. Pressing the right hand
VOLUME/VALUE button raises the volume of that part.
6. If you like, you can also select different sounds manually for each part.
! Make sure that the PROGRAM button to the far right of the PA-60 is lit before you continue this operation!
7. Highlight the part playing the sound you wish to change (be sure the part is active – i.e. the keyboard icon appears next
to the name of the sound). Now use the PROGRAM BANK buttons to select a bank of sounds. To see more sounds
inside a bank, use the PAGE+ and PAGE- buttons. Highlight the name of the new sound and play a few keys to see if
this is the sound you want. If it is, press STYLE PLAY button again. The name of the new sound will appear in the
DISPLAY. If not, select another sound using this same method.
8. Play the PADS! There are four PADS and a STOP PAD above the keyboard. Each one is assigned a different sound or
sound effect. New and different sounds can be assigned to any PAD.
Editing overview
1. The PA-60 is enormously powerful. The depth of all the possible editing is far more than can be covered here. However,
to get a taste: Press the MENU button to the top left of the DISPLAY. This will enter you into the STYLE edit mode. Use
the PAGE+ and PAGE – buttons to view all 25 Edit screens on the DISPLAY.
2. Here is a quick example. Start the STYLE playing by pressing the red START/STOP button. Or have a little more fun.
You can also start the STYLE playing by tapping the TAP TEMPO button four times. The style will begin playing at the
tempo of your tapping.
3. Press the MENU button and use the PAGE keys to go to page 20: STYCTL: DRUMS. Highlight the SNAR: DES function.
Rotating the VALUE WHEEL will substitute different snares into the selected kit! (This will not work on every STYLE, but
works on many)
4. Press the STYLE PLAY button to exit the EDIT page.
Saving your settings
1. By now, you have a selected a STYLE you like and some SOUNDS you enjoy, and made an edit or two. All your current
settings can be saved as a “PERFORMANCE”
2. Press the PERFORM button to the far right of the PA-60.
3. Press the WRITE button.
4. You can NAME your PERFORMANCE by pressing the DRUM VALUE button to the left of the DISPLAY. Use the VALUE
WHEEL to select the correct letter, and use the UP / + and DOWN / – keys to move through the name.
4