Do you have a question about the Korg Soundlink DRS 168RC and is the answer not in the manual?
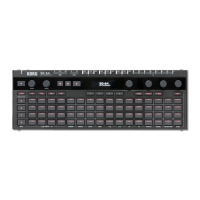
Details the main features and capabilities of the 168RC recording console.
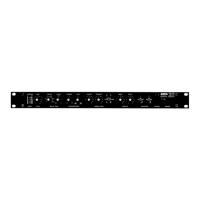
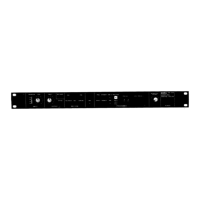
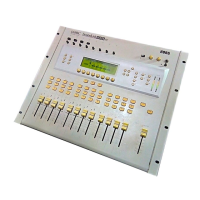
Explains the various controls and buttons on the front and rear panels.
Describes how audio signals flow through the console and the different operational modes.
Guides users on interpreting information displayed on the console's LCD screen.
Details the process of adjusting and modifying various operational parameters.
Provides a system connection example using an 168RC and one ADAT device.
Details the correct procedure for powering on the connected devices.
Explains how to set the clock source for the ADAT and the 168RC.
Lists essential checks to perform before beginning operations.
Guides on selecting which signals are to be sent to the monitor.
Describes how to input keyboard signals to specific channels.
Explains how to monitor signals that have been input to channels 9 and 10.
Details the process of sending signals to the ADAT unit.
Describes how to input signals received from ADAT into channels 1 and 2.
Explains the procedure for configuring channel pairing settings.
Covers how to make adjustments using the built-in equalizer.
Details applying effects to signals routed to the ADAT.
Explains how to apply effects to signals from the master L/R.
Guides on recording signals to the ADAT.
Explains the overdubbing process for recording.
Details the process of mixing down tracks.
Guides on listening to the master output.
Explains how to save current settings as a program.
Details how to recall previously saved programs.
Covers various other useful functions and features of the console.
Explains the settings and parameters available in the MISC mode.
Details the input/output configurations for the EX. BUS.
Covers the MIDI setup, connections, and device ID settings.
Details the Program (PGM) mode for saving, loading, and managing programs.
Explains the Input/Send/Pan (I/S/P) mode for channel configuration.
Covers the Equalization (EQ) settings for each channel.
Details the Bus Assign settings for routing signals to master and group buses.
Explains the input selection and phase settings for channels.
Covers the AUX send settings for channels 1 and 2.
Details the effect send settings for channels.
Explains the pan settings for stereo positioning of signals.
Covers the input/output and edit settings for effects 1 and 2.
Details settings for the group and master buses.
Covers monitor and master send settings.
Explains the channel and bus meter settings.
Simulates the ambiance of a large concert hall.
Provides a hall reverb with variable room environments.
Emphasizes early reflections for a tighter room sound.
Simulates a bright, room-like reverb.
Simulates a high-density plate reverb with warm reverberation.
Simulates a light plate reverb with dry-sounding reverberation.
Isolates early reflections for decay curve shaping.
Multi-tapped delay with left, center, and right taps.
Delay effect with pitch modulation using an LFO.
Stereo harmonic chorus effect with biased LFOs for spaciousness.
Combines multitap choruses and delays for complex stereo effects.
Slightly detunes pitch for a chorus-like effect.
Chorus effect using two LFOs for complex waveform modulation.
Combines three chorus blocks for a dimensional ensemble effect.
Simulates a rotary speaker with pitch and speed modulation.
Changes the pitch of the input signal.
Modulates pitch shift using an LFO for dynamic effects.
Limits input signal volume to a specified level.
Applies limiting to low, mid, and high frequency ranges independently.
Adds spaciousness and presence to the sound.
Pans the sound automatically between left and right.
Provides a 7-band graphic equalizer for sound shaping.
Combines a 2-band parametric EQ with early reflection effect.
Applies a 2-band parametric EQ followed by a delay effect.
Adds sparkle and delay with taps to the sound.
Combines delay and chorus effects for varied delay sounds.
Combines flanger and delay effects for modulation and echoes.
Combines delay and phaser effects for modulated sounds.
Combines phaser and tremolo effects for pleasant modulation.
Uses a gate to mute signals below a threshold, followed by a limiter.
Combines a limiter with an exciter for harmonic enhancement.
Simulates guitar amp characteristics like distortion and EQ.
Explains the Musical Instrument Digital Interface (MIDI) standard.
Details how to connect MIDI devices to the 168RC.
Covers setting MIDI channels and device IDs for communication.
Explains using MIDI for controlling parameters and automation.
Details how to expand the system using MIDI connections.
Provides various system connection examples for different configurations.
Offers solutions for common problems and issues encountered with the console.
Lists and explains potential error messages displayed by the console.
Provides detailed technical specifications of the 168RC console.
Shows diagrams of the console's front and rear panels with dimensions.
Lists available optional accessories for the 168RC.
A comprehensive list of all 168RC parameters with their original numbers.
Details how to send parameters from the console.
Explains the format of MIDI exclusive data for the console.
Illustrates signal levels and their corresponding dB values.
Presents a block diagram showing the console's internal signal flow.
| Type | Digital Recording Studio |
|---|---|
| Channels | 16 |
| Inputs - Mic Preamps | 8 |
| Outputs - Main | 2 |
| Outputs | 8 |
| EQ Bands | 3-band EQ per channel |
| Effects | Built-in effects processor |
| A/D Resolution | 24-bit |
| Sampling Frequency | 44.1kHz |
| Bit Depth | 24-bit |
| USB | Yes |
| Remote Control | Optional |
| Display | LCD |
| Tracks | 8 |
| Inputs - Line | 8 |
| Connectivity | MIDI In/Out |
| Storage | Internal hard drive |
| Dimensions | NA |
| Weight | NA |