www.kregtool.com
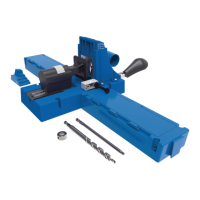
Pocket-Hole Placement
In addition to the proper Kreg Jig
®
settings, spacing pocket holes evenly across the workpiece is an
important part of getting a strong joint. The Kreg Jig
®
features a three-hole drill guide that allows you
do this in a variety of workpiece widths without the need to reposition the workpiece after drilling each
hole. Use the guide below to determine how to position your workpiece for drilling pocket holes.
Beforeturningonthedrill,slidethebitintothedrillguideuntilthetipofthebittouchesthe
workpiece. Withdraw the bit about ¼" (6mm). Turn on the drill, make sure it is running at
full speed, and feed the bit into the workpiece. Always run variable-speed or multi-speed
drills at the fastest speed. A shop vacuum connected to the vacuum port quickly removes
the wood chips and the hole can be drilled in one motion. When not using a shop vacuum,
remove the vacuum port, and while drilling the pocket hole, partially withdraw the bit
several times to clear the chips. Stop drilling when the stop collar contacts the drill guide.
Wait until the drill stops rotating to withdraw the bit from the drill guide.
Forwidepartssuchaspanels,werecommendplacingtherstpockethole2"(51mm)
from the panel edge and every 6" (152mm) to 8" (203mm) on center after that. When
drilling panels, you can use any drill guide hole.
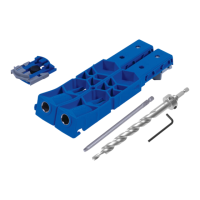
Drilling Pocket Holes
Withthepocketholesdrilled,positionandclampyourparts.Smallflatassembliescanbe
alignedbyclampingthemtoaflatsurface.WhenusingaKregclamptoclamplargeflat
assemblies off the edge of your work surface, position the large clamp pad on the side of the
joint opposite the pocket holes. Align the corners of case assemblies, such as a cabinet or
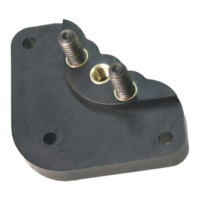
bookshelf, using bar clamps or a Kreg right-angle clamp. (See Optional Accessories.)
With your assembly securely clamped, drive the pocket screws using a variable-speed
drill/driver and the included 6" (152mm) driver bit. For drills with a clutch, adjust it to fully
seat the screws without over-driving them.
Joining parts
1" to 2" Wide Material 2" to 3" Wide Material 3" to 4" Wide Material
Use B and C guides Use A and B guides Use A and C guides
1" to 2" Wide Material
USE B AND C GUIDES
2" to 3" Wide Material
USE A AND B GUIDES
USE A AND C GUIDES
3" to 4" Wide Material
 Loading...