EN
PREPARING DRINKS
Degree of
Hardness
Class 0
Very soft
Class 1
Soft
Class 2
Moderately hard
Class 3
Hard
Class 4
Very hard
° dH < 3° > 4° > 7° > 14° > 21°
° e < 3.75° > 5° > 8.75° > 17.5° > 26.25°
° f < 5.4° > 7.2° > 12.6° > 25.2° > 37.8°
Appliance
Setting
0 1 2 3 4
Fill a glass with water and immerse the strip. Fig. 1
Read the water hardness after one minute. Fig. 2
Indicate the number of red zones when setting your appliance.
Coffee circuit rinse settings
You can choose whether or not to activate this when the machine is switched on.
Installing the filter
When turning on for the rst time, the appliance will ask you if you want to install the water
lter. If you want to, press “YES” and follow the instructions on the screen.
Installing the lter in the appliance: screw the lter cartridge into the bottom of the water
tank using the accessory supplied with the cartridge. Fig. 3.
Set the month in which the cartridge was installed (position 1 in the image, gure to the left
of the opening) by turning the grey ring on the upper end of the lter. The month in which
the cartridge needs replacing is indicated in position 2 of the image. Fig. 4.
Put a 20 oz container under the steam nozzle. Fig. 5.
The appliance should function whether a lter is installed or not after the rinse cycle.
The water circuits must be relled. To do this, follow the instructions on the screen. The
appliance will begin by preheating the circuits, lling up the water circuits and will then carry
out a test followed by automatic rinsing.
The screen then displays the main drinks menu.
Preparing the appliance
Remove and ll the water tank. Fig. 6.
Close by placing the lid on the tank. Fig. 7.
Open the lid on the coffee beans container and pour in the beans (9 oz maximum). Fig. 8.
Close the lid on the coffee beans tank. Fig. 9.
Information on recipes
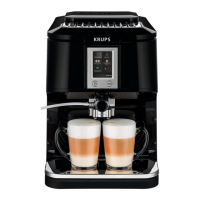
Depending on the recipe selected, your Espresso Automatic EA88 will automatically
adjust the quantity of ground coffee needed.
Preparing the grinder
You can adjust the strength of your coffee by adjusting the size of the ground coffee beans.
In general, the ner the coffee grounds the stronger and creamier the coffee, however this
depends on the type of coffee used.
Adjust the size of the ground beans by turning the ‘Coffee grind setting’ knob (N) on the
bean tank. You are advised to do so during the grinding process and gradually. After three
preparations, you will notice a very distinctive difference in taste.
11
 Loading...
