PAGE 4
302803
DPF-MRK-003 REV D 7/24/19
PRISM+ PRO KIT WITH CONTROLLER 2803
866 277 9598 | INFO@KURYAKYN.COM
454 COUNTY ROAD VV SOMERSET, WI 54025
KURYAKYN.COM
INSTALLATION INSTRUCTIONS
-CONTINUED-
STEP 12
Use your ngernail to rub the adhesive backing; this will
activate the adhesive. Do not remove backing until actually
placing lights on bike.
STEP 13
Apply a small amount of dielectric grease to the extension
cords that are connected to the controller. Connect lights to
the cords.
STEP 14
Remove and discard backing from light’s adhesive backer.
Align and place light to bike. Press into place for one
minute; full bonding will occur after 24 hours.
STEP 15
Repeat the process of applying dielectric grease to lights
and cords, connecting them, and adhering lights to the bike
until all lights are installed.
STEP 16
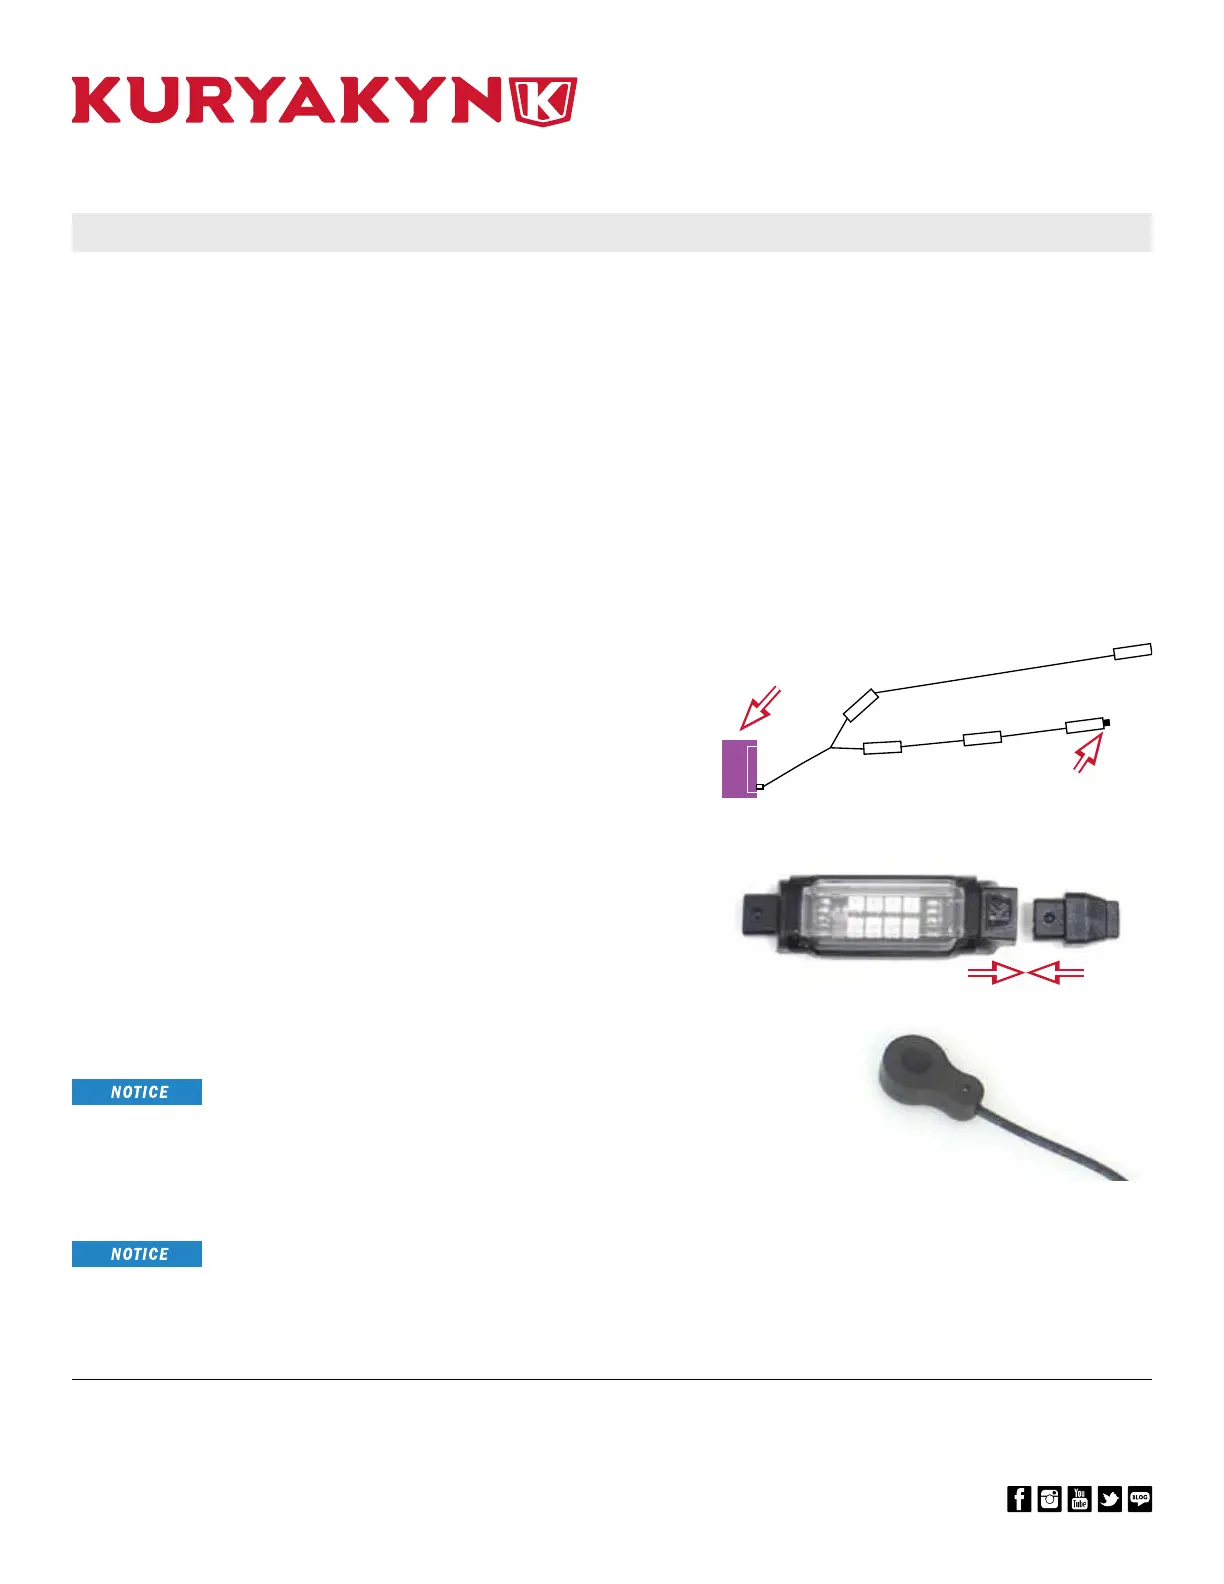
Refer to FIG 2 and PIC 9. Per each channel, connect a
loop connector on the end of the branch that has the most
L.E.D.s on it. Be sure the raised dot on the Loop Connector
is aligned with the K-shield logo on the light. Refer to the
L.E.D. count table located on the last page to help you
determine how many lights are on each branch and each
channel.
Note: FIG 2 is for reference only, as connection of cords and lights will
vary.
LF
1
RF
2
LR
3
RR
4
STEP 17
Test function of lights. Ensure all of the lights properly
function before operating motorcycle.
STEP 18
Refer to PIC 10. Remove and discard adhesive backer from
the Bluetooth Controller’s switch. Align and place it on the
bike. Press into place for one minute; full bonding will occur
after 24 hours.
STEP 19
Secure all cords in a safe place. Ensure that cords are
secured away from any moving parts, excessive heat or
pinch points.
SECURE ALL WIRING AWAY FROM ANY MOVING PARTS, PINCH
POINTS OR EXTREME HEAT. KURYAKYN WILL NOT ISSUE A
WARRANTY ON ANY ELECTRICAL COMPONENT THAT FAILS
DUE TO PINCHED, CRIMPED, BROKEN, ABRADED, MELTED OR
FRAYED WIRES.
STEP 20
Reinstall seats and any other part that may have been
removed during the process to gain access to your battery.
IT IS THE INSTALLER’S RESPONSIBILITY TO ENSURE THAT ALL
OF THE FASTENERS (INCLUDING PRE-ASSEMBLED) ARE TIGHT-
ENED BEFORE OPERATION OF THE MOTORCYCLE. KURYAKYN
WILL NOT PROVIDE WARRANTY COVERAGE ON PRODUCTS OR
COMPONENTS LOST DUE TO IMPROPER INSTALLATION OR LACK
OF MAINTENANCE. PERIODIC INSPECTION AND MAINTENANCE
ARE REQUIRED ON ALL FASTENERS.
K-SHIELD
LOGO
BLUETOOTH
CONTROLLER’S
SWITCH
OFF BIKE VIEW
RAISED
DOT
LOOP
CONNECTOR
LOOP CONNECTOR:
MOST L.E.D.
S ON A
BRANCH
BLUETOOTH
CONTROLLER
PIC 10
PIC 9
FIG 2
 Loading...