98
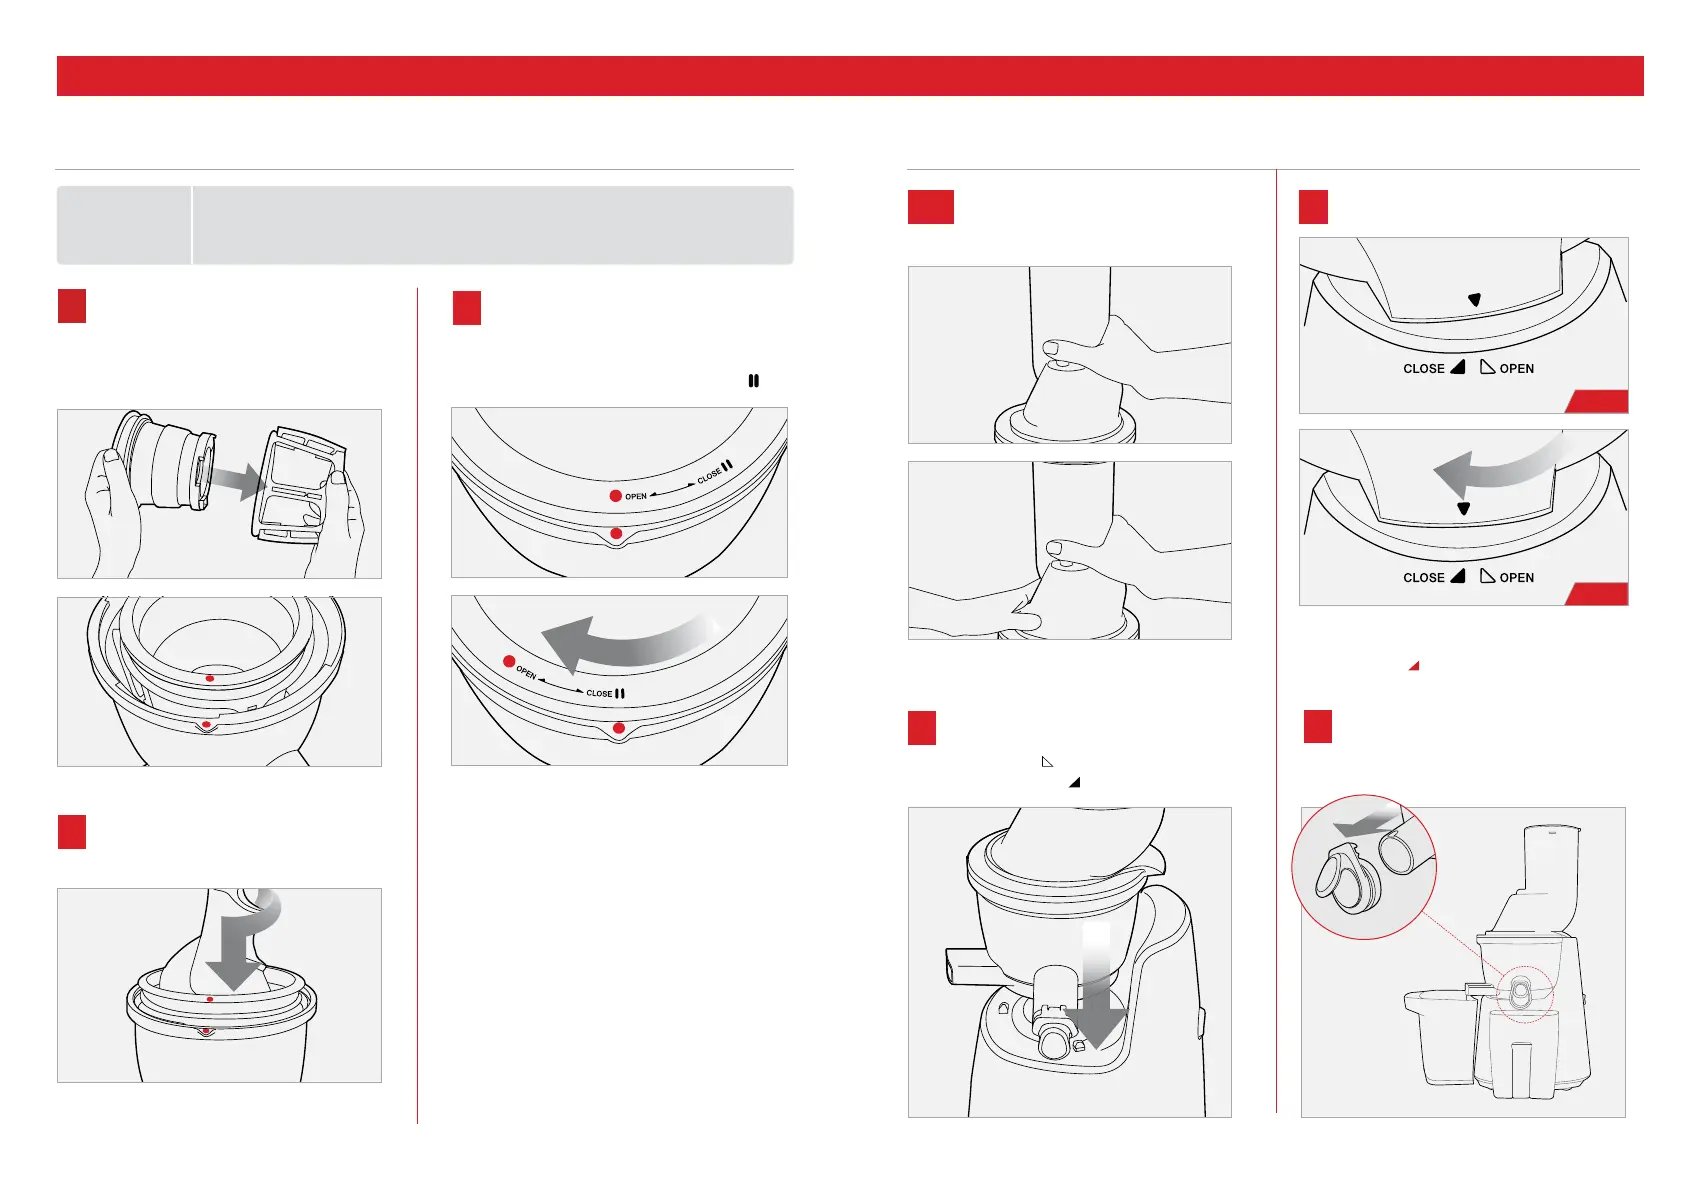
HOW TO ASSEMBLE
The juicing screw needs to be locked in
place in order to close the drum lid.
Note |
STEP 1
Top-set Assembly
STEP 2
Top-set and Base Assembly
Assemble the strainer into the rotation
wiper then place this assembly in to the
juicing bowl ensuring the red dot
●
on
the strainer is aligned with the red dot
●
on the juicing bowl.
Place the juicing screw into the strainer.
Turn and press down on it until it clicks
into place.
Place the drum lid on to the juicing bowl
aligning the red dot
●
on the drum lid with
the red dot
●
on the juicing bowl. Turn
clockwise to close, aligning the red dot
●
on the drum lid with the close mark .
Check Before
Operating
• Wash the parts before rst use.
• Ensure that the silicone ring is assembled properly.
1
2
3
4
6
Place the pulp cup under the pulp
spout and place the juice cup under the
juice spout as shown in the illustration.
Place the drum lid on the juicing bowl.
Align the down arrow
▼
on the drum
lid with the
OPEN mark on the base
and turn to the
CLOSE position.
Open
Close
Detachable
Open/Close mark on the top-set.
5
For easy assembly hold the drum lid
by grabbing the feeding tube and turn
clockwise as shown in the illustration.
TIP
Note | The juicer will not operate if the down arrow
▼
on the drum lid is not completely aligned
with the CLOSE mark on the body.
 Loading...