15
TracNet H90 Installation Guide
Mount the BDU
Mount the BDU
Follow these steps to install the BDU inside the vessel.
Note: You may choose to wait to mount the BDU until after
you have completed all system wiring.
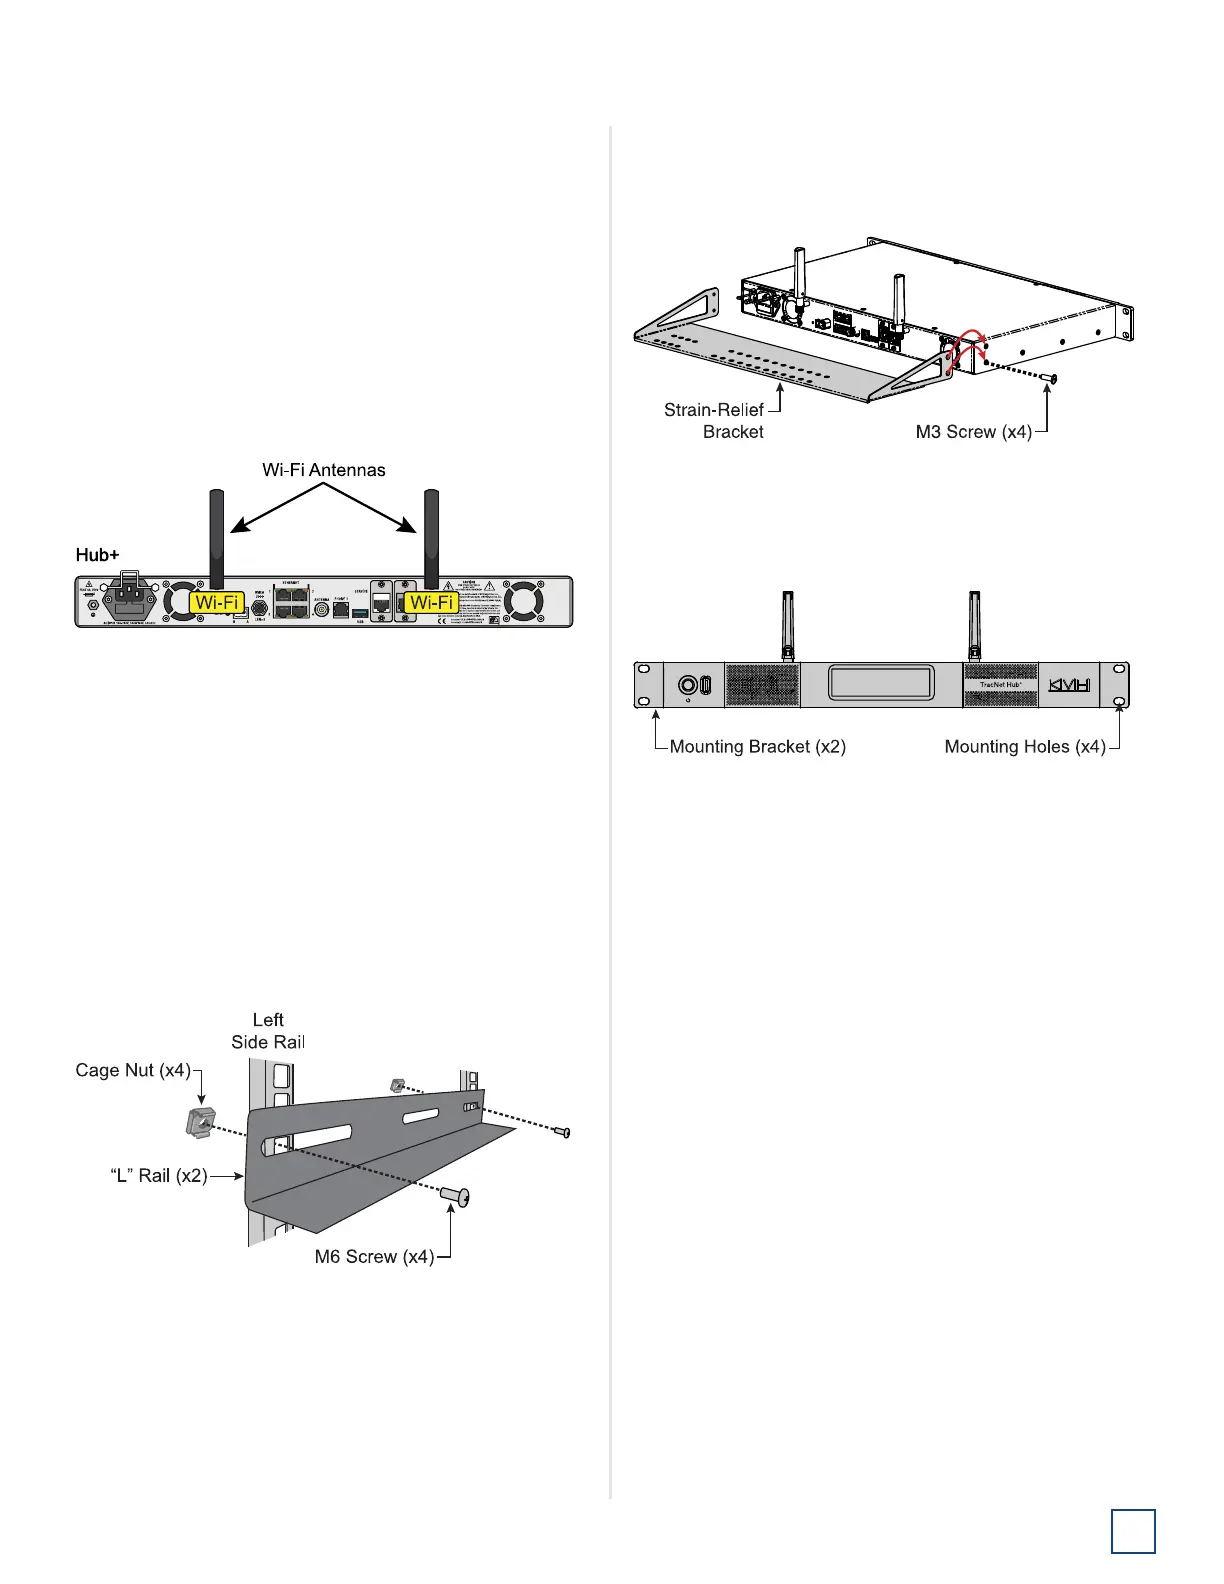
Connect the Wi-Fi Antennas
First, connect the two supplied Wi-Fi antennas to the rear
panel of the BDU.
Figure 24: Wi-Fi Antenna Connections
Mounting the BDU in a Rack
The Hub+ BDU can be mounted in a standard equipment
rack. You will need 1U of available space.
1. Be sure to support the bottom of the BDU – don’t rely
on the front mounting brackets alone. The BDU weighs
8.3 lbs (3.7 kg). If the rack does not already provide
underside support, install the “L” rails provided in the
kit (see Figure 25). These rails can be nested for
extended depth; connect them end-to-end using the
supplied M5 screws and nuts (not shown in the figure).
Figure 25: “L” Rail Installation
2. Attach the supplied strain-relief bracket to the back of
the BDU using the four supplied M3 screws.
Figure 26: Attaching the Strain-Relief Bracket
3. Insert the BDU into the rack and secure its front
brackets to the rack with appropriate fasteners.
Figure 27: Front Mounting Brackets
Mounting the BDU on a Shelf
1. Attach the supplied strain-relief bracket to the back of
the Hub+ BDU using the four supplied M3 screws (see
Figure 26).
2. Secure the BDU in an adequate manner to prevent it
from shifting while the vessel is in motion. Heavy-duty
hook-and-loop tape is provided in the kit.
Note: If you choose not to use the supplied hook-and-loop
tape, adhesive-backed rubber feet are also supplied in the
kit to attach to the BDU’s underside to protect the
mounting surface.

 Loading...
