10
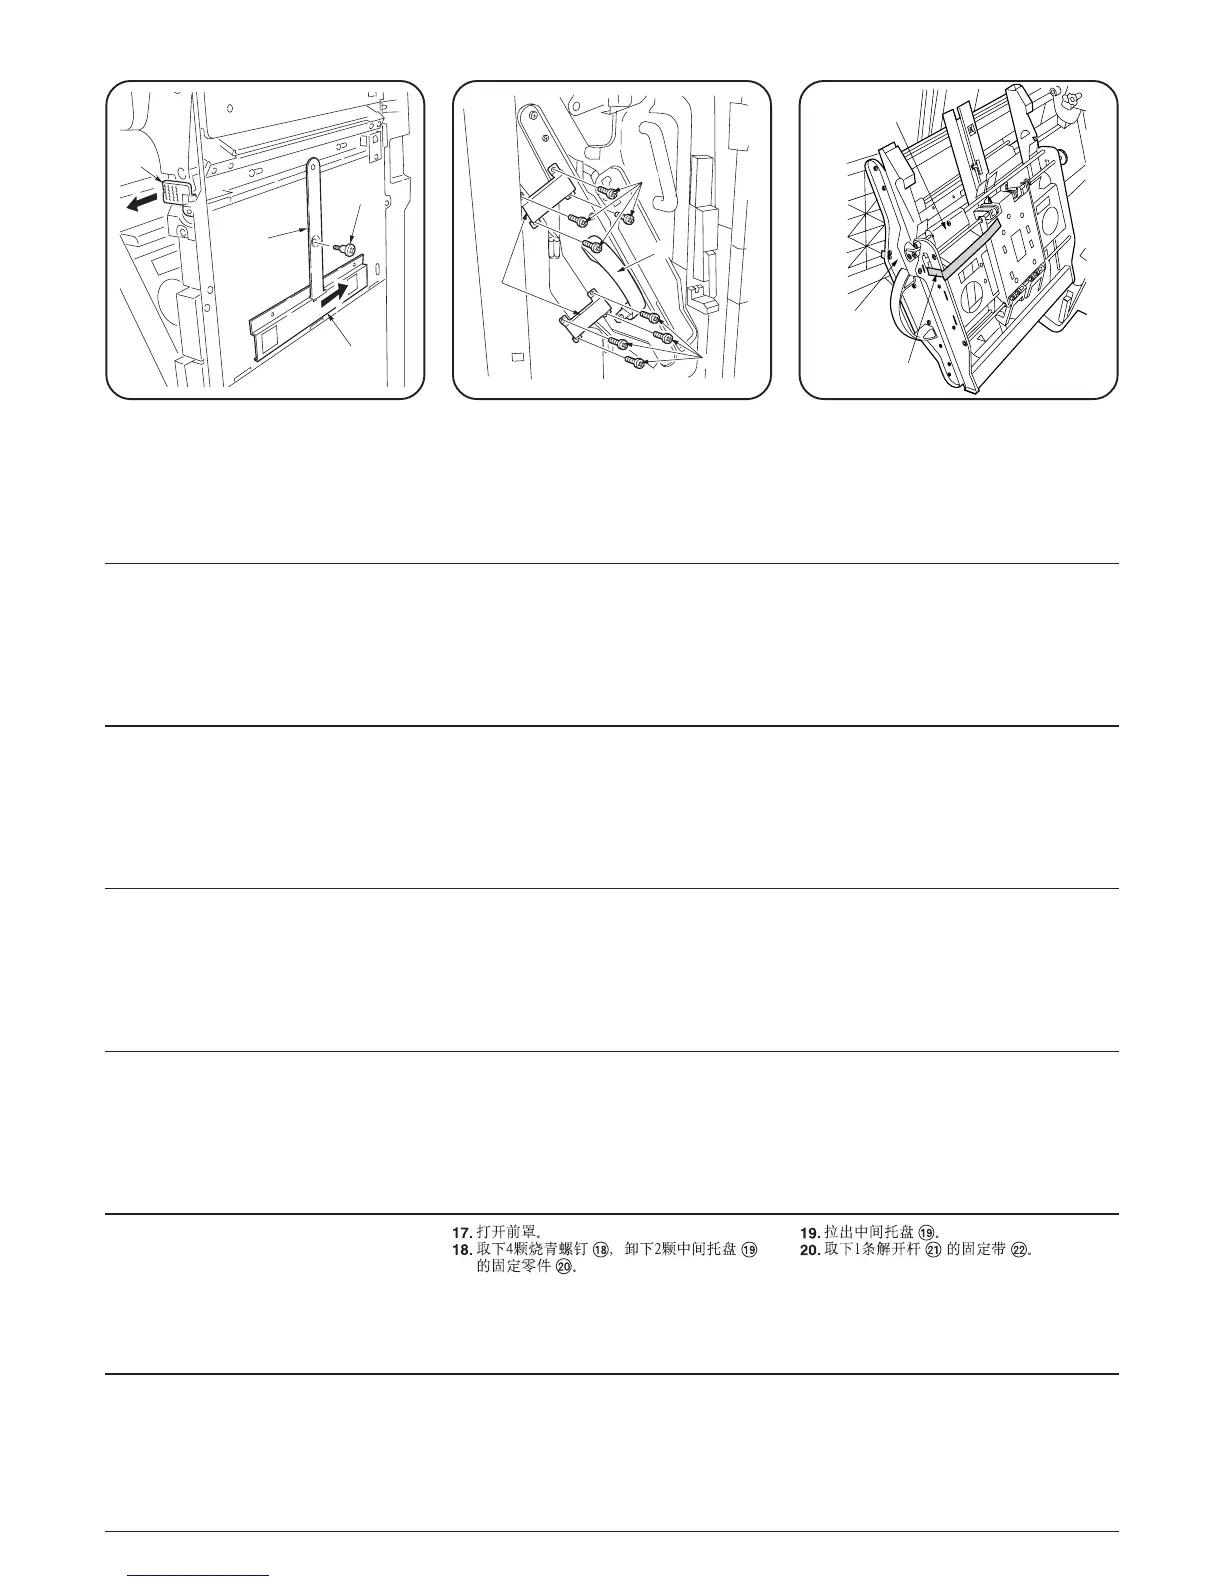
19. 中間トレイ(を引き出す。
20. 解除レバー⁄の固定テープ¤1本を外
す。
19. Pull out the intermediate tray (.
20. Remove the strip of fixing tape ¤ from the
release lever ⁄.
19. Retirer le plateau intermédiaire (.
20. Retirer la bande adhésive de fixation ¤ du
levier de dégagement ⁄.
19. Hale la bandeja intermedia (.
20. Quite la cinta adhesiva de fijación ¤ de la
palanca de liberación ⁄.
19. Ziehen Sie das Papierzwischenmagazin (
heraus.
20. Entfernen Sie den Streifen Arretierklebe-
band ¤ vom Lösehebel ⁄.
19. Estrarre il vassoio intermedio (.
20. Rimuovere la striscia di nastro di fissaggio
¤ dalla leva di rilascio ⁄.
⁄
(
¤
17. 前カバーを開く。
18. 青ビス*各4本を外し、中間トレイ(の
固定金具)2個を取り外す。
17. Open the front cover.
18. Remove the four blue screws * locking
each of the two separate retainers ) to the
intermediate tray ( and detach both retain-
ers ).
17. Ouvrir le couvercle avant.
18. Retirer les quatre vis bleues * fixant
chacun des deux arrêtoirs ) au plateau
intermédiaire ( et libérer les arrêtoirs ).
17. Abra la cubierta frontal.
18. Quite los cuatro tornillos azules * que
aseguran cada uno de los dos retenedores
separados ) a la bandeja intermedia ( y
saque ambos retenedores ).
17. Öffnen Sie die vordere Abdeckung.
18. Entfernen Sie die vier blauen Schrauben
*, die jeden der zwei separaten Halter )
am Papierzwischenmagazin ( befestigen,
und nehmen Sie beide Halter ) ab.
17. Aprire il pannello anteriore.
18. Rimuovere le quattro viti blu * che
bloccano ciascuno dei due fermi separati )
per il vassoio intermedio (, quindi staccare
entrambi i fermi ).
*
*
(
)
h
7
i
d
15. 手順8で外したピン71本で連結板レール
Miを取り付ける。
16. 解除取手dを引いたとき、レール解除M
hがスムーズに作動するか確認する。
15.=N U !"#=7 !"
i
16.= !"#$%&'=d !"#$
h !"#$
15. Use one of the pins 7 that were removed
in step 8 to fix the connecting plate i in
place.
16. Pull out on the release hook handle d and
confirm that the latch plate h operates
smoothly.
15. Mettre et fixer la plaque de connexion i en
place à l’aide d’une des goupilles 7 ayant
été retirées à l’étape 8.
16. Tirer sur la poignée du crochet de
dégagement d et vérifier que la plaque de
verrou h fonctionne correctement.
15. Utilice uno de los pasadores 7 desmontados
en el paso 8 para fijar la placa de conexión i
en su posición.
16. Saque el mango de gancho de liberación d y
confirme que la placa de pestillo h funciona
sin problemas.
15. Verwenden Sie einen der Stifte 7, die in
Schritt 8 entfernt wurden, um die
Verbindungsplatte i zu befestigen.
16. Ziehen Sie den Freigabehakengriff d
heraus, und bestätigen Sie, dass die
Klinkenplatte h reibungslos funktioniert.
15. Usare uno dei perni 7 che erano stati
rimossi al punto 8 per fissare in posizione la
piastra di connessione i.
16. Tirare verso l'esterno la maniglia del gancio
di rilascio d e assicurarsi che il pannello di
chiusura h funzioni regolarmente.
 Loading...