16
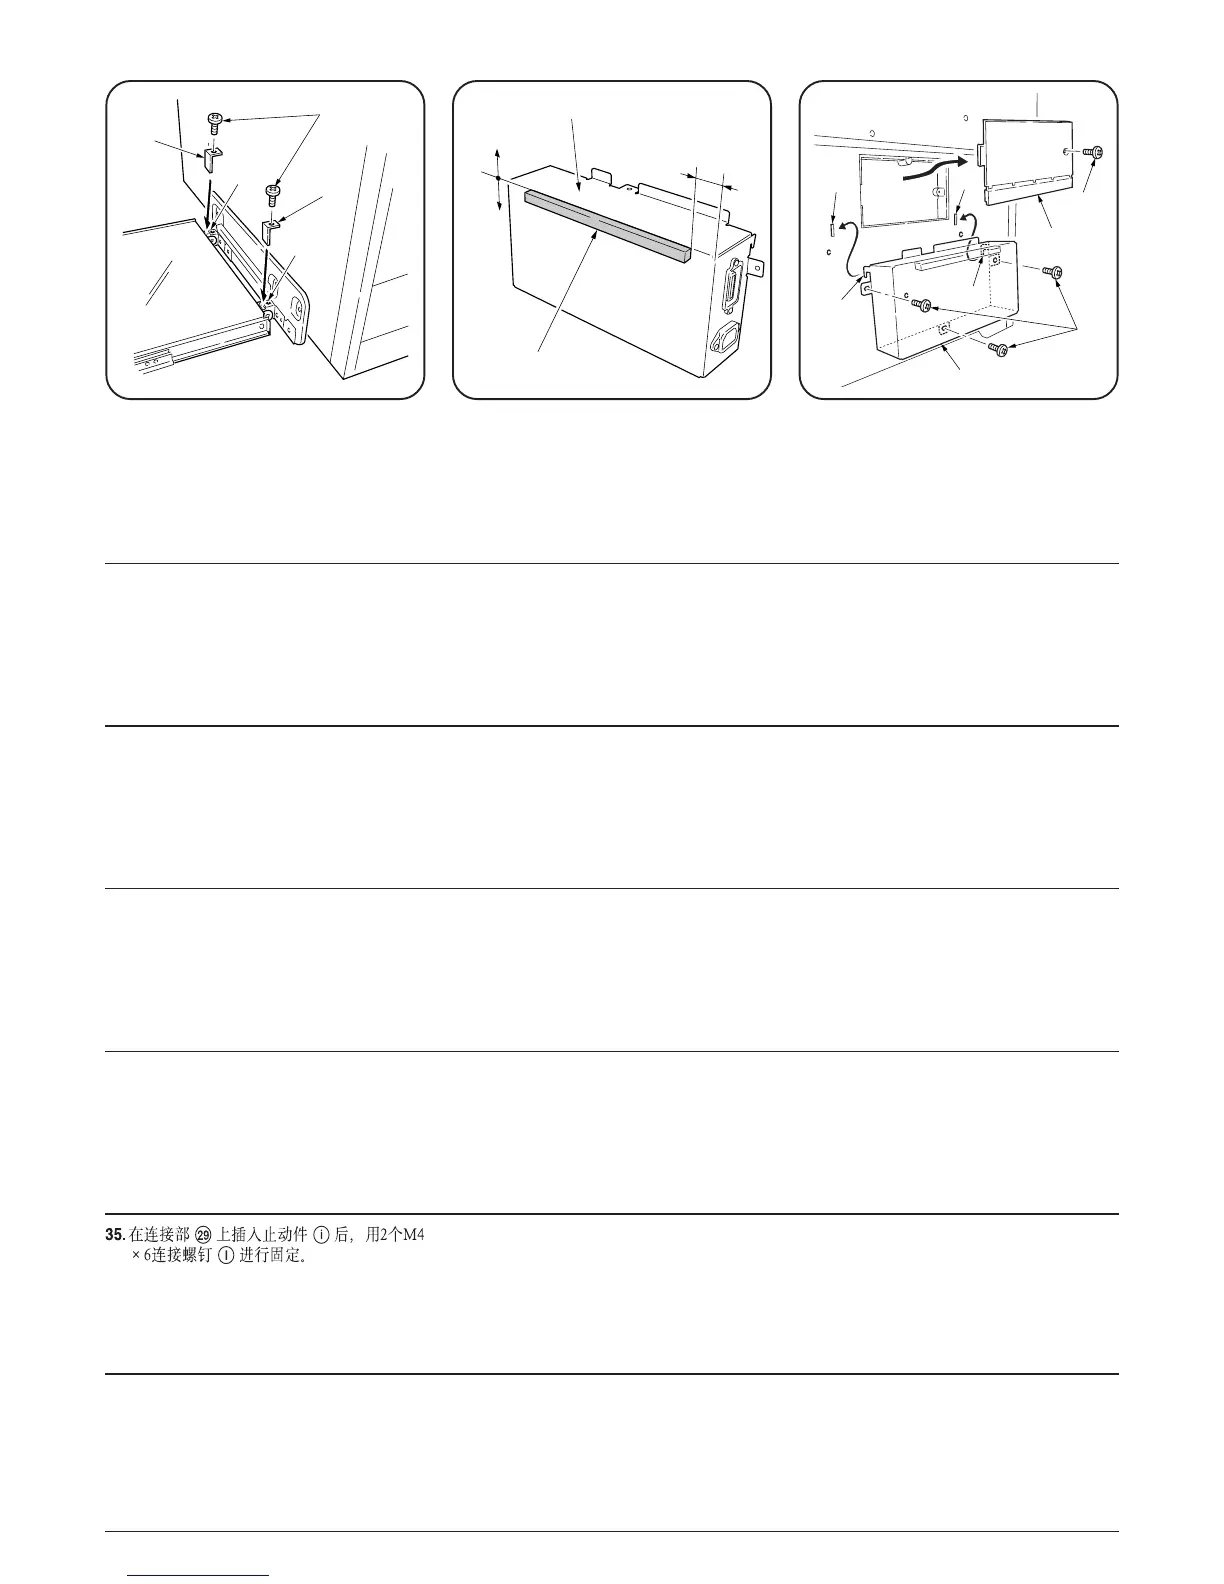
50. 連結部ˆにストッパ連結板eを挿入し、
M4×6バインドビスm2本で固定する。
50. Insert the stopper e to the connecting
section ˆ and fix it with the two M4 × 6
binding screws m.
50. Insérer la butée e dans la section de
connexion ˆ et la fixer à l’aide des deux vis
de raccordement M4 × 6 m.
50. Inserte el tope e en la sección de conexión
ˆ y fíjelo con los dos tornillos de sujeción
M4 × 6 m.
50. Führen Sie den Anschlag e in den
Verbindungsteil ˆ ein, und befestigen Sie
ihn mit den zwei M4 × 6-Verbundschrauben
m.
50. Inserire il dispositivo di fermo e nella
sezione di collegamento ˆ e fissarlo a
mezzo delle due viti di serraggio M4 × 6 m.
51. 組立オプションボックスjにガスケット
(10×10×200)Qを図の位置に貼付
ける。
e
e
m
ˆ
ˆ
51.= !ENM=×=NM=×=OMMF=Q= !"#
j= !"#$
51. Attach a gasket (10 × 10 × 200) Q to the
assembly option box j at the location
shown in the illustration.
51. Fixer un joint (10 × 10 × 200) Q à la boîte
d'assemblée d'option j à l'emplacement
indiqué sur l'illustration.
51. Instale una empaquetadura (10 × 10 × 200)
Q en la caja de opción de armado j en el
lugar indicado en la figura.
51. Die Dichtung (10 × 10 × 200) Q an der in
der Abbildung gezeigten Stelle am Bausatz-
Optionskasten j anbringen.
51. Fissare una guarnizione Q (10 × 10 × 200)
alla scatola opzionale di assemblaggio j
nella posizione indicata nel disegno.
Í
Í
Î
Î
Å
j
l
∏
52. ビス”1本を外し、後コネクターカバー
Åを取り外す。
角穴Í2箇所にフック部Î2箇所を引っ
かけ、M4×8Pタイトビスl3本で組立
オプションボックスjを固定する。
52.=N =”= !"=Å
O !=j= !=Î=O
Í= !"#PjQUm !=l=
!=j
52. Remove the screw ” and then remove the
rear connector cover Å.
Insert the two hooks Î on the assembly
option box j into the two holes Í and use
the remaining three M4 × 8 P-tight screws
l to fix the assembly option box j in
place.
52. Retirer la vis ” puis retirer le panneau de
protection du connecteur arrière Å.
Insérer les deux crochets Î sur la boîte
d’assemblée d’option j dans les deux
trous Í et mettre et fixer la boîte
d’assemblée d’option j en position à l’aide
des trois vis de serrage P M4 × 8 l
restantes.
52. Quite el tornillo ” y desmonte la cubierta
de conector trasera Å.
Inserte los dos ganchos Î en la caja
opcional de armado j en los dos orificios
Í y utilice los restantes tres tornillos de
fijación P M4 × 8 l para fijar la caja
opcional j en su lugar.
52. Entfernen Sie die Schraube ” un dann die
hintere Verbindungsabdeckung Å.
Führen Sie die beiden Haken Î am
Bausatz-Optionskasten j in die beiden
Löcher Í ein, und verwenden Sie die
restlichen M4 × 8 P-Festspannschrauben
l, um den Optionskasten j zu befestigen.
52. Rimuovere la vite ” e quindi il pannello
posteriore del connettore Å.
Inserire i due ganci Î sulla scatola
opzionale di assemblaggio j nei due fori
Í e usare le rimanenti tre viti di fissaggio
M4 × 8 P l per fissare la scatola opzionale
j in posizione.
0 m
m
25 ± 5 mm
5 m
m
j
Q
 Loading...