Table of Contents
BASICS
SENSOR
Initial Setup
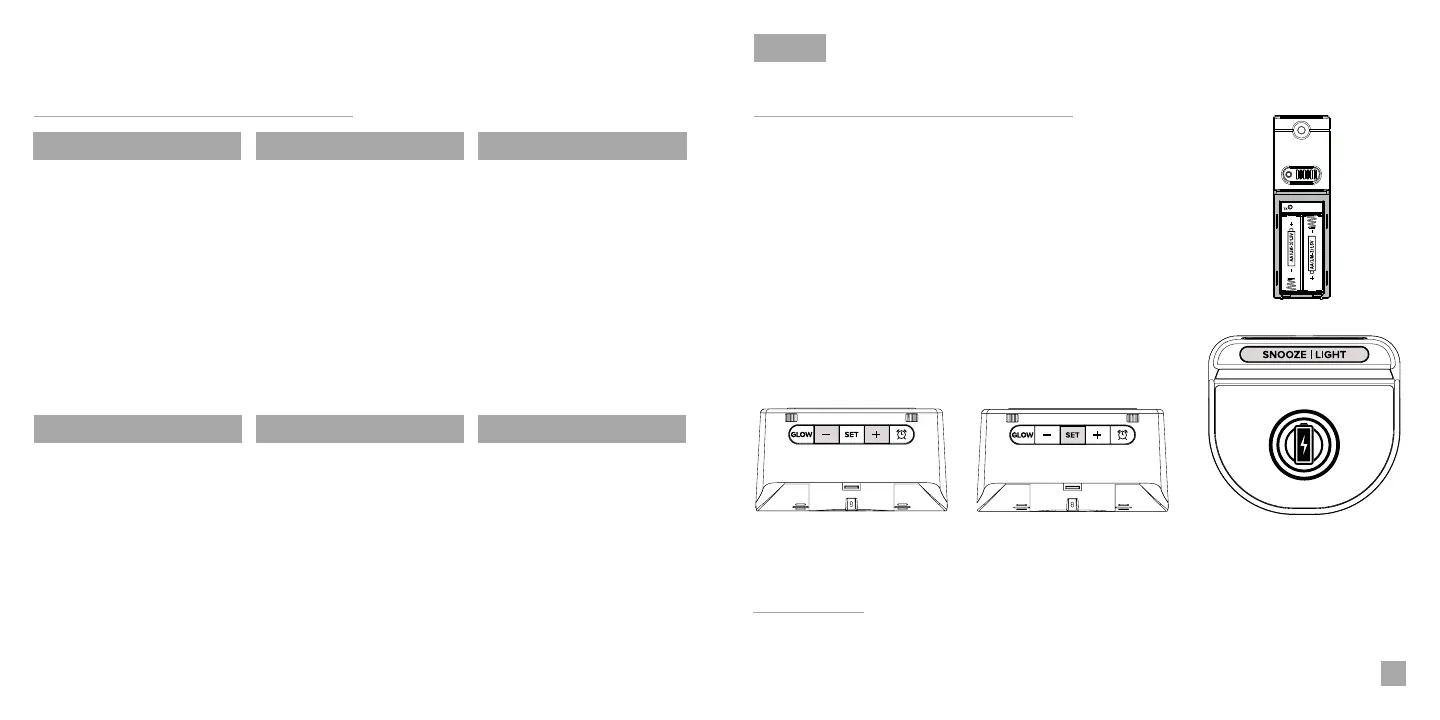
Buttons
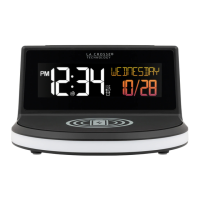
LCD Display
Ports
LCD Display Brightness
Auto-Dim Settings
Display Modes
Display Mode Options
Outdoor Sensor
Mounting Your Sensor
Searching for Outdoor
Sensor
Use the +/- buttons on
the back of the station to
adjust the values.
02
Initial Setup
Power Up
Settings Menu Order
Insert 2 “AA” batteries into the Outdoor Sensor.
Next, insert the Power Adapter into an outlet, then plug it into
the Power Jack on the bottom of the station. A greeting will
appear on the display and then automatically move into the
Settings Menu.
• Language • 12/24 Format • Hour • Minutes • Year • Month
• Date • Month/Date or Date/Month • Celsius/Fahrenheit
You may exit the Settings
Menu at any time by tapping
the SNOOZE/LIGHT button.
02
03
04
04
05
05
06
06
12
13
13
APPENDIX
Specifications
Trademarks & Warning
Factory Reset
Warranty
Recycling & Disposal
Cautions
Statement
13
14
14
15
15
15
16
ALARM
Setting the Alarm
Activate/Deactivate
Snooze Duration
07
07
08
GLOW LIGHT
Glow Light Selection
Glow Light Brightness
09
09
CHARGING
5W Wireless Charger
Phone Compatibility
Wireless Charging FAQs
Phone USB Charging Port
10
10
11
12
BASICS
Note: To enter the Settings
Menu after the initial setup,
hold the SET button on the
back of the station.
Language: Whichever language is selected, the following instructions and weekday will be
presented in that language.
Weekday: Weekday will set automatically after year, month, & date settings are adjusted.