EasyManua.ls Logo

La Crosse Technology WS-9009U-IT User Manual

La Crosse Technology WS-9009U-IT
4 pages
To Next Page IconTo Next Page
Page #1 background imageLoading...
Page #1 background image
WS-9009U-IT www.lacrossetechnology.com/support Page | 1
Model: WS-9009U-IT
Instruction Manual
DC: 060415
WIRELESS TEMPERATURE STATION
Get Started
Step 1: Insert 2 fresh AAA batteries into the TX38U-IT sensor
according to the polarity markings
Step 2: Insert 2 fresh AA, batteries into the temperature station
according to the polarity markings.
Step 3: Let station and sensor sit together for 15 minutes. Then
place sensor outside in a shaded area.
Restart: If the outdoor temperature is not displayed after 3
minutes, remove batteries from the temperature station & outdoor
sensor. Press any button on the temperature station 20 times.
After 15 minutes, return to Step 1 above.
Display Options
Choose to have the indoor or the outdoor temperature on top,
in large numbers.
Simply press the IN/OUT button to change.
Indoor
Temp.
ºF
only
TX38U-IT
Temperature
Sensor
Wall
Hanging
Hole
Battery
Compartment
2 “AA
batteries
Removable
Stand
BUTTONS
Battery
compartment
2 “AAA
batteries
Outdoor
Temp.
ºF
only
Question and Answer IconNeed help?

Do you have a question about the La Crosse Technology WS-9009U-IT and is the answer not in the manual?

La Crosse Technology WS-9009U-IT Specifications

General IconGeneral
BrandLa Crosse Technology
ModelWS-9009U-IT
CategoryWeather Station
LanguageEnglish

Summary

Get Started

Sensor Battery Installation

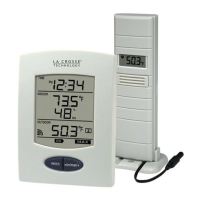
Insert 2 fresh AAA batteries into the TX38U-IT sensor according to the polarity markings.

Station Battery Installation

Insert 2 fresh AA batteries into the temperature station according to the polarity markings.

Initial Setup and Placement

Let station and sensor sit together for 15 minutes, then place sensor outside in a shaded area.

Display Options

Switch Indoor/Outdoor Display

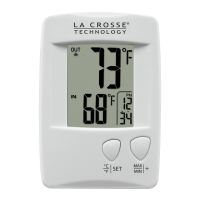
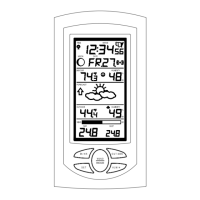
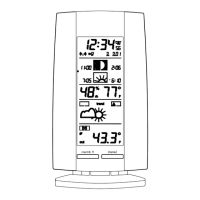
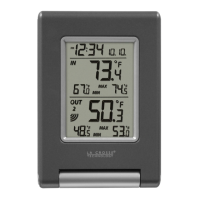
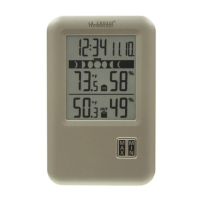
Choose to have indoor or outdoor temperature on top, in large numbers. Press IN/OUT button to change.

View/Reset MIN/MAX Readings

View Min/Max Temperatures

Press the MIN/MAX button to view minimum and maximum indoor/outdoor temperatures.

Reset Min/Max Temperatures

Hold the MIN/MAX button for 5 seconds to reset minimum and maximum readings.

Low Battery Indicator

Outdoor Sensor Battery Status

The TX icon displayed indicates the outdoor sensor batteries need replacement.

Wireless Thermometer Battery Status

The RX icon displayed indicates the wireless thermometer batteries need replacement.

Position Outdoor Sensor

Optimal Sensor Mounting Location

Mount on a north-facing wall or in any well shaded area, under an eave or deck rail.

Transmission Range Note

Maximum transmitting range is over 260 feet in open air, not including walls.

Care and Maintenance

Battery Handling Precautions

Do not mix battery types or old/new batteries. Always purchase correct size and grade.

Cleaning and Usage Guidelines

Clean with a soft damp cloth, do not use solvents. Not a toy, not for medical use.

Warranty and Support Information

Limited Time Warranty

Provides a 1-year limited time warranty for manufacturing defects in materials & workmanship.

Customer Support Contact

Contact customer support for questions or visit online help (manuals and FAQS).

FCC Statement

Compliance with FCC Rules

Equipment tested and found to comply with Class B digital device limits for residential installations.

Interference Mitigation

User is encouraged to try to correct interference by reorienting antenna or increasing separation.

Co-location and Operation Conditions

Device must not be co-located with other transmitters and must accept interference.

Related product manuals