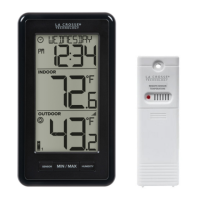
This document serves as a comprehensive setup and user guide for the La Crosse Technology Wireless Thermometer, Model WS-9160Uv3, along with its associated TH Sensor, Model TX141-B. The device is designed to provide accurate indoor and outdoor temperature readings, with additional features for humidity and historical data tracking.
Function Description:
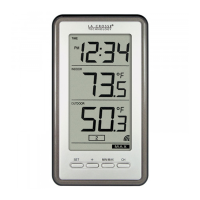
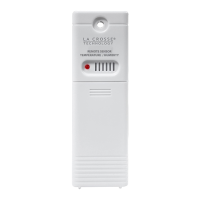
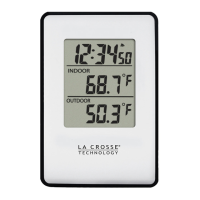
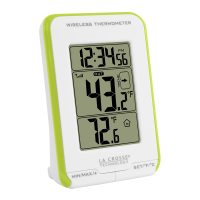
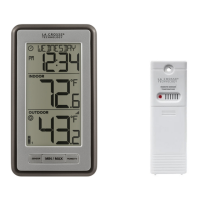
The La Crosse Technology Wireless Thermometer system consists of a main Weather Station (WS-9160Uv3) and a remote Temperature/Humidity Sensor (TX141-B). The main station displays indoor temperature and humidity, as well as outdoor temperature received wirelessly from the remote sensor. It also features a calendar display, time, and the ability to track minimum and maximum temperature records with time/date stamps. The system supports up to three remote sensors, allowing for monitoring of multiple locations. Optional add-on sensors, such as a Rain Sensor or additional Temperature/Humidity Sensors, can expand the system's capabilities.
Important Technical Specifications:
Weather Station (WS-9160Uv3):
- Temperature Range: 32°F to 122°F (0°C to 50°C)
- Humidity Range: 10% - 99% RH
- Power: Requires 2-AA, IEC, LR6 batteries (not included)
- Battery Life: Over 24 months
- Dimensions:
- Width: 2.13" (5.41cm)
- Depth: 1.06" (2.69cm)
- Height: 5.91" (15.01cm)
- Frontal View (excluding depth): 3.96" (10.05cm)
TH Sensor (TX141-B (all versions)):
- Temperature Range: -40°F to 140°F (-40°C to 60°C)
- Humidity Range: 10% - 99% RH
- Transmission Range: Over 330 feet (100 meters) in open air RF 433MHz. This range does not account for walls, floors, or other large obstructions.
- Update Interval: Approximately every 51 seconds
- Power: Requires 2-AA, IEC, LR6 batteries (not included)
- Battery Life: Over 24 months
- Dimensions:
- Width: 1.58" (3.99cm)
- Depth: 0.83" (2.1cm)
- Height: 5.08" (12.99cm)
Usage Features:
Power Up:
- Insert 2-AA batteries into the Temperature Sensor.
- Insert 2-AA batteries into the Weather Station.
- Once sensor readings appear on the station, the sensor can be mounted outdoors.
Custom Calendar Display:
- Press and release the DATE button to cycle through calendar display options (e.g., "WEDNESDAY," "WED 10/28," or no display). The thermometer will retain the selected display.
- To enter the Settings Menu, hold the SET button until the display changes.
- Use the +/- buttons to adjust values (hold for quick adjustment).
- Press and release the SET button to confirm values and move to the next setting or exit.
- Settings Menu Order: Hello, Language (English, Español, Français, Deutsch), 12/24 Hour Format, Hour, Minutes, Year, Month, Date, Month/Date or Date/Month display, Fahrenheit/Celsius, Thank You.
- The selected language affects other menu items and the weekday readout.
- The weekday automatically sets when Year, Month, and Date are configured.
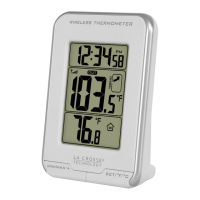
Temperature/Humidity Readings:
- Indoor Temperature: Displays current indoor temperature.
- Indoor Humidity: Displays current indoor humidity (press HUMIDITY button to view).
- Outdoor Temperature: Displays current outdoor temperature from the remote sensor.
- Low Battery Icons: Separate icons indicate low battery for the station and the sensor.
- Reception Icon: Indicates if the station is receiving data from the sensor.
- Auto-Scroll Icon: When multiple sensors are connected, readings will automatically scroll through each channel.
- Channel Indicator: Shows readings from sensor on channel 1, 2, or 3 if multiple sensors are connected.
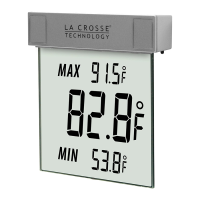
Temperature Records (MIN/MAX):
- Press and release the MIN/MAX button to toggle through minimum and maximum temperature readings with their corresponding time/date stamps.
- Viewing Order: Indoor Minimum Temp, Indoor Maximum Temp, Outdoor Minimum Temp (Channel 1), Outdoor Maximum Temp (Channel 1). If additional sensors are added, their records will also be shown.
Reset Temperature Records:
- Press and release the MIN/MAX button to view the specific temperature value to reset.
- Hold the MINUS (-) button until dashes appear.
- The reading will then reset to the current value.
Sensor Mounting:
- Insert a mounting screw through the top hole to securely mount the sensor, or hang it from the back using a nail.
- Mount the sensor vertically in a protected, well-shaded area to avoid direct weather elements (sunlight, rain, snow) that could cause inaccurate readings.
- For additional protection, a Sensor Weather Shield (bit.ly/weather-shield) can be purchased separately.
- Online video instructions for sensor mounting are available at: bit.ly/th_sensor_mounting.
Search for Sensors:
If sensor readings show "NO" or dashes:
- Hold the SENSOR button to initiate a search for all sensors. The Reception Indicator will animate.
- If the sensor doesn't connect after 3 minutes, bring it next to the display and remove power from both the sensor and station.
- Press any button on the station 20 times and leave the parts powered off for a few moments.
- Install new alkaline batteries into the sensor, then power up the station.
- If data still doesn't appear, contact support staff or visit bit.ly/basic_restart for additional help.
Factory Restart:
- If the station is acting strangely, hold the DATE and RAIN buttons simultaneously to perform a factory restart.
Sensor Weather Shield (not included):
- Designed to protect the outdoor sensor from rain and snow.
- Offers limited protection from the sun's heat.
- Optional purchase at: bit.ly/925-1418.
Optional Add-on Sensors:
- The station can read an add-on Rain Sensor (displayed in the Time Area) and up to two additional Temperature/Humidity Sensors (displayed as Channel 2 or 3 in the Outdoor Temperature Area).
- Adding Sensors:
- Install batteries into the add-on sensor(s). For Temp/Humidity sensors, select channel 2 or 3 before inserting batteries.
- Hold the SENSOR button until the Reception Indicator animates to start a search.
- Sensors should connect within a few minutes.
- Viewing Add-on Sensors:
- Press the RAIN button to view Rain readings and history.
- Press the SENSOR button to toggle through readings from sensors 1, 2, or 3.
- When multiple sensors are connected, you can view individual sensors or auto-scroll through all three channels. The auto-scroll indicator will lose one segment every 1 second for 5 seconds, then switch to the next channel.
- Purchase Extra Sensors: Visit bit.ly/ws-9160uv3_parts to find and purchase compatible add-on sensors.
Maintenance Features:
Care & Maintenance:
- Do not mix different battery types (Alkaline, Lithium, standard, rechargeable) or old and new batteries.
- Always purchase the correct size and grade of battery.
- Replace the entire set of batteries at once.
- Clean battery contacts before installation.
- Ensure correct battery polarity (+ and -).
- Remove batteries during periods of non-use to prevent leakage and corrosion.
- Dispose of used batteries promptly and responsibly according to local regulations.
FCC Statement:
- The device complies with Part 15 of the FCC Rules, designed to provide reasonable protection against harmful interference in residential installations.
- Users are encouraged to correct interference by reorienting the receiving antenna, increasing separation between equipment and receiver, connecting equipment to a different circuit, or consulting a radio/TV technician.
- Any changes or modifications not expressly approved by the party responsible for compliance could void the user's authority to operate the equipment.
Warranty & Patents:
- La Crosse Technology, Ltd. provides a 1-year limited time warranty from the date of purchase against manufacturing defects.
- For full warranty details, visit: www.lacrossetechnology.com/pages/warranty.
- Patent information is available at: www.lacrossetechnology.com/pages/patents.
- Double Your Warranty: Register your product at bit.ly/ws-9160uv3_register and opt-in for product emails to double the standard 1-year warranty for free.
Support:
- Self Help: bit.ly/ws-9160uv3_support
- Online Contact: bit.ly/contact_techsupport
- Phone: 1.608.782.1610 (Mon-Fri 8am-6pm CST)
- Stay in touch via YouTube, Twitter, Facebook, and Instagram for setup videos and feedback.