2. Quick Start Guide
Contents in package should contain the following:
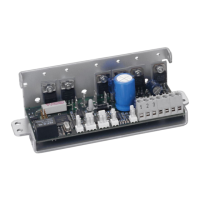
• TC-XX-PR-59
• TC-NTC1 (NTC thermistor)
• TC-WIRE3 (sensor wire with 3 pin connector)
Note: Controller comes with outer sheet metal casing to protect contents and dissipate heat generate
by power transistors. The sheet metal casing has eight 4.5 mm diameter thru holes, four per surface.
Note that for better cooling of the controller, it is better to mount it directly on a metal surface without
standoffs so that as much surface as possible of the metal casing comes in contact with the surface it
is mounted to. It is also beneficial if the mating surface can dissipate the heat, is as flat as possible
and a thermal interface material is used to fill any gaps between the controller casing and the mating
surface.
If the controller is placed in an airstream, that will also have a positive impact of the cooling of the
controller.
If load current is higher than 15A, sufficient cooling of the controller is needed.
1. Install the software onto PC. Software can be downloaded from lairdthermal.com website on the
TC-XX-PR-59 product page.
2. Connect power supply, communication wire, sensor and thermoelectric assembly/modules
(TEM’s) to the controller according to the picture below. Consult drawing for the thermoelectric
assembly on how to connect power to it. Note that for thermoelectric assemblies with combined
TEM and fan power, TEM and fan power must be separated.