3
A
Multifunction button
B
Microphone
C
RESTART button
D
LED indicator
(Blue = camera is on, flashing red = camera is recording,
red = recording protected)
E
Input for GPS module (optional)
F
Power input
G
Memory card slot
CONTROLS:
Press multifunction button Protect recording
Hold multifunction button Turn camera on / off
Press RESTART button with paperclip Restart the camera
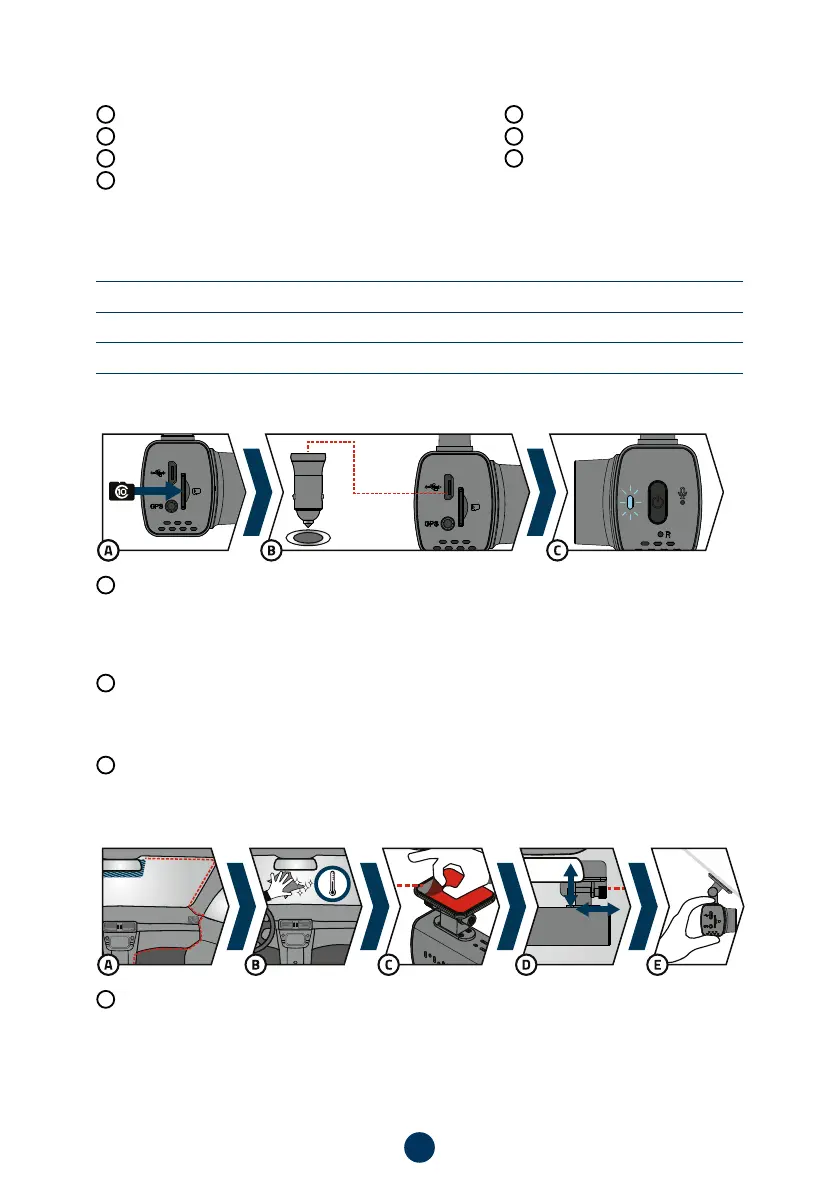
3. FIRST USE
A
Insert the microSD card into the camera.
›
Use branded cards from reputable manufacturers of class 10 and higher with a capacity of up to 128 GB.
›
Only remove the card when the camera is turned off.
›
Format the card directly in the camera the first time you use it, and repeat the formatting at least once a
month to ensure proper operation of the camera.
B
Plug the adapter into the car cigarette lighter and use the USB cable to connect it to the camera. The camera
is designed to operate only when connected to power.
›
Instead of a battery, the camera contains a supercapacitor, which provides power and has a longer life-
span than a conventional battery.
C
When connected to the power, the camera will automatically turn on and start recording.
›
In some vehicles, it is first necessary to turn the key in the ignition.
4. PLACEMENT ON WINDSCREEN
A
The ideal place to mount the dashcam is the space between the windshield and the rearview mirror so that
it does not obstruct the driver‘s view.
›
When installing, ensure the cable does not interfere with safety features in the car (e.g. airbag).
 Loading...