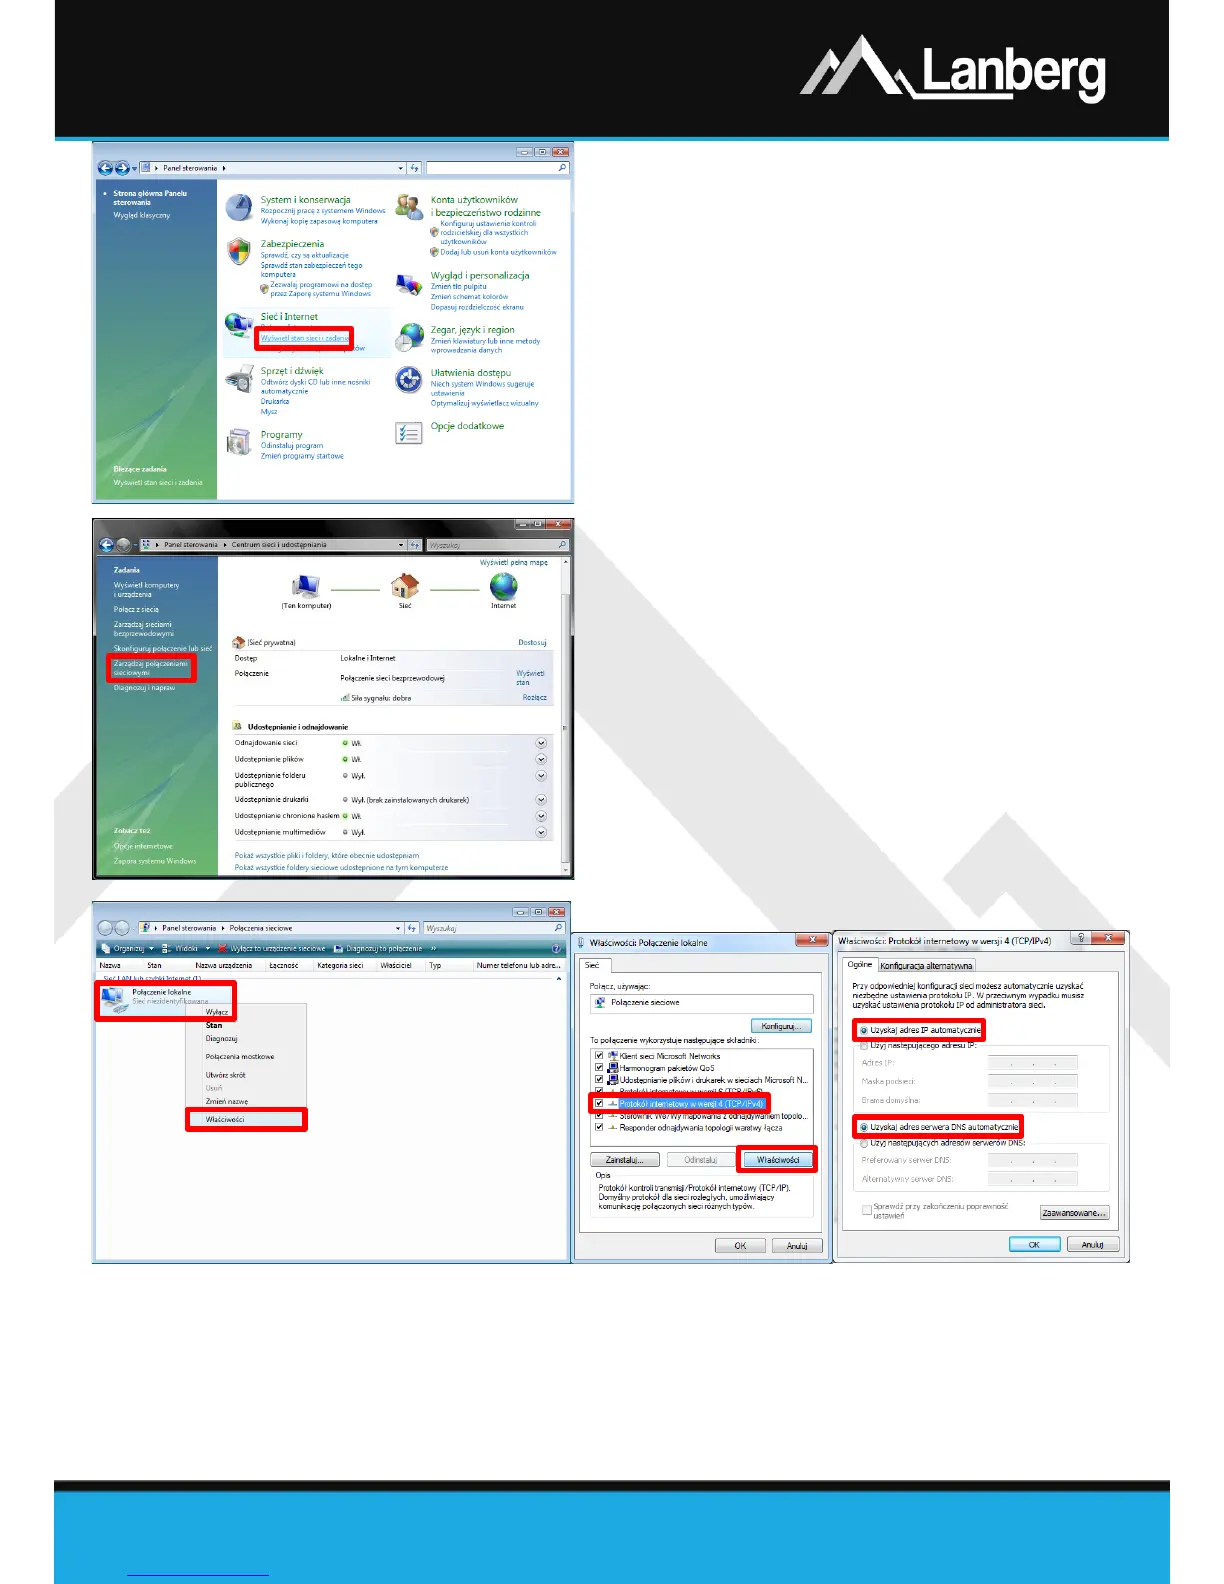
3.3.2) Windows Vista
Step 1) Press „Start” „Control panel” „View
network status and tasks”,
Step 2) After proceeding to the new section, click using
left mouse button, on the left side of the window
the following option „Manage network
connections”,
Step 3) After proceeding to the new section, press right
mouse button on „Local Area Connection”, then
from the drop-down list, select „Properties”,
Step 4) Depending on the current PC’s security options,
the message "User Account Control" may appear
on the screen. Press "Continue
to proceed,
Step 5) On the newly opened window, select verse
„Internet Protocol Version 4 (TCP/IPv4)” by
pressing left mouse button, and then left click on
the button „Properties”,
Step 6) On the newly opened window, select the flags
„Obtain an IP Address automatically” and
„Obtain DNS server address automatically” by
pressing the left mouse button and then press
„OK” button.