9
GRILLCHEF
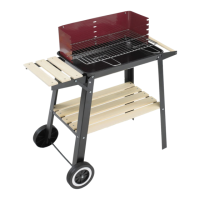
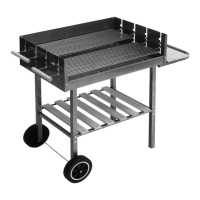
Assembly
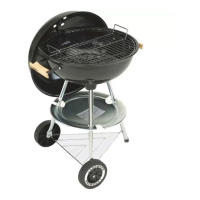
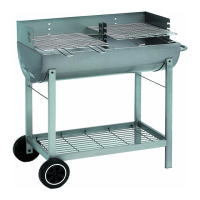
The grill must be in a stable position on a rm
substrate during operation.
Do not use in enclosed areas, or in areas covered
by a roof.
Only use safe lighting materials (such as
LANDMANN solid re starter).
The fuel container has a holding capacity of
approximately 4 kg.
Before using the barbecue for the rst time, it
should be heated with fuel (charcoal or briquet) for
approximately 30 minutes.
Instructions for safe operation of the grill
device
CAUTION!
For your safety the heads of the screws should
always point outward, otherwise injuries can
occur.
Only rmly tighten all screw connections after
assembly is concluded, otherwise undesired
material tension can occur.
1. Fasten the crossbar (G) to the pair of wheel
elements (L) with M6x40 bolts and M6 nuts.
Attention: Shelf holder (I) is also fastened at
the same time.
2. Repeat step 1 with the pair of stand elements
(H) and fasten the right end of the shelf holder
(I).
3. Fasten the shelf boards (M) onto the shelf
holders (I) with the M5x18 screws and M5
nuts.
4. Turn the assembled trolley upside down and
guide the axle (J) through the appropriate
bores of the wheel stand elements (L) Slide
the wheels (K) over the ends of the axle (J) and
secure the wheels with the M8 stop nuts.
5. Turn the trolley right side up and place the
re bowl (N) on the wheel stand - and stand
elements (G + L). Screw the re bowl (N) onto
the stand heads using M6x10 bolts and M6
nuts.
6. Fasten the side parts of the wind screen (D + O) to
the re bowl (N) using M6x10 bolts and M6 nuts.
Attention: For this step rst only fasten on the
front to the side, and below in the centre.
7. Place the wind screen - rear wall (C) between
the wind screen side parts (D + O ) and
fasten it with M6x10 bolts and M6 nuts.
Attention: The lower bolts connect the re
bowl (N) with the wind screen side parts and
the rear wall (C).
8. Screw the side bracket (F) to the lower right
side of the re bowl (N) using M6x25 screws
and M6 cap nuts.
9. Press the Ø6.5x26 bolts into the bores of the
side shelf (E) and place the side shelf on the side
bracket (F). The ends of the bolts will then rest
in the matching bores of the side bracket (F).
10. Place the charcoal grate (B) in the re bowl (N).
11. Then place the grate in the desired position in
the wind screen (D + O).
WARNING!
The grill must be placed on a stable and rm
substrate during operation, otherwise it can
tip over.