6
Hardware Setup
Chapter 2
Network Application Platforms
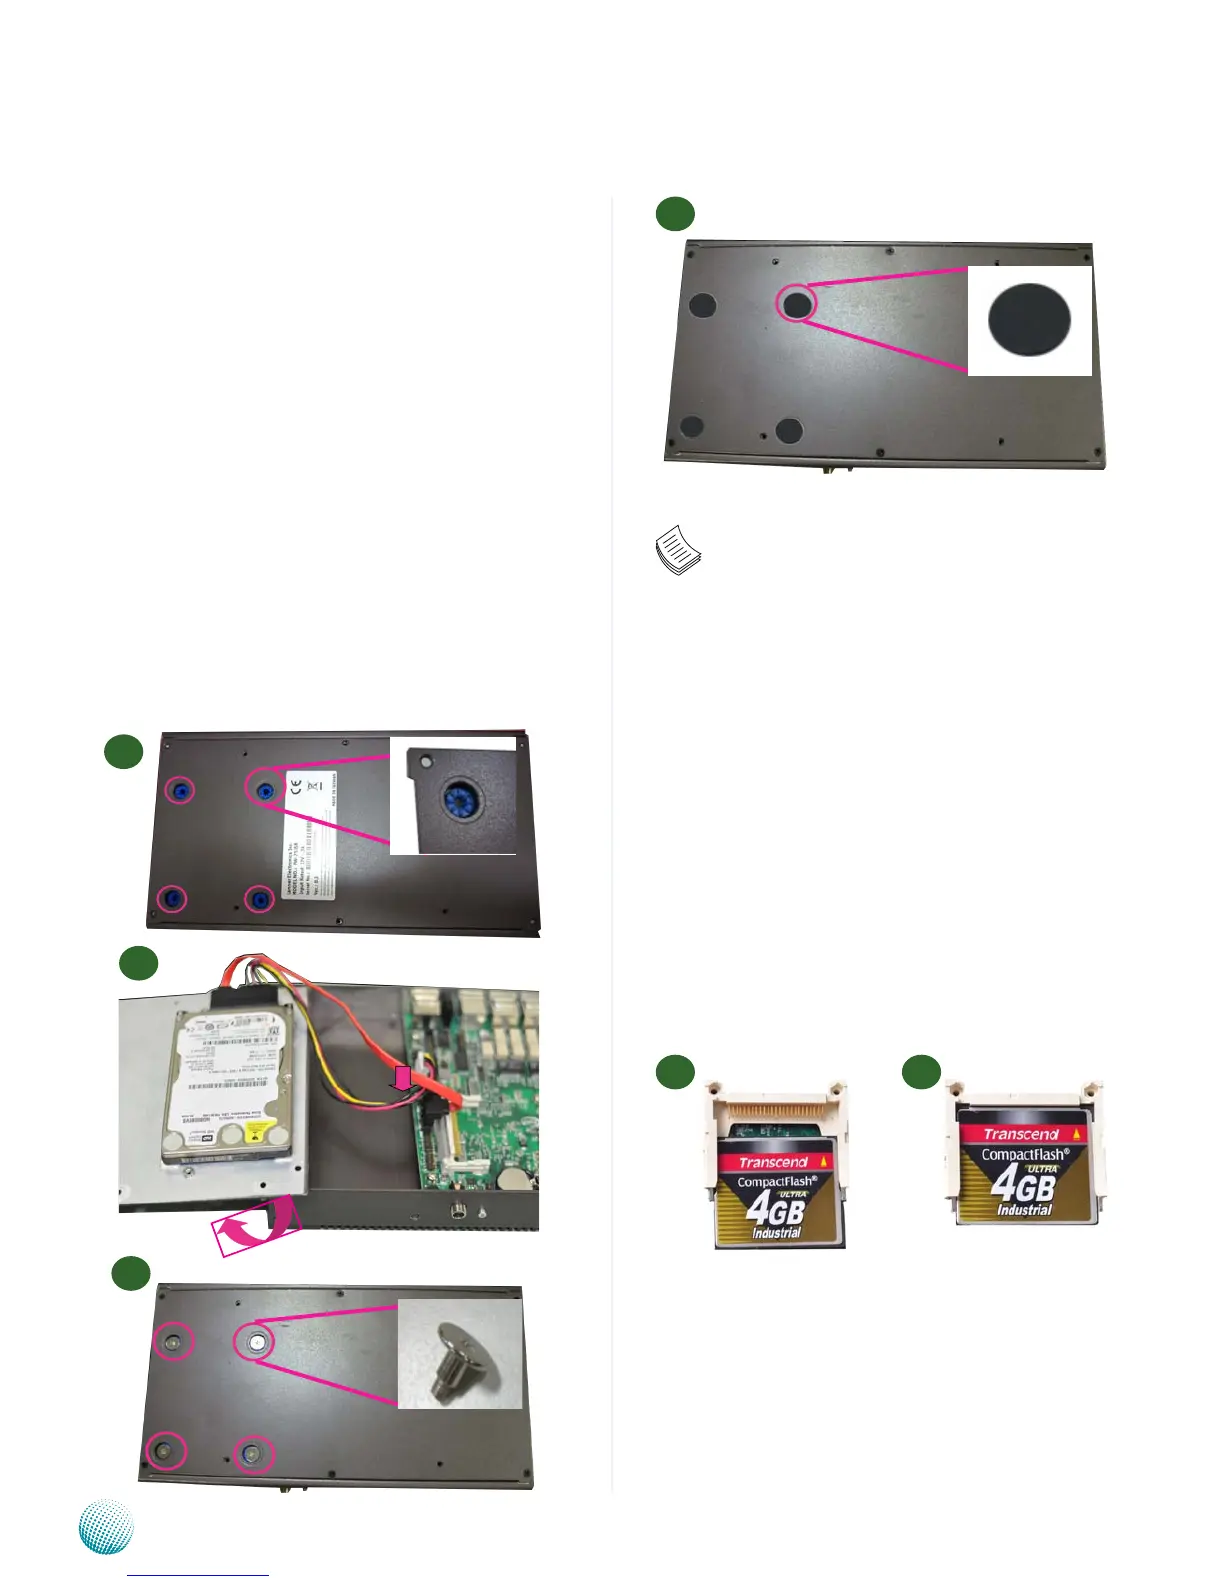
Installing the Hard Disk
The system can accommodate one Serial-ATA disk (2.5”).
Follow these steps to install a hard disk into the FW-7541:
Take off the black cap covering the hard disk mounting 1.
holes and insert the anti-vibration rubber to the
mounting holes. Make sure that the rubber goes
through the holes when inserting it.
Place hard disk inside the cover and align the corners of 2.
the hard disk with the mounting holes on the cover.
Secure the hard disk with 4 mounting screws from the 3.
outside of the cover.
Use the ESD protection pad in the hard disk installation 4.
screw pack to cover the exposed screws for ESD
protection
Connect the Serial-ATA cables to the HDD.5.
Plug the Serial-ATA drive and power cables to the 6.
Serial-ATA drive and the 4-Pin Serial-ATA Power
connectors on the main board respectively.
Installing a CompactFlash Card
FW-7541 provides one CompactFlash slot. Follow the
procedures bellow to install a CompactFlash card.
Align CompactFlash card and the card slot with the 1.
arrow pointing toward the connector.
Push the card to insert into the connector.2.
1 2
Note:
To Secure a 2.5” hard disk to the tray, use the 1.
mounting holes and fasten it with the screws
from the outside of the chassis cover as
illustrated in step 3 . Make sure that you use
the ESD protection pad to cover the exposed
screws for ESD protection .
Fanless models (models C/D) only support 2.
industrial hard disk.