Safety
7
!
Charge only
Ni-Cd batts.
Rechargeable
battery warning
(inside door)
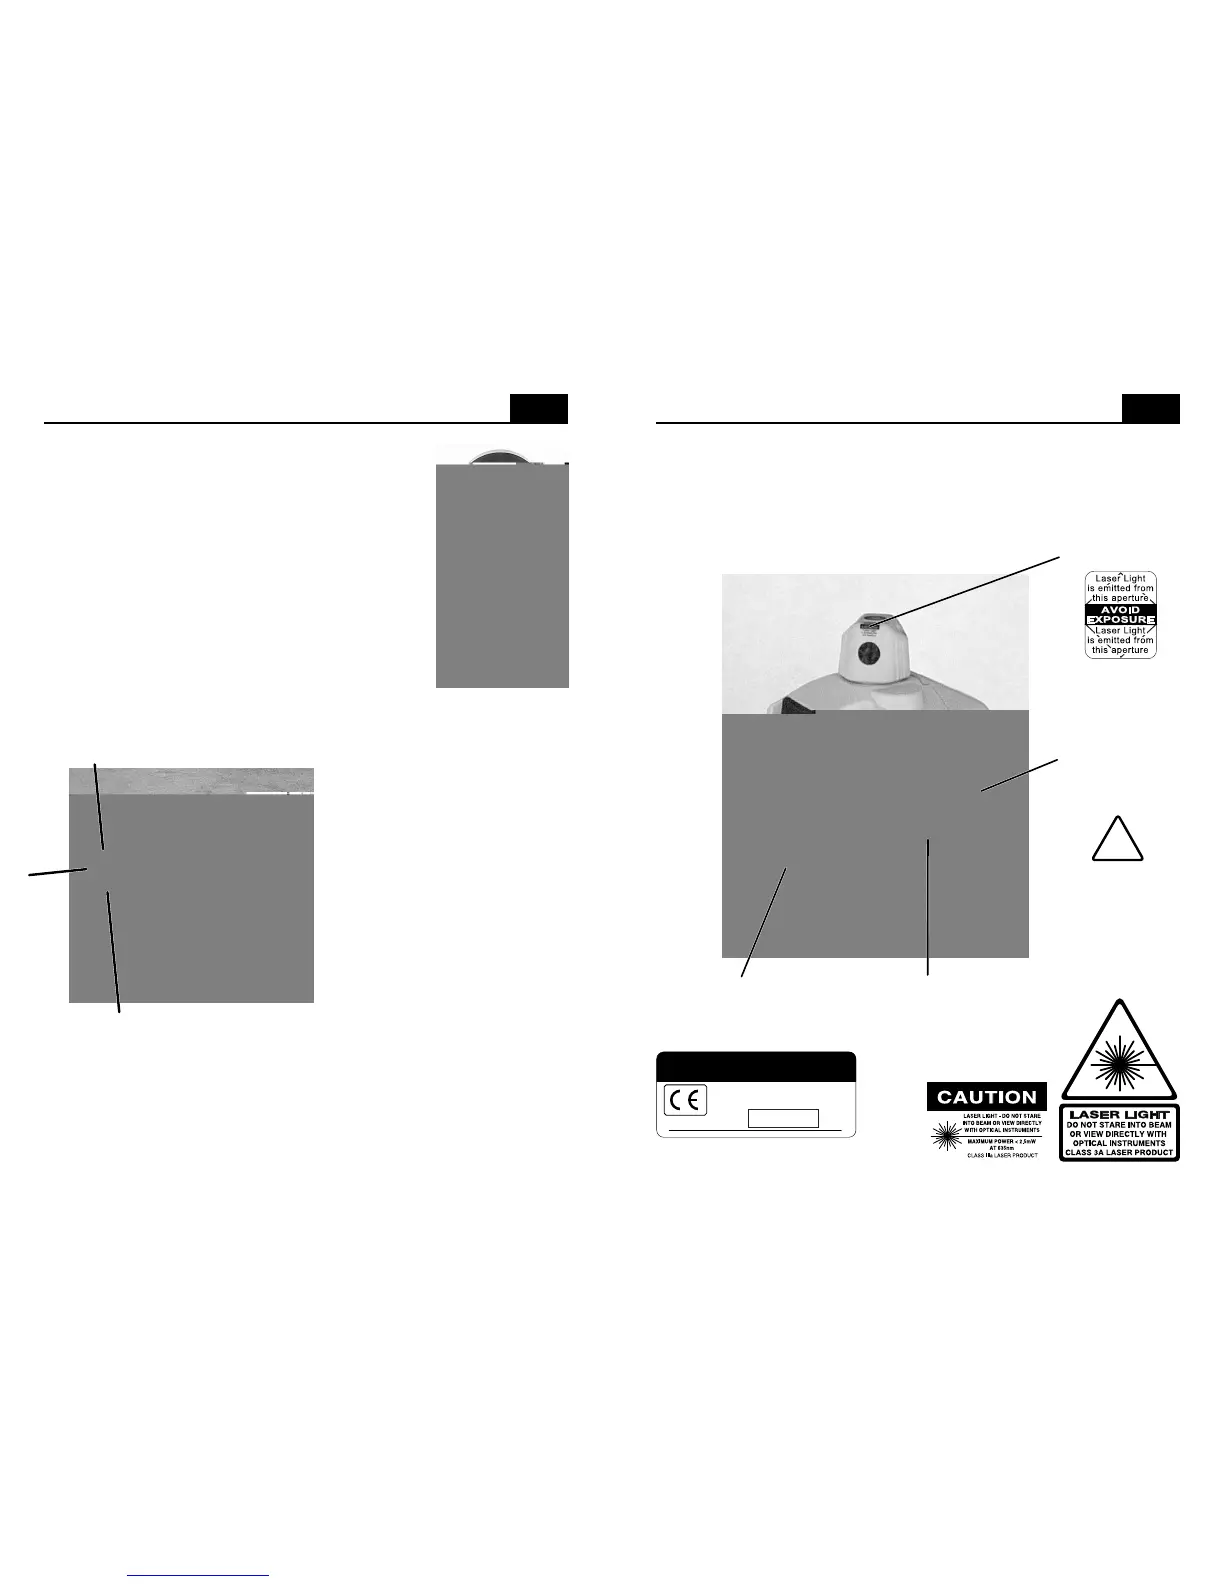
Serial / CDRH
compliance
and EC mark
Aperture label
C.D.R.H. / Osha
Caution / Class IIIa label
IEC class IIIa label and
laser light logotype
Caution and certification
label locations
10
Serial No.
Made in U.S.A. by: Laser Reference, Inc.
450 Salmar Ave. • Campbell, CA 95008
This product complies with FDA
standards 21 CFR subchapter J
X
Vertical And Line Layout Setup
Assemble the vertical mount and attach the laser to
it. Remove the receiver from the rod clamp, turn it
on and set it on your far point, laying it on its side.
With the receiver pickup window facing the laser, use
the beam center notch for alignment over the point.
Return to the laser/mount assembly and use the Y-
axis leveling screw (now at the bottom of the laser) to
rough center the vertical vial (visible through the
window in the control panel now at the top of the
laser) Note that the surface the vertical mount is
resting on should be reasonably level. Turn the laser
on and stop the beam rotation (using the - button).
Turn the rotating head to project the beam downward
toward your near point while you rough align the assembly. Turn-on the
rotation while keeping the beam on the near point and sliding the base of
the assembly until the receiver's audio tone begins.
The X-axis leveling knob (now
near the top of the laser) is used
as a fine mechanical line control
to center the beam plane on the
receiver. The receiver's audio
tone will become constant when
the beam is centered on the
receiver. Make a final
adjustment of the vertical axis
vial after the alignment is done
and re-align to the receiver if
necessary. Note that the laser is
completely manual when in the
vertical mode and you will have to check the bubble from time to time to
insure accuracy. Draw a line around the feet of the mount to allow you to
verify that the mount has not been moved.
The mount can also be tripod mounted for vertical setups.
Check the vertical vial and your benchmarks regularly to be sure
your work will be accurate. The L5 is designed for vertical
alignment up to two stories high.