8. Rigging e Sails: Jib
1. Attach the jib clew strop to the jib clew and
attach the two jib clew blocks to each end with
a bowline.
(fi gure 31)
2. Attach and thread the jib sheets as shown.
e jib ratchet blocks’ cleating position can be
adjusted.
3. Attach the jib to the forestay by twisting the
jib hanks onto the forestay.
(fi gure 32)
4. Tie the jib halyard to the head of the jib us-
ing the thin rope hoist the jib.
5. Attach the jib tack to the furler with the jib
tack hook.
(fi gure 32)
6. Tension the jib lu by pulling on the thick
part of the jib halyard. Do not over-tension it
beyond the tension of the forestay.
7. e halyard will automatically cleat in the
cam cleat at the hounds.
8. Remove the thin halyard and store it in the
halyard bag.
9. Attach the jib halyard retaining shockcord
and englefi eld clip to the furling drum pin
with a bowline.
10. Attach the thick halyard clip onto the
shock cord clip; you may furl the jib until
launched.
(fi gure 33)
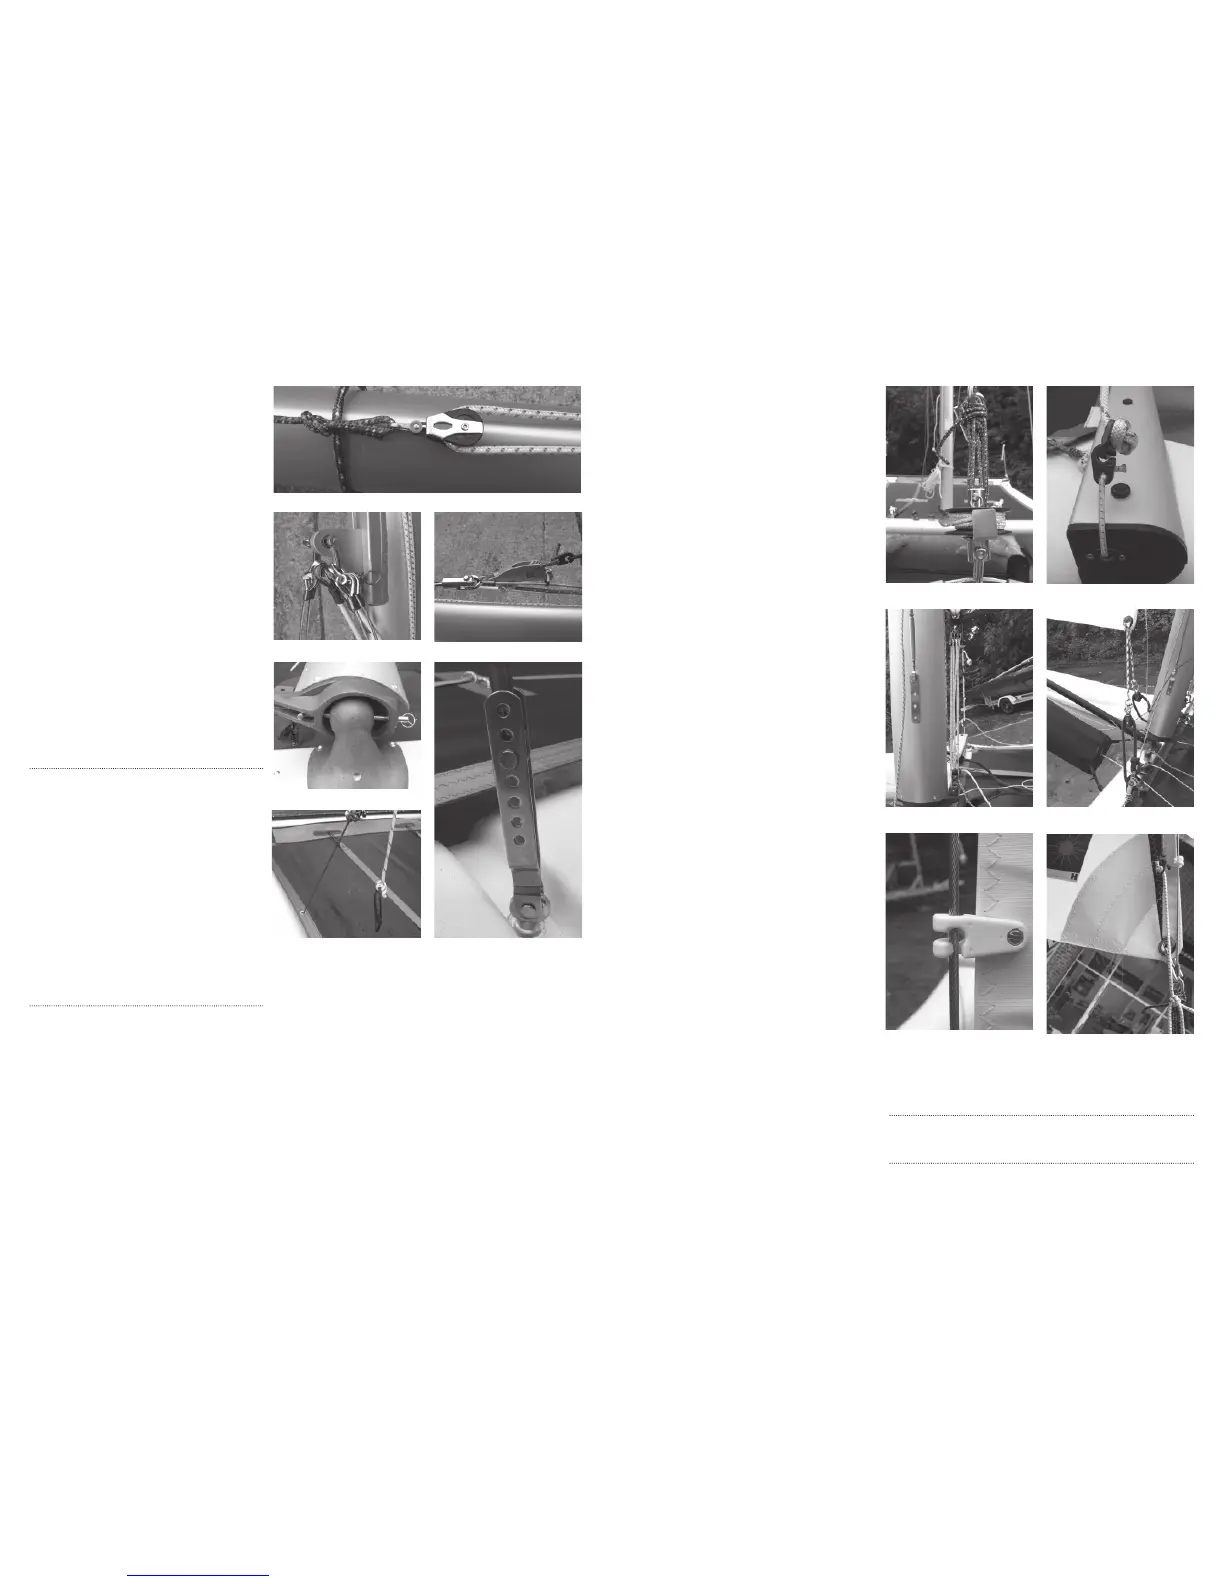
fi gure 28 fi gure 29
fi gure 30
fi gure 32
fi gure 31
fi gure 33
9. read the gennaker halyard through
the bullet block located on the front face of
the mast.
(fi gure 22)
10. Insert the standing rigging hound into the
track on the front face of the mast as shown.
Ensure that the forestay, trapeze wires and
shrouds are not tangled.
(fi gure 23)
11. Attach jib halyard and extension as shown.
(fi gure 24)
12. Position the mast onto the boat. While one
person lifts the mast at shoulder height,
another one should position the mast foot
onto its ball support and inserts the pin/axle.
(fi gure 25)
13. Attach the shrouds to the hull chain plates
ensuring the adjuster pins are positioned third
hole down as shown.
(fi gure 26)
14. Attach the aft trapeze wires to the respective
ends of the elastic that pass under and through
the side edging tapes of the trampoline.
(fi gure 27)
15. Ensure that the forestay, trapeze and
shrouds are not tangled.
Please note: Prior to raising the mast, please ensure:
• All halyards are led to the foot of the mast ready to
facilitate hoisting of sails.
• All clevis pins, rings and spreader ends are thoroughly
encapsulated with amalgamating or electrical insulation
tape. ( is prevents snags to the sail and derigging from
occurring while sailing).
• When attaching the forestay, make sure you get the
shackle pin through the jib furling gear and not through
the outer guide only or the mast will fall down.
• Shrouds must not be loose before going afl oat; there is a
risk the mast could jump o the ball step in waves.
• It is recommended to check the rigging tension after
two or three sails.
16. To raise the mast one person should pull the
two forward trapeze handles whilst another
stands on the trampoline and raises the mast
to its upright position.
(fi gure 28)
17. Hold the mast with the trapeze wires until
the forestay lacing is tied securely by lacing
the forestay onto the jib furler clevis pin (three
loops minimum).
18. Remove the mast foot pin/axle to allow the
mast to turn freely, before re-tensioning the
forestay lacing fi rmly.
19. Ensure none of the rigging is tangled then
attach the forward trapeze wires to the
respective front beam shockcords
20. Pass the jib furler line through the cam
cleat on the starboard side of the front beam.
(fi gure 29)
21. Attach the downhaul system to the tang on
the aft edge of the mast foot.
(fi gure 30)
fi gure 22
fi gure 23 fi gure 24
fi gure 27 fi gure 26
fi gure 25
Please note: To lower the jib, reattach thin part of the halyard. Pass the
halyard behind the shroud and back to the bow. Pull the halyard to unlock
it from the cam cleat.
 Loading...