Do you have a question about the LAVAZZA Tiny ECO and is the answer not in the manual?
This appliance is intended for household and similar applications like staff kitchen areas, farm houses, hotels, motels, etc.
Place the coffee machine in a safe, stable location away from extreme temperatures, hot surfaces, or flames.
Connect the machine only to adequate, grounded power sockets matching the appliance's voltage.
Do not operate with a damaged cord. Protect it from sharp edges, heat, and oil. Do not carry by the cord.
Live parts must not contact water. The unit must not be dipped in any liquid.
Prevent children from playing with the machine and keep packaging materials out of their reach.
Avoid touching hot parts immediately after use and be cautious of hot liquid splashes during dispensing.
Unplug and cool before cleaning. Do not immerse. Use a soft cloth and mild detergent. Do not use alkaline agents.
If inactive for a long time, unplug, store in a dry place out of reach of children, and protect from dust.
Do not attempt to repair faults yourself. Contact authorized Lavazza Service Centres for repairs.
Fill only with fresh drinking water. Ensure water level is above the minimum mark.
Use only Lavazza A MODO MIO or compatible capsules. Do not insert fingers or other objects.
Dispose of the appliance separately as electrical equipment. Follow local regulations for proper disposal.
Lists the items included in the package, such as the machine, welcome kit, instruction booklet, quick start guide, and warranty sheet.
Lists conditions that void the warranty, including incorrect use, unauthorized repairs, tampering, and improper storage or use.
Lift the lid, remove the water tank, and rinse it thoroughly before filling to the MAX level.
Fit the supply plug into the power outlet to prepare for operation.
Press the SWITCH-ON/STAND-BY/SUPPLY button to turn the machine on. The button light will indicate status.
The machine automatically enters STAND-BY mode after 2 minutes of inactivity. It can also be switched off manually.
Perform a wash cycle by dispensing a tankful of water to clean the hydraulic circuit before first use.
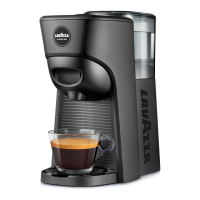
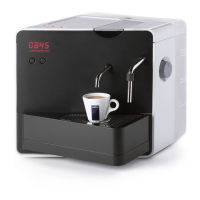
Place the cup under the coffee dispenser for a classic espresso.
Remove the drip tray to accommodate cups of different sizes for a long coffee.
Take out the capsule tray, insert a compatible capsule, and reinsert the tray.
Press the button to start dispensing coffee. Press again to stop. Automatic stop after 90 seconds if not pressed.
Wait for the button light to stabilize, then remove the capsule holding tray and the used capsule.
The machine will not stop if water runs out during dispensing. Ensure the tank is full before starting.
Wash machine components with cold/lukewarm water and non-abrasive cloths. Dishwasher safe for removable parts.
Clean and dry all parts thoroughly before reassembling them.
Perform a weekly coffee brewing without a capsule to clean the dispenser. Dispense one cupful of water.
Do not leave water in the tank for more than 3 days. Empty, rinse, and refill with fresh water every 2-3 days.
Remove the cup supporting grid, disassemble, and empty the drip collecting tray. Check regularly for fullness.
Descale every 2-3 months or when water flow reduces or coffee isn't hot enough. Use Lavazza DESCALING agent.
Fill tank with descaling agent and water, run cycle, do not interrupt. Use a moist cloth for spills.
Never use vinegar. Do not switch off or move the machine during descaling. Do not drink dispensed solution.
Dispense descaling solution in intervals, waiting between cycles. Empty the collection container as needed.
After descaling, rinse by refilling the tank with fresh water and running multiple dispensing cycles.
Check power connection, power strip, and ensure power supply is present. Contact customer service if issues persist.
Store machine at room temperature and descale if limescale build-up is suspected.
Ensure machine is on a stable surface, check cable position, fit movable parts, top up water, and insert capsule.
Check for electrical failure, ensure water tank is full and correctly inserted, and repeat power-on procedure.
Check tank insertion and integrity. For front leaks, check capsule insertion and compatibility.
Machine may be too cold. Disconnect, let it reach ambient temperature, then reconnect and press button.
Check tank insertion and integrity. If problem persists, contact customer service.
Use compatible capsules and ensure the lever is in the correct position for a new capsule.
Run the machine washing cycle or descale the machine if limescale build-up is suspected.
Replace faulty capsule, check pump, clean spout, or descale if limescale build-up is suspected.
Ensure water tank is correctly inserted and wait for the button light to stabilize.
Try power cycling the machine by disconnecting and reconnecting the plug.
Details the nominal voltage and power rating, which are to be found on the appliance label.
Specifies the machine's dimensions (height, width, depth) and its approximate weight.
Provides information on the water tank capacity, housing materials, and cable length.
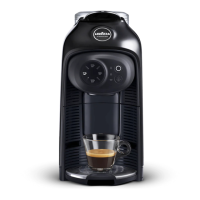
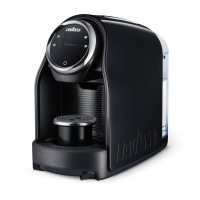
| Product type | Capsule coffee machine |
|---|---|
| Built-in grinder | No |
| Capacity in cups | 1 cups |
| Hot water system | - |
| Number of spouts | 1 |
| Coffee input type | Coffee capsule |
| Coffee maker type | Semi-auto |
| Appliance placement | Countertop |
| Brand compatibility | Lavazza A Modo Mio |
| Water tank capacity | 0.6 L |
| Coffee capsule/pod system | A Modo Mio |
| Adjustable coffee strength | Yes |
| Reservoir for brewed coffee | Cup |
| Cord length | 0.8 m |
| Control type | Buttons |
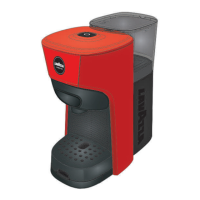
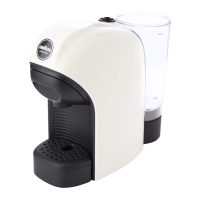
| Product color | Black, Green |
| Housing material | Acrylonitrile butadiene styrene (ABS) |
| Drip/spout adjustment | Vertical |
| Number of adjustable drip tray positions | 2 |
| AC input voltage | 220 - 240 V |
| AC input frequency | 50 - 60 Hz |
| Auto power off after (min) | 2 min |
| Package type | Box |
| Package depth | 200 mm |
| Package width | 325 mm |
| Package height | 345 mm |
| Quantity per pack | 1 pc(s) |
| Depth | 260 mm |
|---|---|
| Width | 139 mm |
| Height | 270 mm |
| Weight | 2500 g |