18
Removing the Blade
1. Remove the blade nut and the mulching fan (Fig. 32).
2. Remove the blade from the blade driver (Fig. 32).
3. Examine the mulch fan for worn or bent blades.
Replace it if necessary.
4. Examine the blade driver for bent or sheared drive
lugs. Replace it if necessary.
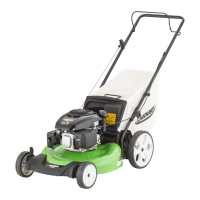
Sharpening the Blade
File the top side of the blade to maintain its original
cutting angle (Fig. 33A) and inner cutting edge radius
(Fig. 33B).
153
1
m4783
2
AB
Figure 33
1. Sharpen at this angle only 2. Maintain the original
radius here
Note: The blade will remain balanced if you remove the
same amount of material from both cutting edges.
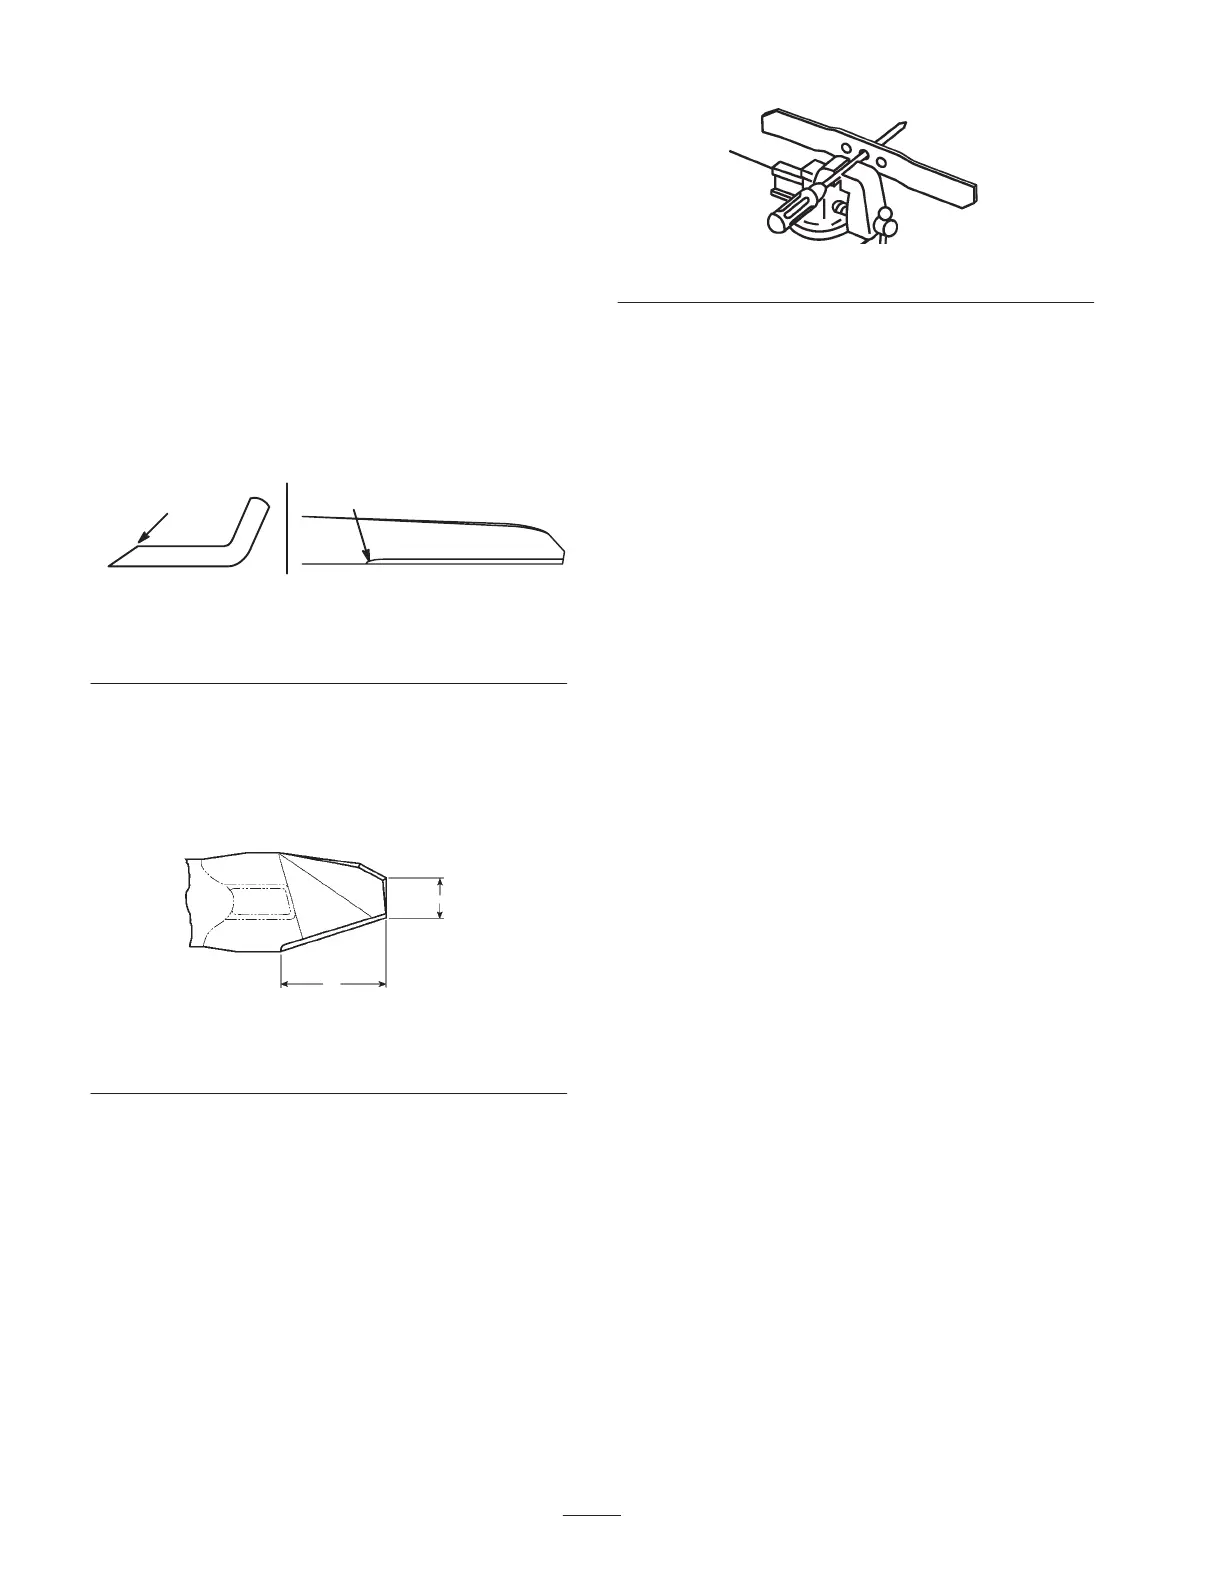
Note: Do not grind the blade more than 5 inch (127 mm)
from the outside ends and no less than 2 inch (51 mm)
from the trailing edge (Fig. 34).
990
2”
(51 mm)
5”
(127 mm)
Figure 34
Balancing the Blade
1. Check the balance of the blade by placing the center
hole of the blade over a nail or a screwdriver shank
clamped horizontally in a vise (Fig. 35).
1007
Figure 35
Note: You can also check the balance by using a
commercially manufactured blade balancer.
2. If either end of the blade rotates downward, file that
end (not the cutting edge or the end near the cutting
edge; refer to Figure 34). The blade is properly
balanced when neither end drops.
Installing the Blade
1. Ensure that the blade driver is installed on the
crankshaft. See Figure 32.
2. Install the blade over the lugs of the blade driver with
the curved ends toward the housing (Fig. 32).
3. Install the mulch fan into the blade recess (Fig. 32).
4. Secure the blade with the blade nut (Fig. 32)
5. Torque the blade nut to 47 ft-lb (63 Nm).
Note: Replace the blade nut after installing and removing
the blade four times. The blade nut’s locking power
diminishes and the blade nut could loosen if you do not
replace it.
6. Connect the wire to the spark plug.
Cleaning the Exhaust Port
Carbon deposit build-up in the exhaust port causes
excessive wear and power loss. Check and clean the
exhaust port every 100 operating hours.
1. Disconnect the wire from the spark plug (Fig. 4).
2. Drain the fuel from the fuel tank.
3. Tip the lawn mower onto its right side.
 Loading...