22
1
2
2
3
1725/1014
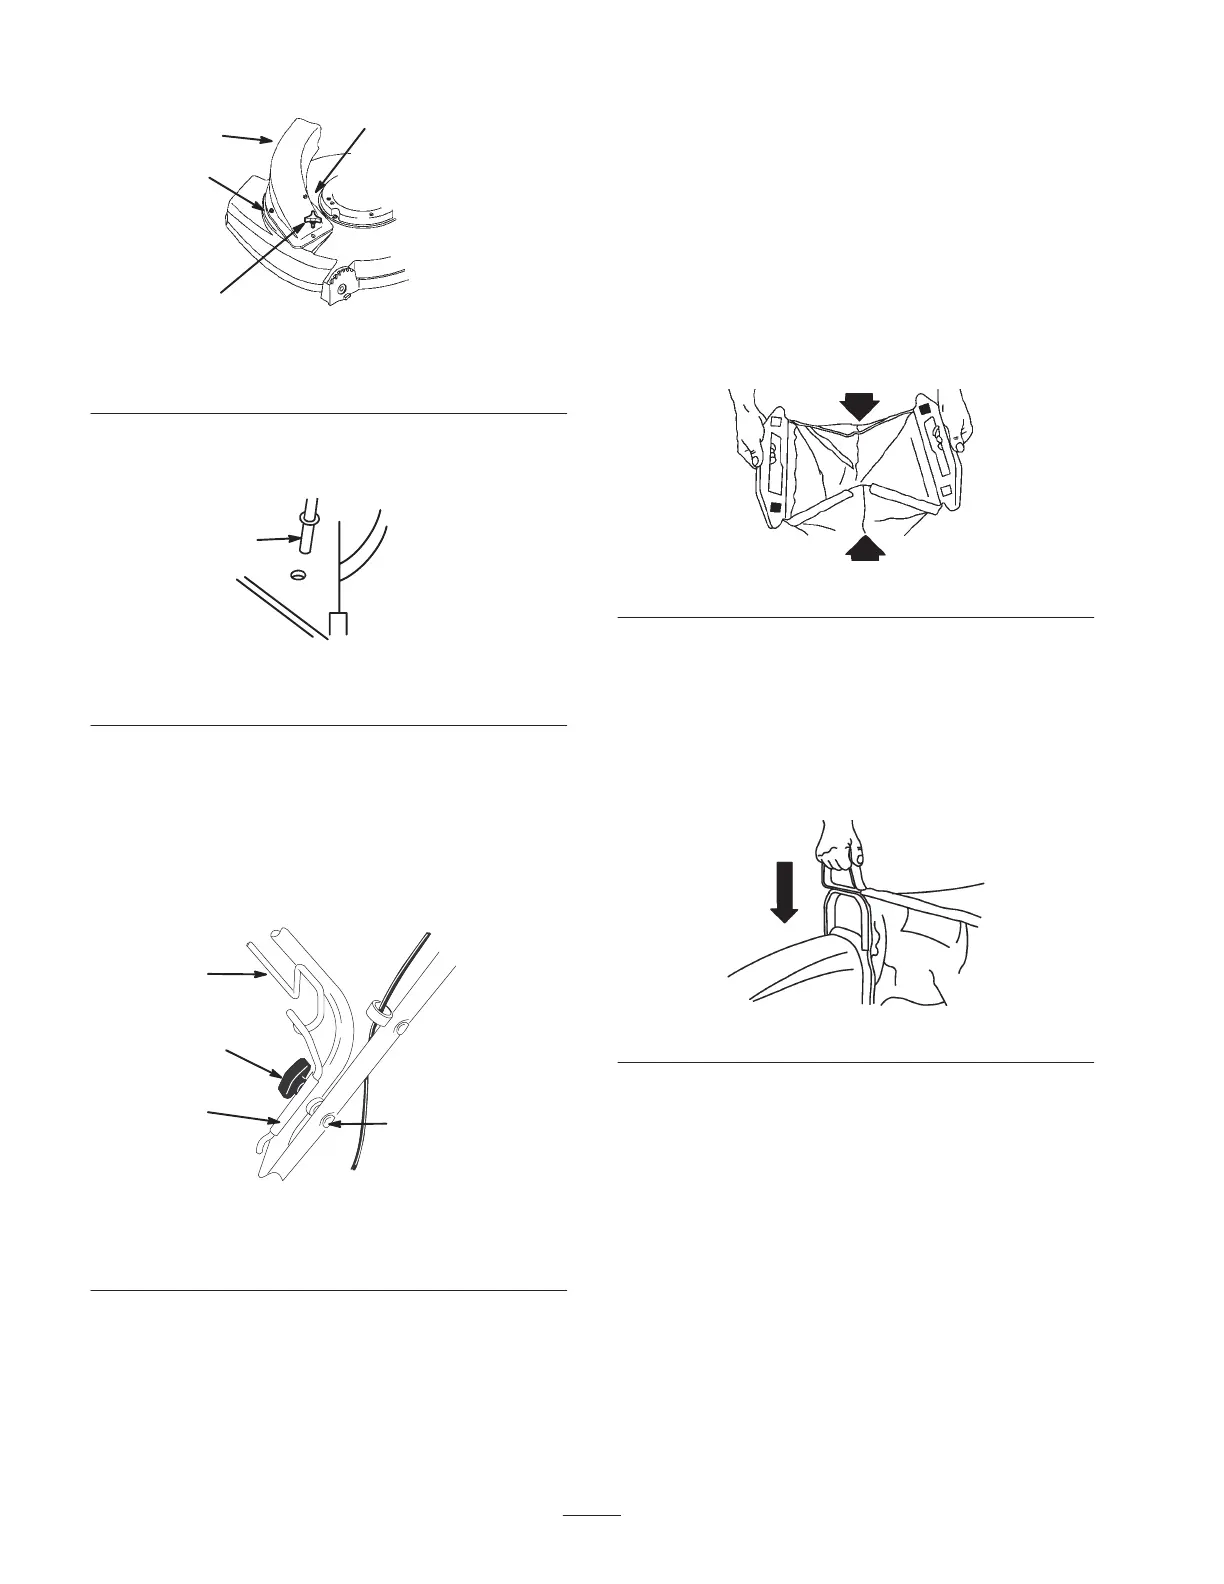
Figure 41
1. Chute assembly
2. Shoulder bolts
3. Knob
4. Insert the chute support rod through the hole at the
right rear of the deck (Fig. 42).
1145
1
Figure 42
1. Chute support rod
5. Slide the chute assembly clockwise to install it; slide it
counterclockwise to remove it.
6. Secure the chute assembly to the housing with a knob
(Fig. 41).
7. Remove the knob and the bolt that secures the left side
of the upper and lower handle sections (Fig. 43).
2
1
3
4
m–5311
Figure 43
1. Knob
2. Bolt
3. Hanger clamp
4. Bag hanger
8. Hold the hanger clamp on the inside of the handle
sections. Insert the handle bolt from the inside of the
handle sections through the holes in the hanger clamp.
9. Position the bag hanger leg into the hanger clamp
groove and secure it with a knob.
10. Repeat steps 7 through 9 for the right side of the
handle sections.
11. Close the rear of the bag by folding the sides in and
pressing the interlocking rear handle halves together
(Fig. 44).
1012
Figure 44
12. Position the rear bag handles into the bag hanger on
the handle.
13. Grasp the bag assembly handle and slide it over the
flange of the grass chute (Fig. 45).
14. Push downward on the handle until it seats into
position.
1010
Figure 45
Adjusting the Bag
You may need to adjust the bag when you change the
handle height. A properly adjusted bag should be taut on
the top cloth area between the front bag handle and the
rear bag hanger handles. If the bag is too tight or too
loose, adjust as follows:
 Loading...