PAGE 7
FT-897 Installation:
The meter jack on the FT-897 is located under the front panel, just to the right of the main tuning knob.
Plug the right-angle end of the included 1/8” stereo cable into the meter jack. Plug the other end of the
cable into the jack marked “Radio” on the rear of the FTL-Meter.
If desired, connect a suitable power supply (12VDC @ 250mA) to the DC Power jack on the rear of the
FTL-Meter, using the supplied 2.5 x 5.5mm center-positive power cable. This power connection supplies
power to the backlight only. If the backlight feature is not desired, simply leave the DC power unconnected,
and the meter will still function normally.
SETUP
Yaesu included two menu items in the extended menu system of the FT-857 and FT-897 transceivers, to
allow configuring an external meter such as the FTL-Meter. In order to access those menu items, first, the
extended menu system must be enabled if it is not already.
Press and hold the FUNC button on the transceiver to enter menu mode. Rotate the SELECT knob
until menu 1, “EXT MENU” is showing. Turn the main tuning knob until EXT MENU is “ON”. This
enables the extended menu system.
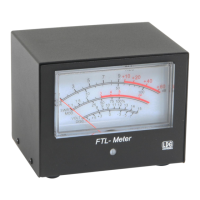
Initial Calibration
As shipped from the factory, the FTL-Meter is calibrated, but may require some adjustment due to
shipping or other factors. When the radio is off, the needle on the FTL-Meter should rest at the “1:1” line
on the SWR scale. If it does not, insert a flat blade screwdriver into the plastic screwhead under the meter
face on the front panel of the FTL-Meter. Gently turn the screw in either direction until the needle rests on
1:1.