Do you have a question about the Leica RM2125RTS and is the answer not in the manual?
Explains symbols used in the manual for warnings, notes, and item numbering.
Specifies that only trained laboratory personnel should operate the instrument.
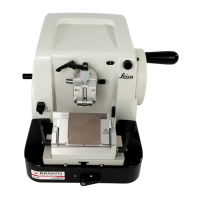
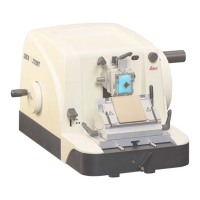
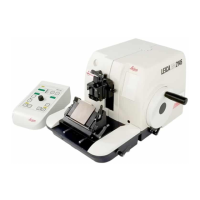
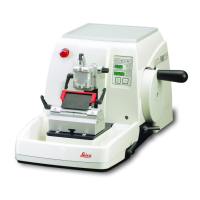
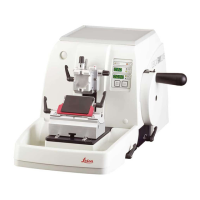
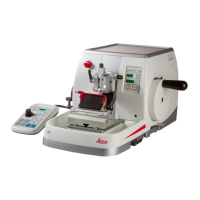
Describes the Leica RM2125 RTS as a rotary microtome for specimen sectioning.
States that information applies to the indicated instrument type and describes identification label.
Highlights the importance of reading and following safety instructions for operation and maintenance.
Emphasizes owner's and personnel's responsibility for safe operation and compliance with instructions.
Covers warnings related to instrument markings, transport, installation, and operation.
Details safety features like handwheel lock and handwheel brake.
Explains the function of knife guards and safety procedures for their use.
Identifies and labels key parts of the Leica RM2125 RTS from different views.
Details technical specifications including feed systems, handwheel locking, sectioning mechanism, and trimming function.
Lists installation site requirements, general specifications, dimensions, weight, and optional equipment details.
Specifies environmental conditions (temperature, humidity, pressure) and space needed for installation.
Lists items included in the basic instrument package and advises checking delivered components.
Provides step-by-step instructions for safely unpacking and setting up the instrument.
Guides the user on how to attach a specimen clamp to the specimen holder fixture.
Explains how to directly fasten specimen clamps to the specimen holder fixture without the dovetail receptacle.
Details the procedure for attaching the non-orientable knife holder base to the microtome.
Describes how to insert a non-orientable knife holder onto the knife holder base.
Instructions on how to securely clamp the specimen block into the specimen clamp.
Guidance on safely inserting and clamping the microtome knife or disposable blade.
Explains how to set the optimal clearance angle for sectioning using index marks.
Details the specimen retraction function, its purpose, and important precautions during use.
Describes how to position the specimen using a directional holder and warns against orientation during retraction.
Explains how to use the coarse feed wheel for initial trimming of the specimen.
Details trimming the specimen using the coarse feed wheel and handwheel.
Describes trimming by setting a large section thickness and rotating the handwheel.
Explains how to use the mechanical trimming function with its specific stages.
Guides on setting section thickness and rotating the handwheel for consistent sectioning.
Provides steps for safely removing and replacing the specimen in the clamp.
Describes the standard specimen clamp for rectangular blocks and how to mount specimens.
Explains how to use the Vee insert to clamp round specimens in the standard clamp.
Details how to use Foil Clamp Type 1 for small foil pieces and flat, angular specimens.
Describes how to use Foil Clamp Type 2 for large foil ribbons.
Explains how to mount and clamp cassettes in the Universal Cassette Clamp (UCC).
Details how to use the round specimen holder with inserts and clamping rings for cylindrical specimens.
Explains how to move and secure the non-orientable knife holder base.
Describes how to move and secure the knife holder base with lateral movement.
Introduces Knife Holders N and NZ for various knives and their height adjustment feature.
Provides detailed steps for inserting a knife into the holder.
Explains how to adjust the knife height using lay-on edges as reference.
Details how to reposition the knife laterally on the holder base.
Describes Knife Holder E-TC for tungsten carbide blades and its blade insertion process.
Introduces Knife Holder E for disposable blades and its insertion/changing procedure.
Explains how to remove and replace the rear pressure plate on Knife Holder E.
Details the procedure for height and parallel adjustment of the rear pressure plate.
Explains how to adjust the height and clearance angle of the front pressure plate.
Provides a visual overview of available accessories for the microtome.
Outlines general safety precautions and steps for cleaning the microtome's exterior surfaces.
Details the disassembly and cleaning procedure for Knife Holder E, including pressure plate removal.
Explains the cleaning process for the universal cassette clamp, including paraffin removal.
Recommends regular checks, cleaning, and lubrication for trouble-free operation.
Covers knife holder bases (non-orientable, lateral movement) and Knife Holder N.
Details Knife Holders NZ and E for various blades and their features.
Details Knife Holder E for high-profile blades and Knife Holder E-TC for carbide blades.
Lists pressure plates for different blade types.
Includes water bath assembly and disposable blades (low/high profile).
Lists TC-65 blades and 16/12 cm steel knives with profile c.
Lists 16/12 cm steel knives (profile d) and carbide knives.
Describes the variable knife case.
Covers non-orientable fixture, standard clamp, and vee insert.
Details universal cassette clamp and foil clamps (Type I, Type II).
Describes round specimen holders and various sizes of clamping rings.
Lists clamping rings (15mm, 25mm) and section waste tray.
Covers dust cover and safety gloves (sizes S and M).
Addresses issues like alternating thick/thin sections, chattering, or torn specimens.
Deals with sections being compressed, folded, or squeezed together.
Covers "stripes" in sections, noises during sectioning, and high blade consumption.
Addresses issues like no feed motion and high blade consumption.
Outlines the manufacturer's guarantee and warranty terms.
Provides contact details and required information for technical support or spare parts.
Advises on proper disposal of the instrument according to local regulations.
| Type | Rotary Microtome |
|---|---|
| Section Thickness Range | 0.5 - 60 µm |
| Trimming Thickness Setting Range | 1 - 60 µm |
| Horizontal Specimen Stroke | 28 mm |
| Vertical Specimen Stroke | 70 mm |
| Specimen Clamp Rotation | 360° |
| Power Supply | 100-240 V, 50/60 Hz |
| Specimen Retraction | 5 - 100 µm, adjustable |