15
Chapter 3Frame Mortise & Tenon Jig User Guide
THE FMT PRO JIG
3-23 The table has a bit opening
➀
and Joint Aligning Sight
➁
. Pulling
the sight fully forward to its detent provides precise table positioning over
joint cross-marks
➂
. Because the human eye excels at comparisons, we can
perceive differences as small as 0.004" in the space between the edges of the
line and the triangles
➂
. That’s 0.002" off center! You can readily center the
sight using slight table movements until the spaces appear the same
➃
.
1
2
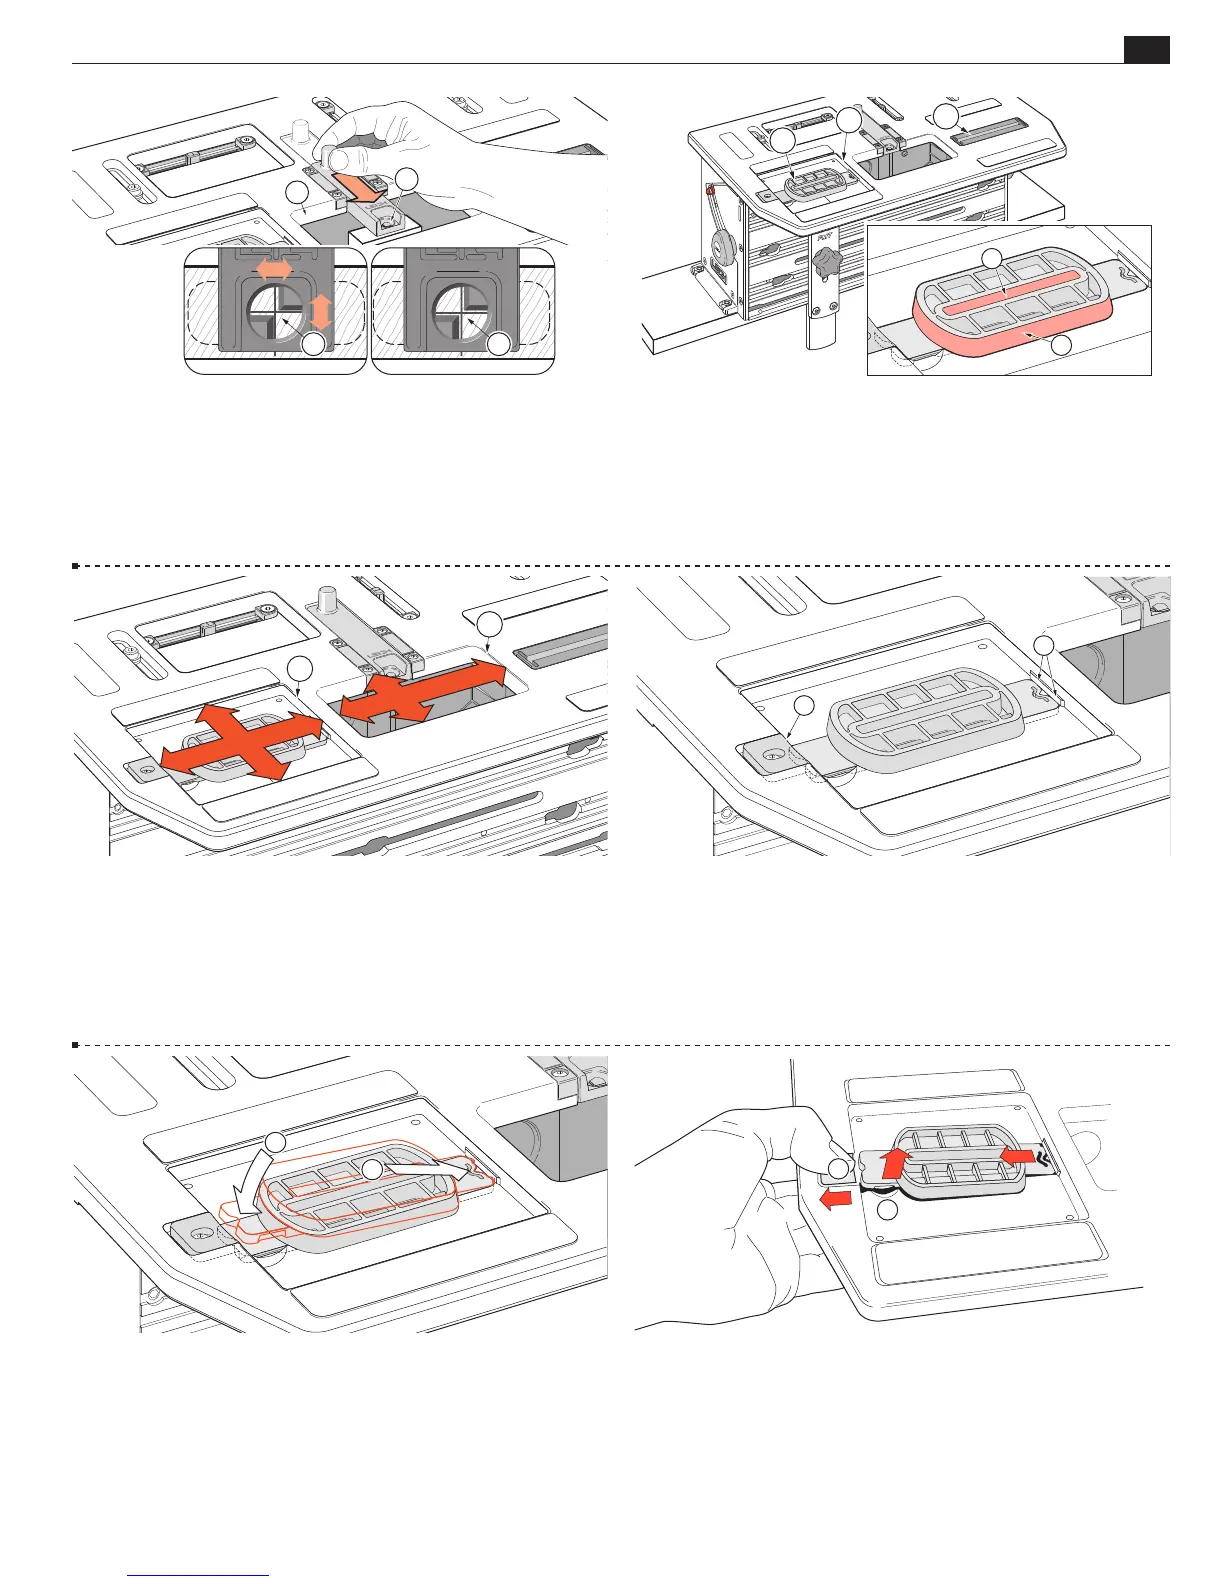
3-24 To the right front is the right-hand “Pin Track”
➀
. The right-
hand router sub-base Guide Pin runs in this track in all routing
operations. To the left front is the Guide Recess
➁
, in which all
Joint Guides
➂
are placed. The left hand router sub-base Guide
Pin runs in the guide slot
➃
for cutting mortises or around the
outside of the Guides
➄
, for cutting tenons.
1
2
3
5
4
3-25 The Guide Pin cannot move horizontally outside the
recess
➀
, and prevents the bit from touching the sides of the bit
opening
➁
.
1
2
3-26 Two small projections on the Guide fit into undercuts on
the right side of the guide recess
➀
. The left end of the Guide is
pushed down and retained by the spring-loaded Guide Latch
➁
.
m Note: the guide end shapes are not identical. Guides can
only be installed one way as shown here.
3-27 Snap the Guides in like this.
Use firm pressure just next to the guide latch.
Note: The guides are injection molded acetal and the guide bases
may vary slightly in tolerance. Some may require more pressure
to insert. The tighter guides will become easier after a few inser-
tions.
3-28
To remove a Guide, pull back the latch
➀
and push through
the finger-hole from below with your fingertip
➁
.
1
2