2
Chapter 1 Frame Mortise & Tenon Jig User Guide
MOUNTING THE FMT PRO
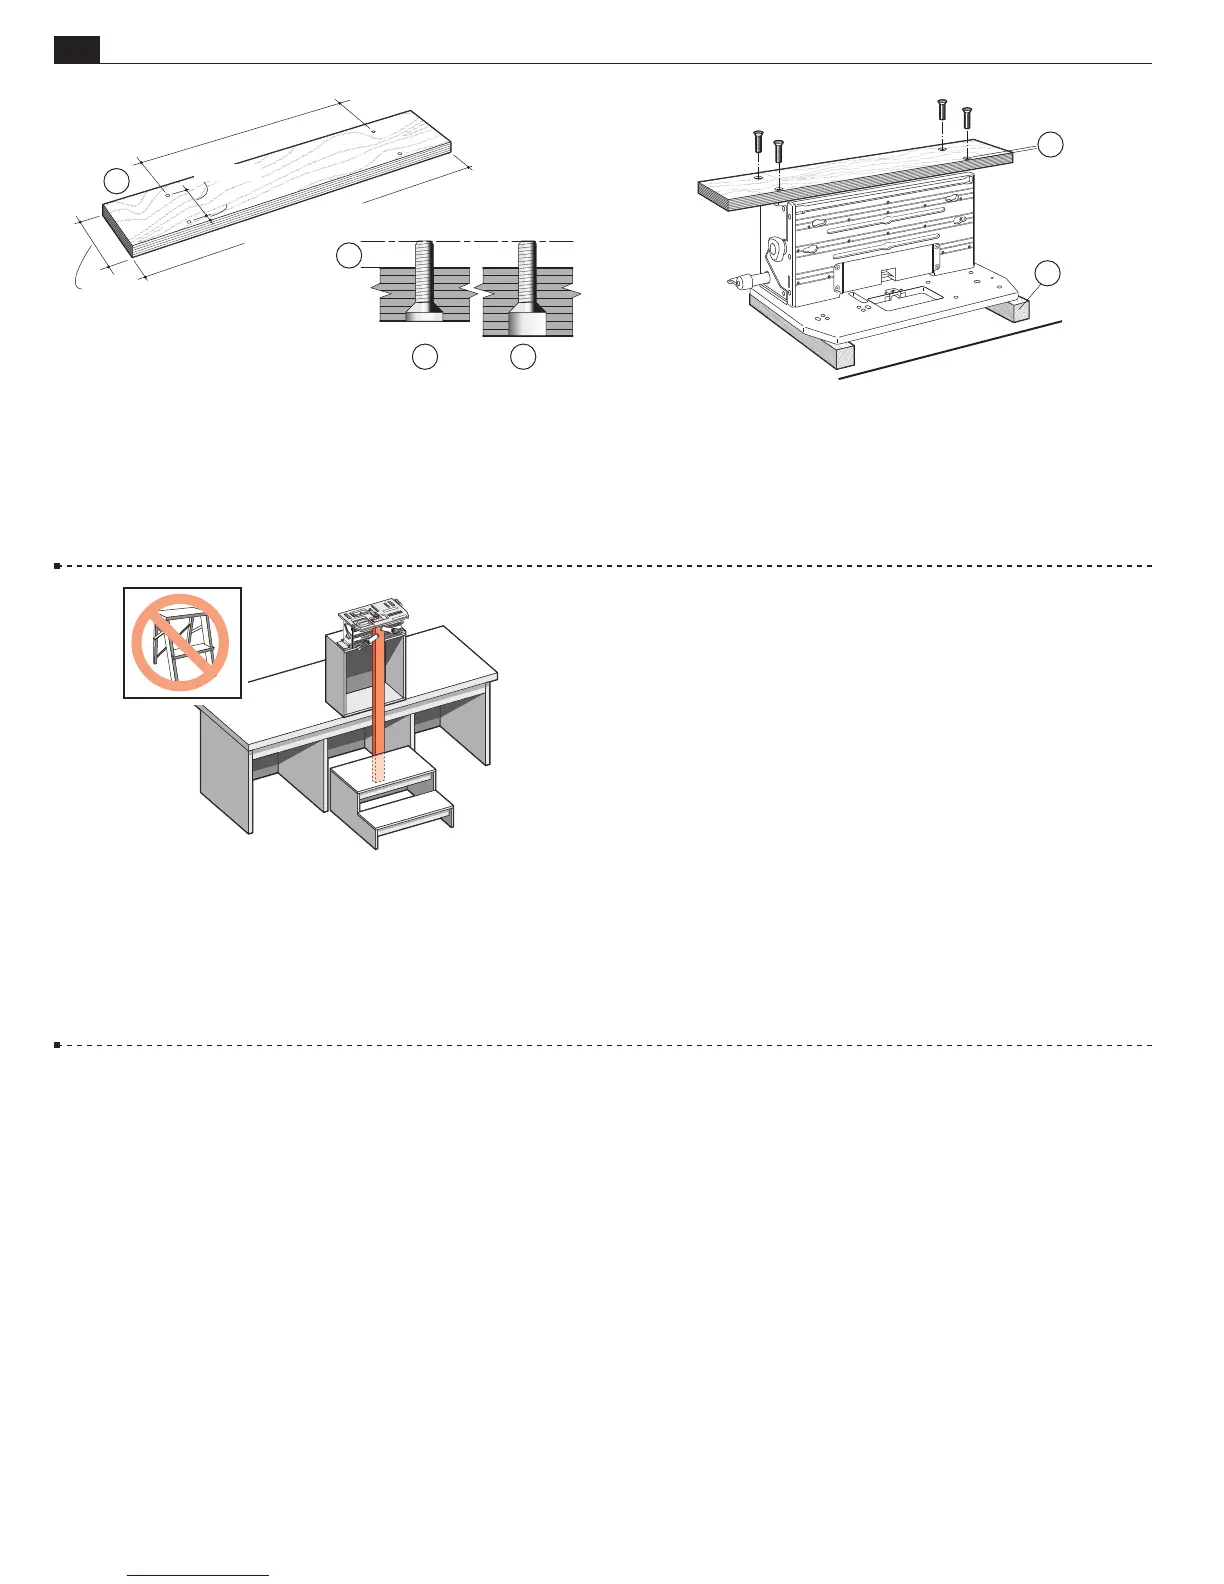
1-1 Mounting the FMT Pro: Prepare a flat board at least
3
⁄4"[20mm] thick, a minimum of 24"x5"[600x125mm]. Drill four
9
⁄32"[7mm] holes on 15
3
⁄4"x3
5
⁄16"[400x84mm] centers,
1
⁄2"[13mm] in
from the front edge of the board
➀
. Countersink
➁
, or counter-bore
➂
if board is thicker, the underside so that the four
1
⁄4–20 x 1" long
machine screws will project above the top surface by
3
⁄8"[9,5mm]
➃
.
3
5
/16"[84mm]
5"[125+mm]
15
3
/
4
"[400mm]
24"[600mm]
1
/2"[13mm]
1
2
4
3
1-2 Turn the jig upside down on two wooden blocks
➀
(to
protect the table and sight knob). Using the four nuts and four
flathead countersunk machine screws, bolt the base board to the jig
using the two nut recesses in each end housings. The
1
⁄2"[13mm]
front edge
➁
to the front of the jig (of course). Now you can
clamp your FMT Pro to any bench.
2
1
1-3 For routing long vertical rails it may be necessary to build
a jig stand to mount securely on your bench. Make the stand and
bench height combination sufficient to accept the board length
you have in mind. The jig stand should be bolted securely to the bench.
Make up a stable platform as shown here to stand on. Do not use
a collapsible step stool, these are unstable and unsafe.
■