MOUNTING THE FMT PRO
FMT PRO CHAPTER 1
1
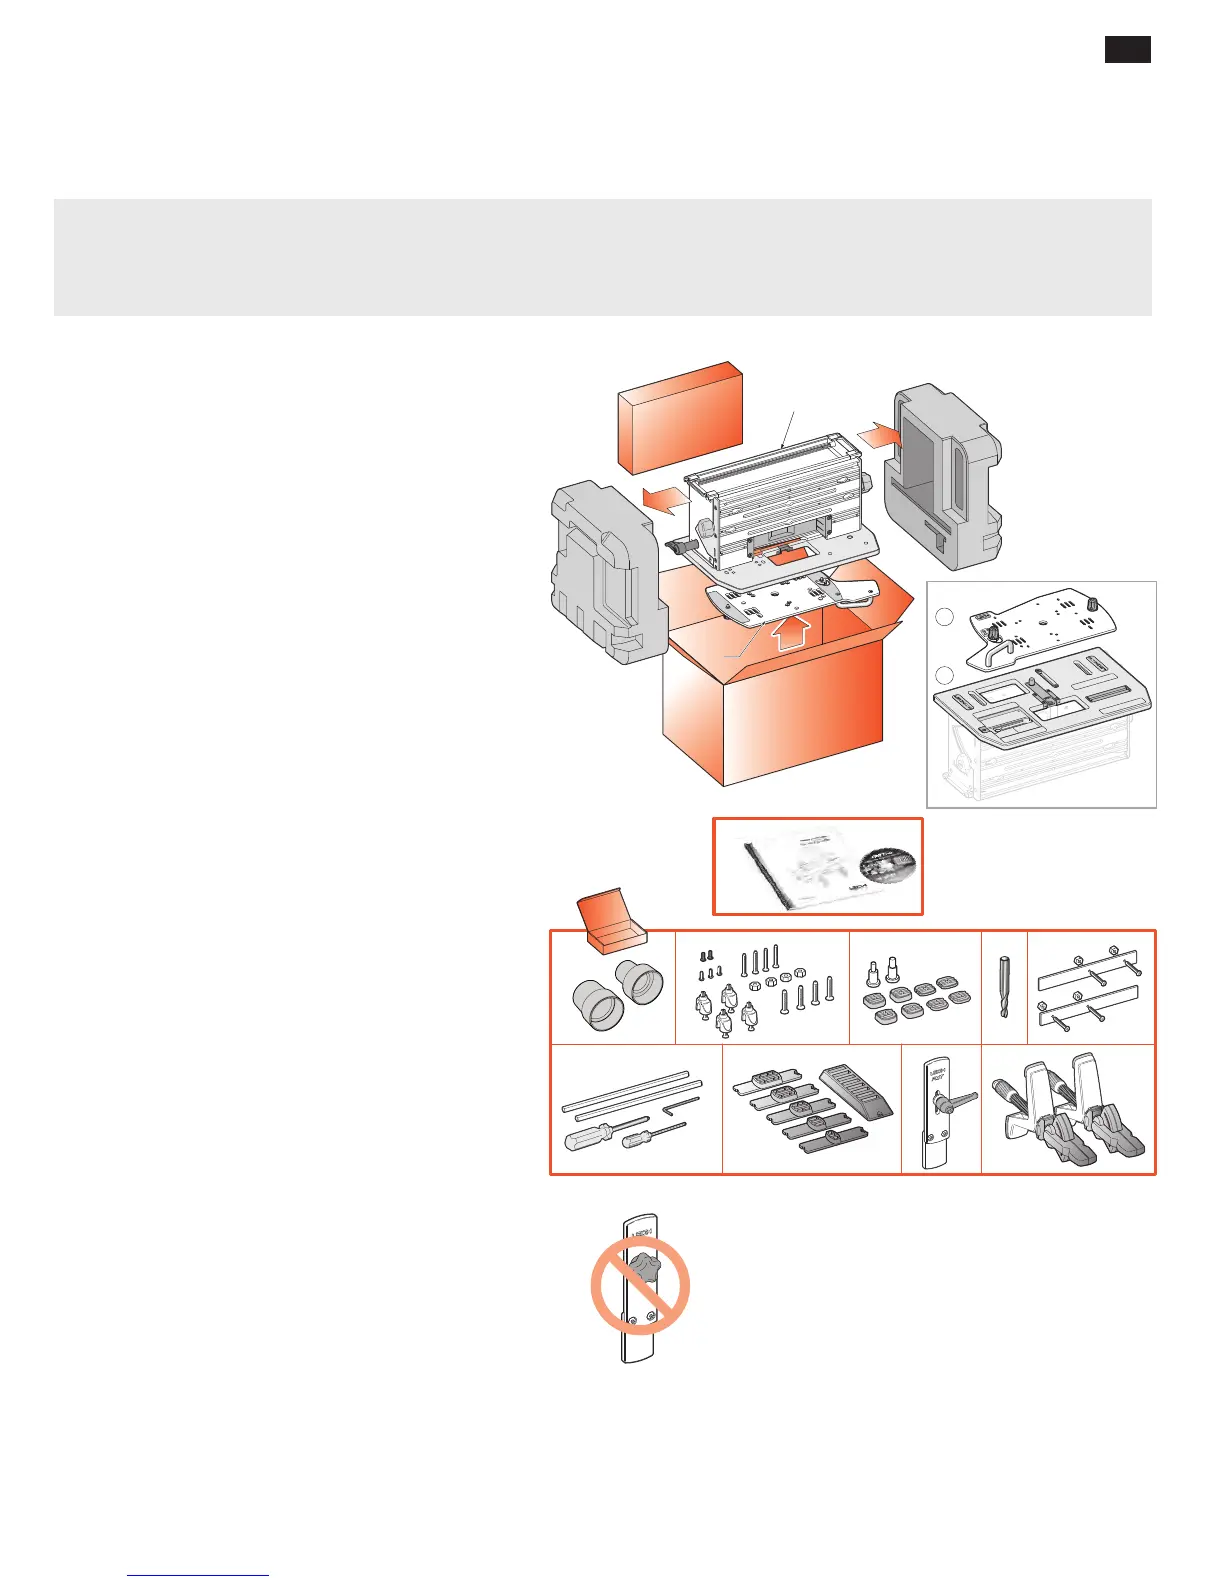
Mounting the FMT Pro
1. 1 The main Jig Body, complete with:
1 Table
➀
2. 1 Router Sub-Base
➁
3. 1 User Guide
1 DVD Video
4. 1 Box Containing:
A 2 Vacuum Hose Adaptors
B 4 Jig Hold-Down Nuts and Bolts
1
⁄4"-20
B 4 U-Posts with 4 Set-Screws and
Four
3
⁄4"Countersink Screws
B 4 1" Countersink Screws
B 3 Hex Socket Button Head Screws 10x24 x
3
⁄8"
B 2 Hex Socket Button Head Screws M6
C 4 High Shim Spacers
C 4 Low Shim Spacers
C 1
1
⁄4"and
1
⁄2" Centering Mandrel
C 1 8 and 12mm Centering Mandrel
D 1
5
⁄16" HSS Spiral Upcut
1
⁄2" Shank
E 2 Outrigger Bars with 4 Screws and Nuts
F 1 Leigh Square Drive Screwdriver
F 1 Leigh
1
⁄8" Hex Ball Screwdriver
F 1
5
⁄64" Hex Key
F 2 Router Hold-down Rods
G 5
5
⁄16" guides (or 6x8mm with FMT Pro-M)
& 1 Guide Stand
H** 1 Side Stop Fence with Lever**
I 2 Cam-Action Speed Clamp Assemblies
3
A B C D E
F G H** I
4
2
4
1
1
2
Jig Assembly and Mounting
The Leigh FMT Pro comes almost fully assembled with all adjustments factory set — however, before you start to
set up your Leigh FMT Pro Jig, make sure you have received all the required parts.
** SIDE STOP UPDATE: Some illustrations show
the side stop fence with a “knob”. All FMT Pro jigs are
shipped with a side stop fence with a “lever”, (see H in
drawing above).
VACUUM BOX UPDATE: Most drawings throughout this
user guide show an older version of the vacuum box, clamp
plate and top extrusion. All FMT Pro jigs are shipped with
the newest parts. These changes are reflected in Appendix III.
Note: Any optional accessories that you ordered may also be inside the parts box, or packaged inside the main carton.
If any of these items are missing from your order, please notify your supplier or Leigh Industries immediately.