27
Chapter 4Frame Mortise & Tenon Jig User Guide
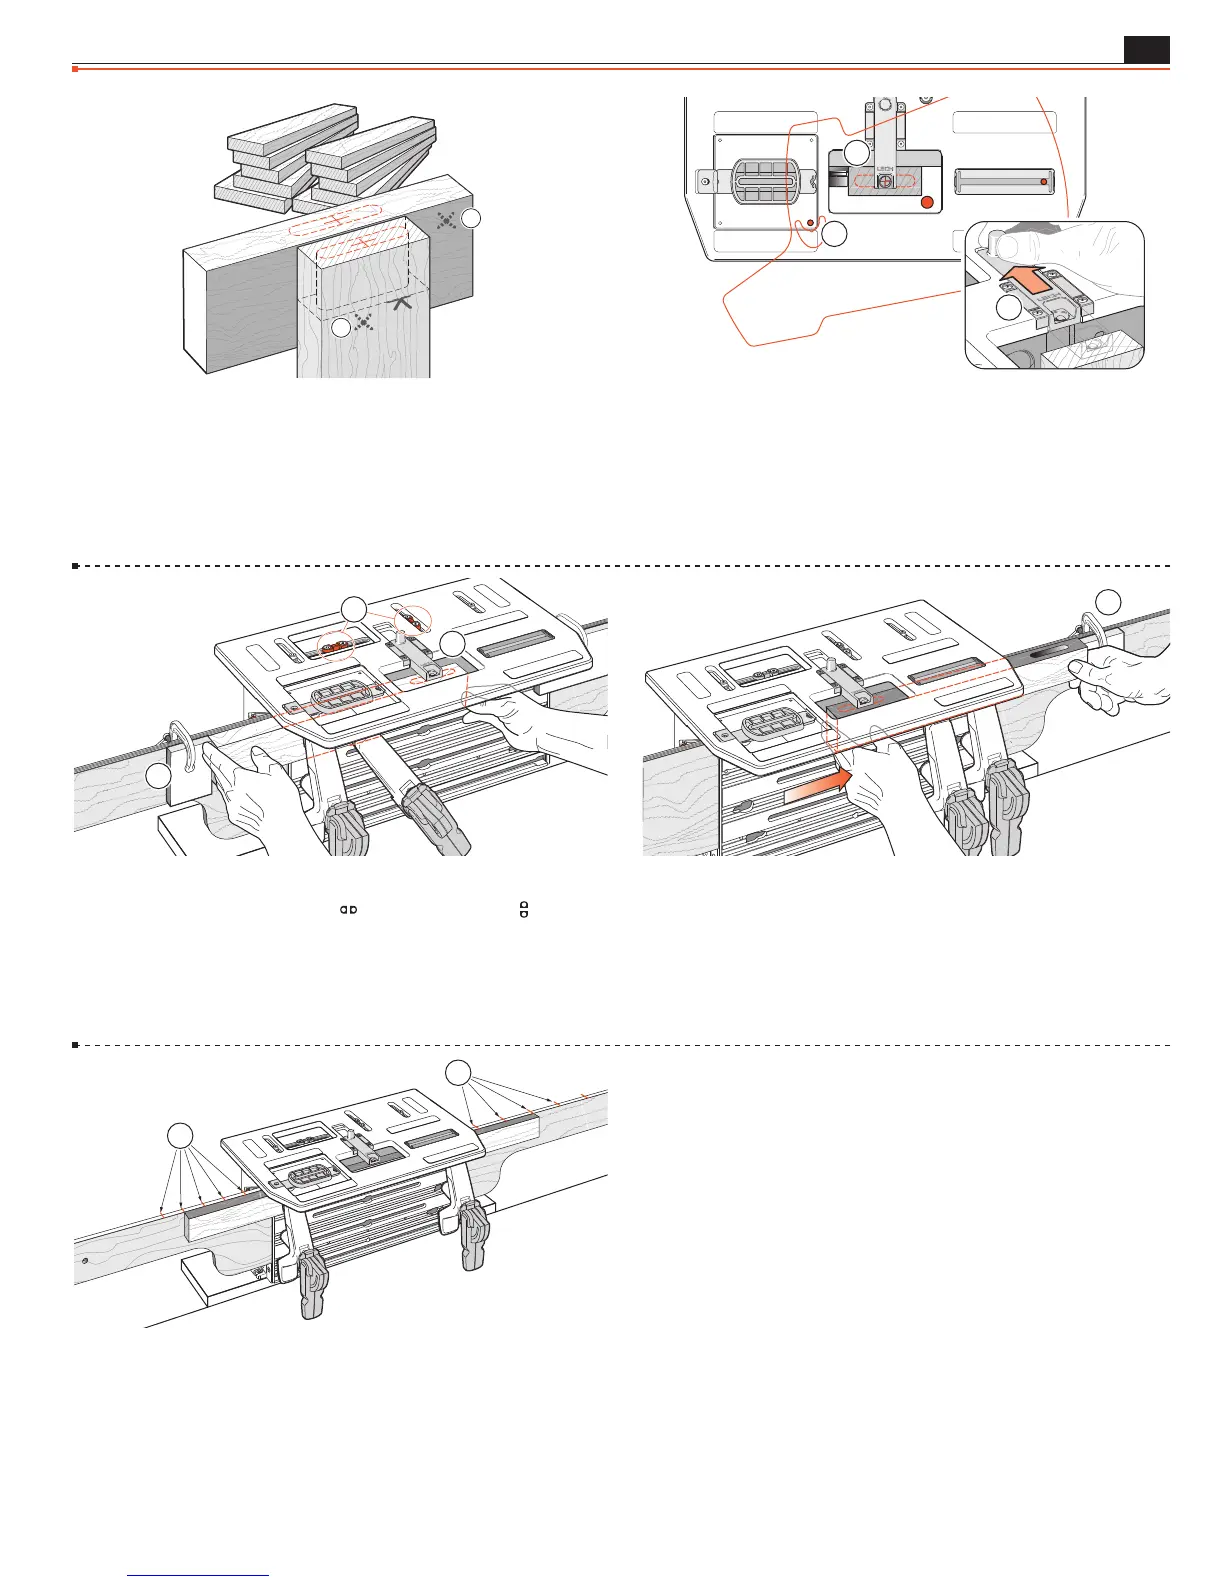
4-27 Production Procedures When routing frame joints it
is only necessary to mark and sight a single tenon and perhaps two
mortises. Once the side stop fence or outriggers are set and the table
sighted for one joint, any number of similar joints may be routed
without marking and without removing the router from the jig.
We recommend marking the finished face which goes against the
clamp plate (shown here from operator view)
➀
.
1
1
4-28 Tenons The router is “parked” with the guide pin in near
front corner of recess
➀
. Extend sight and use only as a tenon stop
➁
when
clamping successive (unmarked) tenon pieces against side stop. Retract
sight
➂
and rout any number of tenons without removing router. Note:
If you forget to retract the sight, the Sub-Base will push it out of the
way as you move it rearward, but we do not recommend this.
3
1
2
4-29 Mortises: Sight one mortise
➀
and set a stop block at the
end of the mortise board
➁
. Set
limit stops and
limit
stops to prevent unintentional table movement
➂
.
2
1
3
4-30 Sight the second mortise by moving the mortise piece (not
the table) and set the second stop block
➁
.
Rout any number of successive (unmarked) mortises without
removing the router from the table.
2
4-31 Successive mortises in “ladder” type construction are quick to
rout. Mark all mortises on only one piece (only one needs a front-to-
back mark!). Sight the first mortise (cross) to set the table and mark
the top of one outrigger in line with the workpiece end. Table locked,
move the workpiece, sighting each successive mortise line, marking
the outrigger(s). To rout, align the unmarked board ends with the
outrigger marks
➀
.
■
See next page for Production routing of Small Joints.
1
1
Production Procedures
MORTISE & TENON ROUTING PROCEDURES