Frame Mortise & Tenon Jig User Guide
32
Chapter 5
MULTIPLE JOINTS
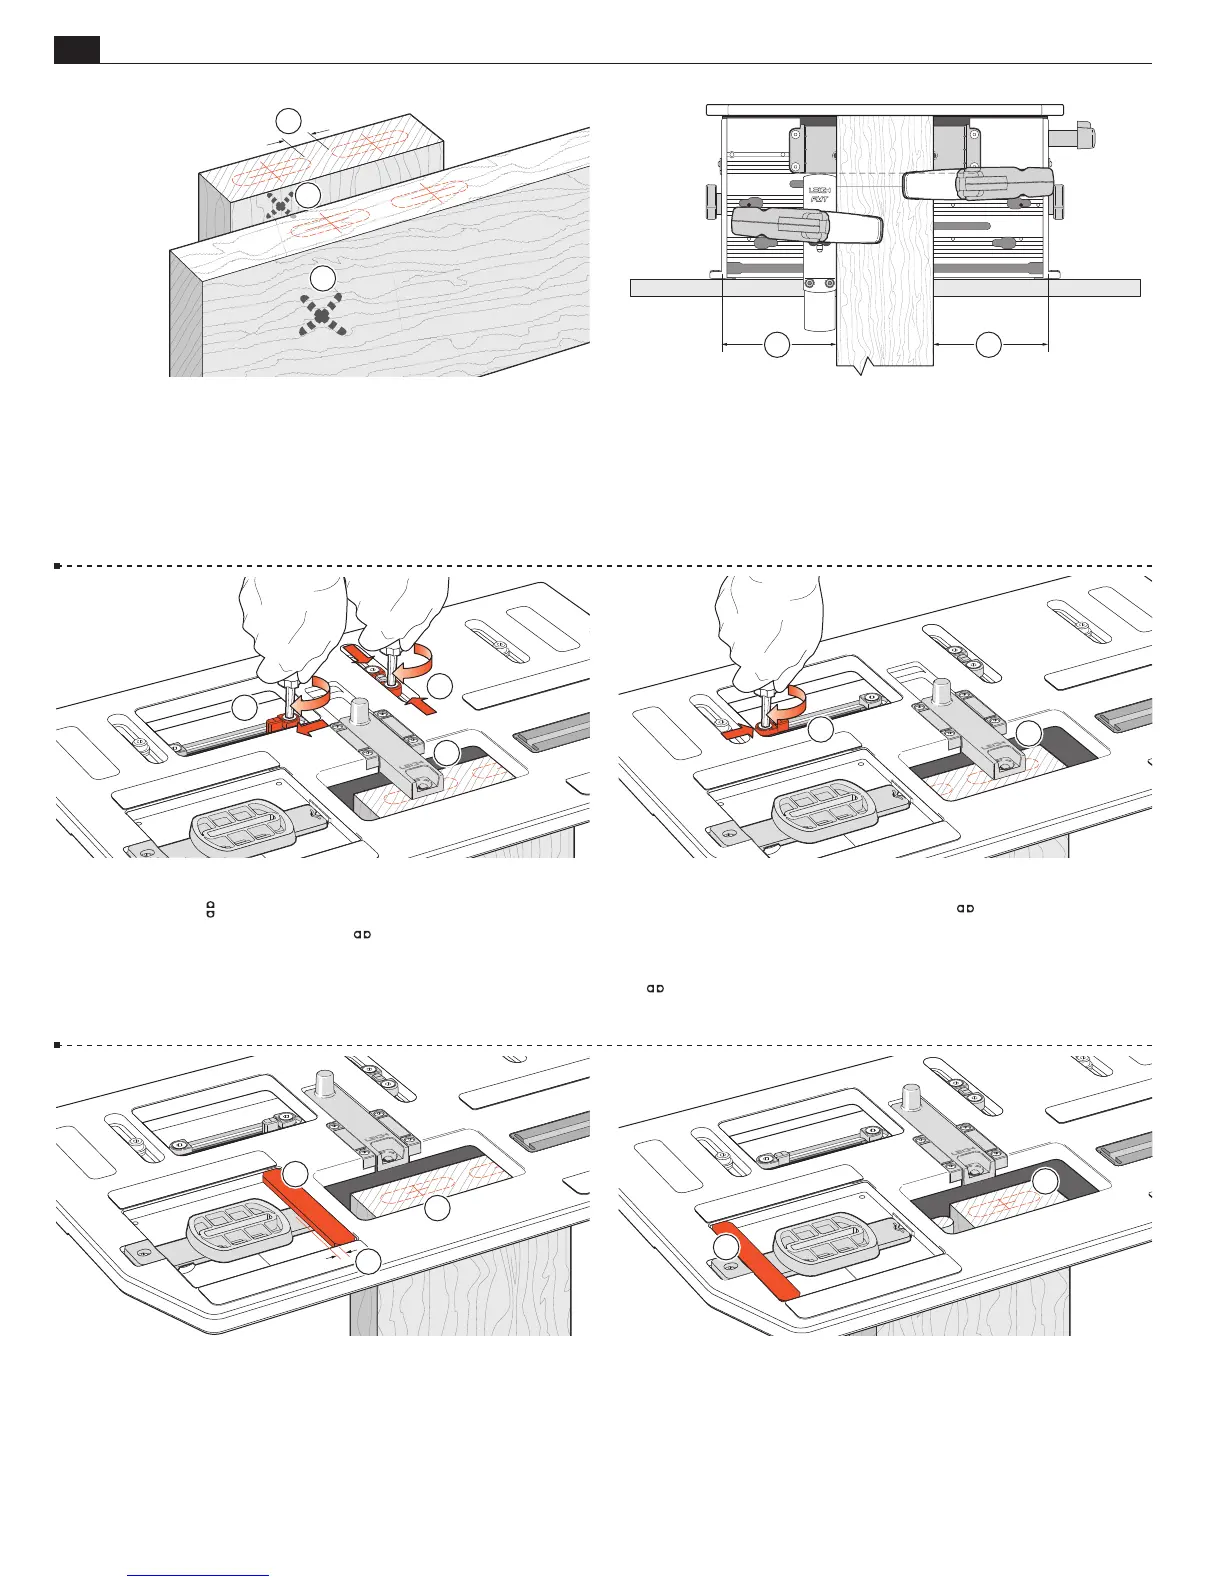
5-5 Sight the left hand tenon and lock the table
➀
.
Set and lock both
limit stops against their stop post
➁
.
Set and lock only the right hand
limit stop against its
post
➂
.
2
3
1
5-6 Unlock the table and sight the right-hand tenon
➃
and
lock the table. Set and lock the left hand
limit stop against
the post
➄
.
Release the table clamp and move the table left and right against
the
stops to double-check sight alignment to the two tenons.
Retract the sight.
5
4
5-7 Move the table left and lock. Do not rout yet. While with
practise it is fairly easy to avoid routing “into” the right tenon
while routing the left
➀
, we recommend that beginners use a small
shop-made “guard” to prevent this
➁
. Use
1
⁄4"[6mm] thick MDF
or plywood. Allow a
3
⁄16"[5mm] gap between the end of the guide
and guard
➂
. Rout the left tenon.
1
2
3
5-8 Move the table right and lock. Lift the left end of the (sta-
tionary) router and move the “tenon guard” left
➀
. Rout the right
hand tenon
➁
. Repeat as required for all tenon ends, moving the
table “guard” piece only once for each pair. Leave the table to the
right. Remove and save the guard. Note: If you change the plunge
height between tenons, there’s the chance of having a step in the
shoulder. We recommend leaving the bit plunged.
1
2
5-3 Mark the two mortise and tenon centers, taking care to allow
space between the joints
➀
at least equal to the tenon bit diameter.
Mark the faces that go against the clamp plate
➁
.
1
2
2
5-4 Set the sidestop fence so that the tenon piece is clamped
approximately centrally on the clamp plate
➀
.
11