Frame Mortise & Tenon Jig User Guide
34
Chapter 5
MULTIPLE JOINTS
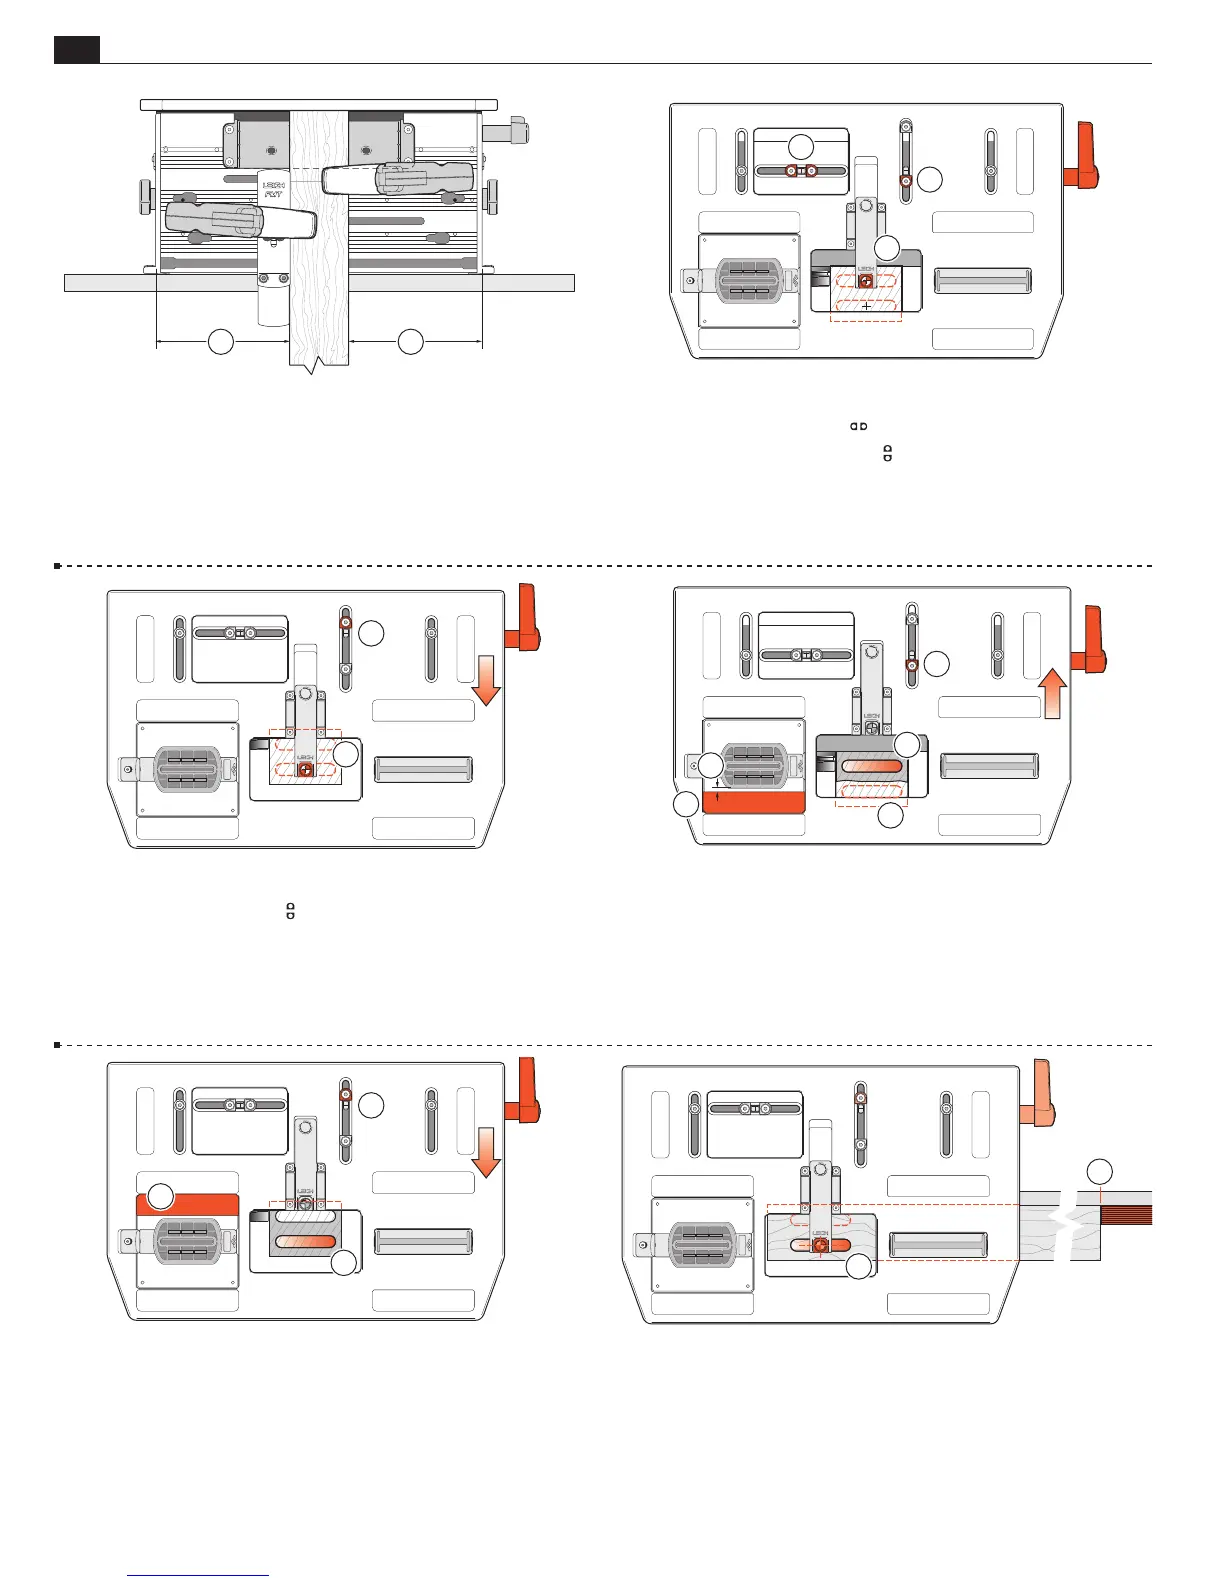
5-16 Unlock the table and sight the front tenon
➃
and lock the
table. Set and lock the rear
stop against its post
➄
. Unlock
the table and move the table front to back against the stops to
double-check the tenon sighting.
4
5
5-17 Move the table to the rear against the stop and lock
➀
. Do
not rout yet. While with practise it is fairly easy to avoid routing
into the front tenon
➁
while routing the rear, we recommend that
beginners use a simple shop-made “guard”
➂
to prevent this. Use
1
⁄4"[6mm] thick MDF or plywood. Allow a
3
⁄16"[5mm] gap
➃
between the side of the guide and guard. Rout the rear tenon
➄
.
2
5
1
3
4
5-18 Move the table forward and lock
➀
. Lift the left end of the router
and move the “tenon guard” to the rear
➁
. Rout the front tenon
➂
.
Repeat as required for all tenon ends, moving the table and guard piece
only once for each pair. Leave the table forward. Note: By using two
or three left-right table positions, (in addition to the front-back posi-
tions), the workpiece width and tenon width may be increased to the
maximum (see Chapter 6, Longer and Shorter Joints).
3
1
2
5-19 Mortises Extend the sight. Position and clamp the mortise
piece so the left end front mortise is centered under the sight
➀
.
Either mark the right hand outrigger or set a stop block for suc-
cessive mortise pieces
➁
. Rout the front mortise.
1
2
5-14 Approximately center the table left to right and lock
➀
.
Extend the sight. Clamp the tenon piece against the sidestop
fence, the tenon piece lightly touching the underside of the sight.
11
5-15 Unlock the table, sight the rear tenon center and lock the
table
➀
. Set and lock both
limit stops against their stop
post
➁
. Set and lock the front
limit stop against its stop
post
➂
.
1
2
3