Frame Mortise & Tenon Jig User Guide
36
Chapter 5
MULTIPLE JOINTS
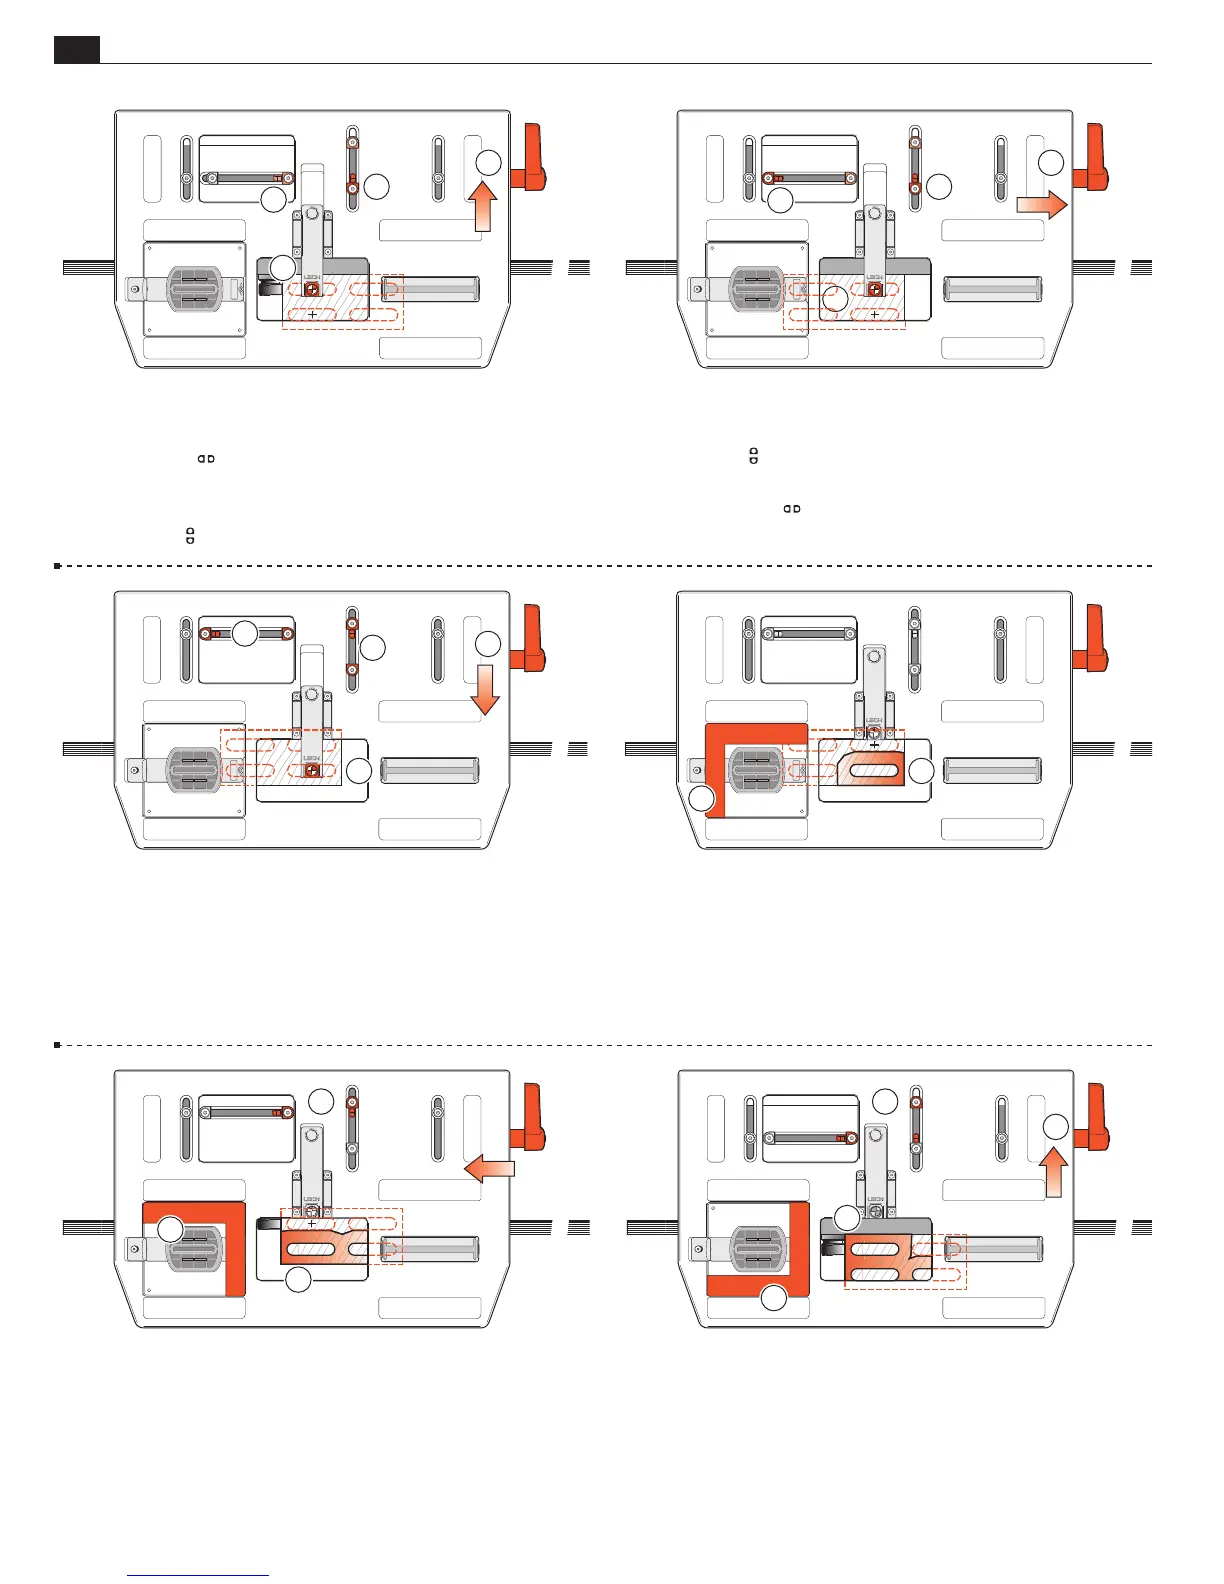
5-28 All four stops are now set
➀
and provided you have sym-
metrically marked out the joint, moving the table to the front
right-hand tenon, the sight should automatically align with that
mark
➁
. If it does not, do not change anything. Just check the
other three positions; the actual joint will be symmetrical.
1
1
2
2
5-29 With practice, it is fairly easy to avoid routing into an adjoin-
ing tenon; however, we do recommend that beginners use a simple
“L”-shaped shop made guard to prevent this
➀
. Use
1
⁄4"[6mm]
MDF or plywood and allow a
3
⁄16"[5mm] gap between the guide
and guard. Rout the front right tenon
➁
.
2
1
5-30 Move the table to the front left against the stops and lock
➀
.
With the “guard” at the rear-right
➁
, rout the front-left tenon
➂
.
1
2
3
5-31 Move the table to the rear left, and lock
➀
. Move the “guard”
to the front-right
➁
. Rout the rear-left tenon
➂
.
1
1
2
3
5-26
Release and move the table to sight the rear left-hand
tenon
➀
.
Note: Ensure the
post is still touching the right-hand limit
stop
➁
.
Lock the table.
Move the front
stop to its post and lock
➂
.
2
1
3
1
5-27 Unlock the table and move to the rear right-hand tenon
and sight
➀
.
Note: ensure the
post is still touching the front limit stop
➁
.
Lock the table.
Move the left-hand
stop to its post and lock
➂
.
3
1
2
1