English
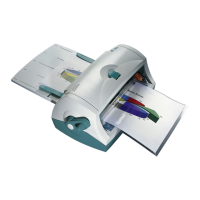
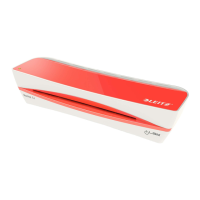
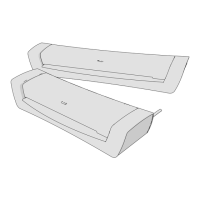
A Lamination cartridge
B Tray
C Insert channel
D Handle
E Output channel
F Removable cutting tray
Safety instructions and
preconditions for use
This unit has been designed for laminating paper or similar
materials with a maximum thickness of 1mm (including
lamination lm). Use it for this purpose only and as
described in these operating instructions.
● Before rst use: Remove the cutter transport protection
at the rear of the unit.
● If children and juveniles are using the unit: Removal of
faults (e.g. lm jam) is only allowed by adults or under
adults’ supervision. The same applies to servicing
(changing cartridge or cutter).
● Protect the environment: Hand in used lm and
cartridges for recycling.
● Only use original LEITZ accessories.
● Keep the operating instructions with the unit at all times.
Helpul hints
● Laminate small items side by side to take full advantage
of the lamination lm’s width.
● When the end-of-roll-marker appears, approximately
45cm of lm is left. You can remove the marker easily by
peeling it off.
● You can also trim your laminated document right to
the edge without the lm coming off. However, such a
document is no longer protected safely against uid. To
ensure protection against humidity a lm border of 1 cm
minimum is recommended.
With a few simple steps you’ll enhance documents like
business cards, photos, certicates, presentations, name
signs and much more:
1. Preparing the laminator
● Place the laminator on a stable, at surface (e.g.
table).
● Fit the tray by gently pushing in both sides until they
click into place.
● Ensure there is enough space behind the unit for the
laminated material.
2. Inserting the document
● Adjust the guides to your document’s width. Be
careful not to buckle the document.
● Insert the document into the laminator as far as it will
go.
3. Laminating
Important: Lamination is permanent. Before laminating
individual pieces, test the process with a similar item.
● Slowly turn the handle clockwise until the document
is caught and completely put out at the rear side.
4. Cutting the laminated document
● To cut the laminated document, press down the cutter
and slide it from one side to the other.
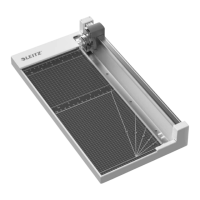
5. Trimming the laminated document
● You may lift and take out the cutting tray to
comfortably trim the laminated document.
A. Replacing the lamination cartridge
● Open the lid.
● Take out the used cartridge and replace it with a new
one.
● Close the lid.
● Turn the handle clockwise until a piece of the lm is
put out at the rear.
B. Replacing the cutter
Lift and take out the cutting tray.
Remove the screw in the cutter bar with a suitable tool
and take out the plastic insert.
Remove the used cutter and replace it with a new one
(blade showing inwards and downwards).
Replace the plastic insert and x it with the screw.
Specications
Lamination system Cold lamination by
lm rollers in cartridge
Working mode manual
Feed through speed variable
Maximum working width 215mm
Max. thickness of laminated item 1mm
Cutting system manual, removable
Net weight 3.53kg
Dimensions (W x H x D) 355 x 247 x 203mm
Subject to technical changes without prior notice.
4