MANUAL LEKKER BIKES / Lekker X 15
CHAPTER 5
Turning on your Lekker X
and charging
16. You are now ready to ride your Lekker X!!! Please
remember to regularly check your pedals and all bolts
are correctly tightened, and to service your bike regularly
so you can enjoy it for many years to come!
The Class Of
MANUAL LEKKER BIKES / Lekker X
CHAPTER 5
Turning on your Lekker X
and charging
We know you are excited to try your Lekker X for the first time! You‘re
nearly there, just a few more steps before it’s ready to go!
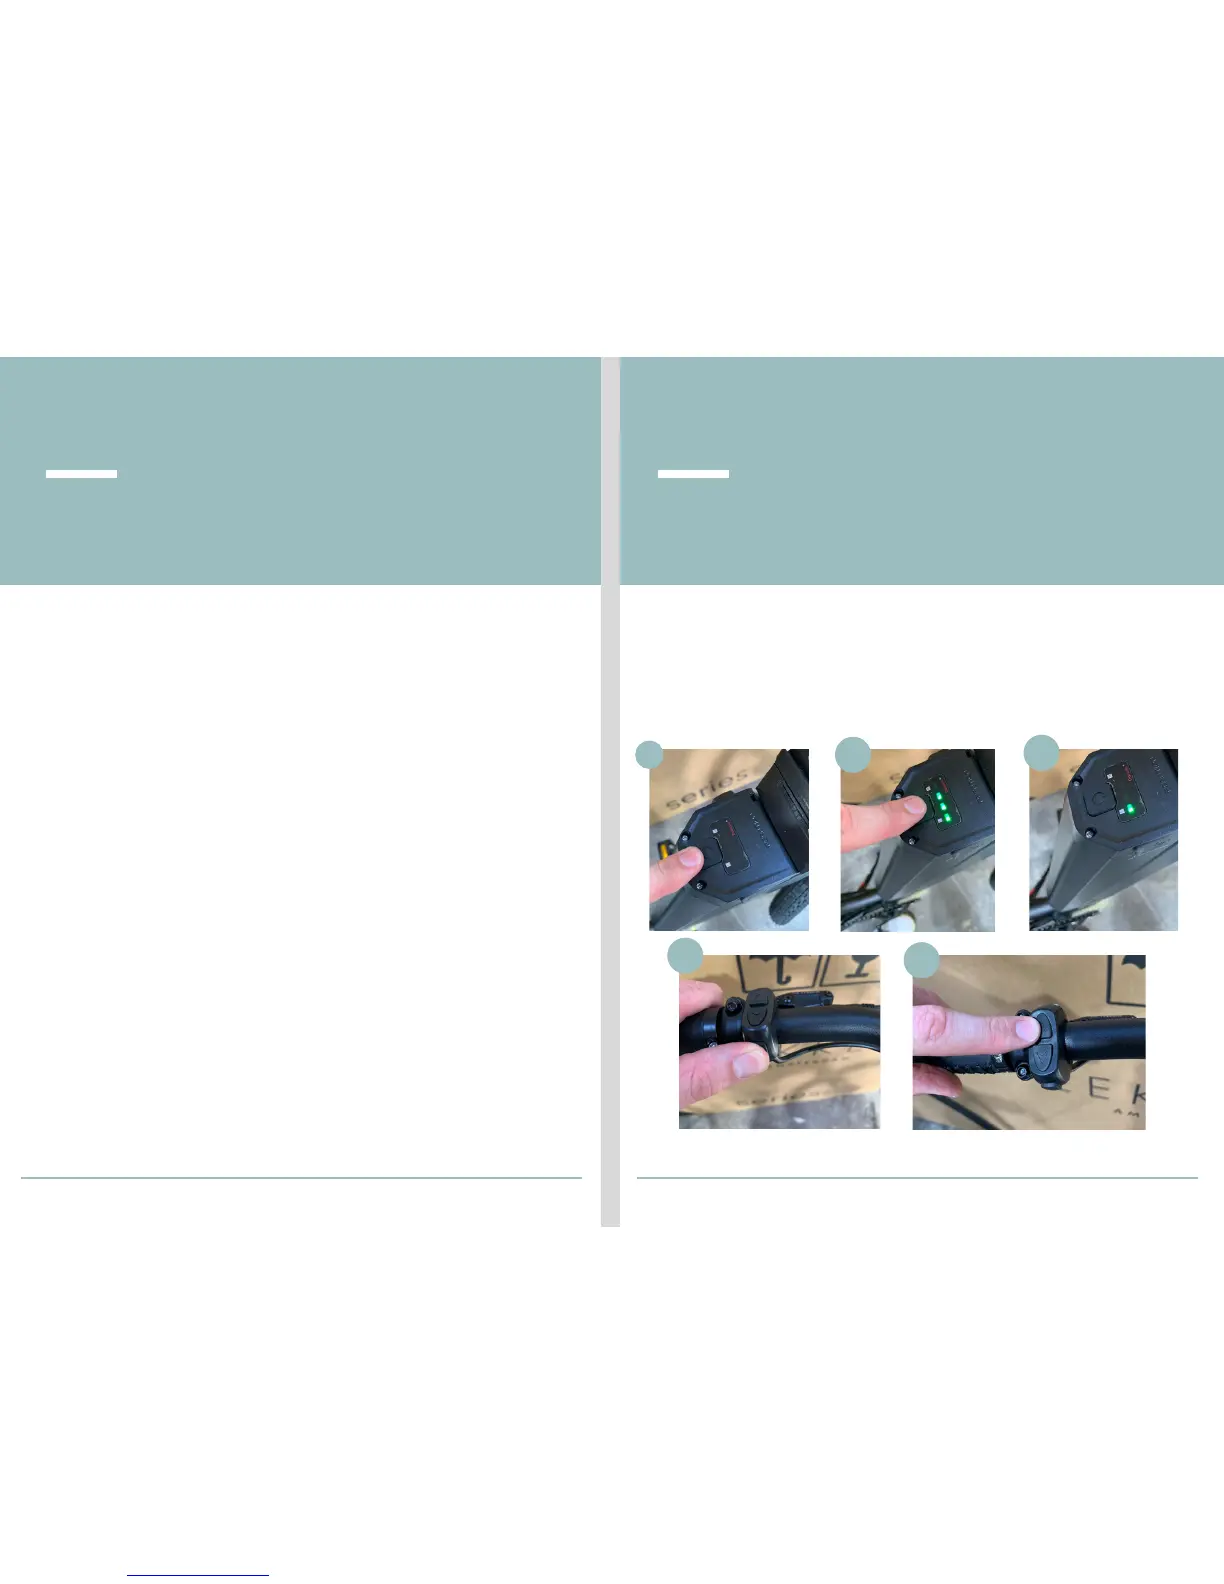
14. Before turning on your Lekker X, we recommend doing this whilst
sitting on the bike, this allows full control over the bike and can avoid
accidents. To turn your Lekker X on, firstly press the “power” button
located at the top of your battery, the 4 LED lights should switch on to
show the current charge, and will revert back to only one LED light for
the remainder of the ride. Using the control module found on the left
hand side of your bar, press the “menu” button for a few seconds to
turn on your screen, once turned on, you can then cycle through the
assist modes using the arrow buttons on the control module. For more
in-depth instructions for your screen, please refer to the
manufacturer's manual, found in PDF format online. PLEASE NOTE:
when turning on your screen, please ensure the brake levers are free
and not engaged, as this will show an error code on the screen. We
also recommend always using assist level 1 for starting, as this will
allow better control of the bike.
15. All batteries will come with some charge, to get the most out of
your battery, you may need to charge it before your first ride. We
recommend that for the first three charges, to charge it for 12hr cycles,
PLEASE NOTE: this will allow the battery to have full charge capacity.
16
14
14.1
14.2
14.3
14.4