Installation of Upper and Lower
Mounting Brackets & Actuators
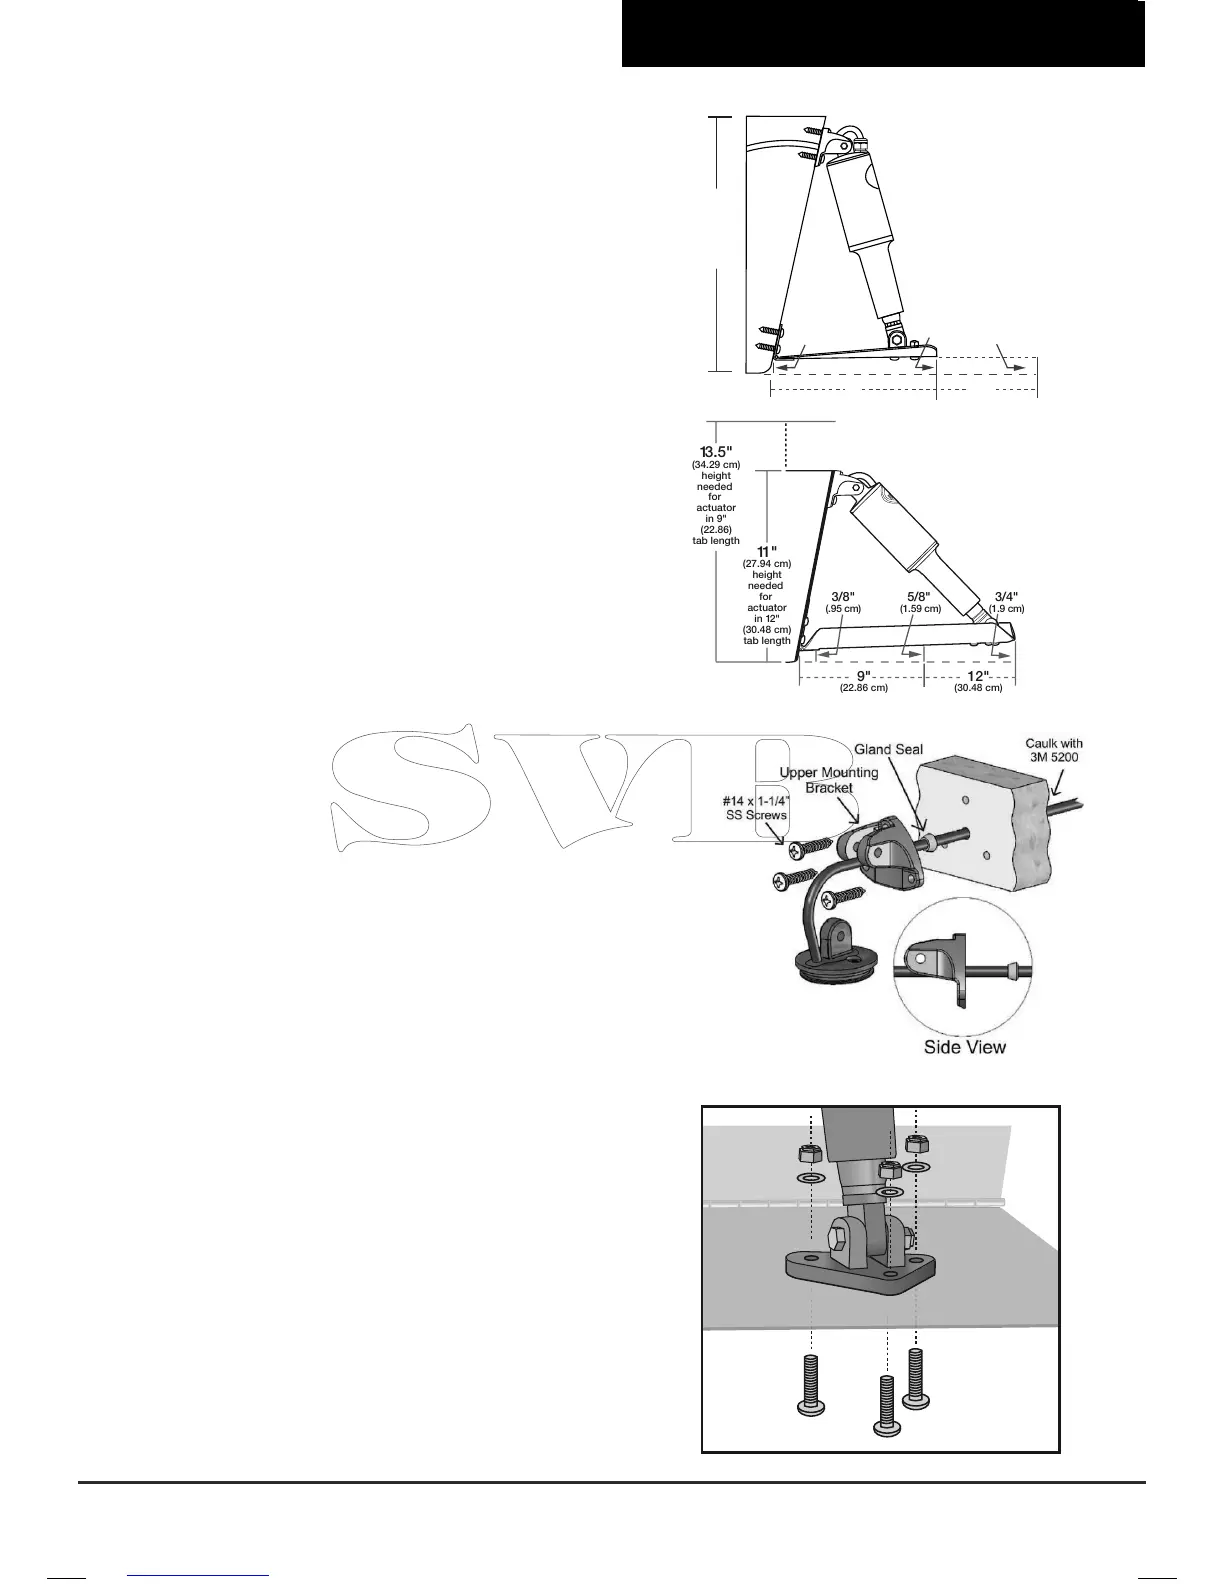
1. Loosely attach the upper mounting bracket
(bracket with four holes) to the top of the actuator
using the 5/16-18" X 1-3/4" (4.45 cm) large hex
head bolt and 5/16-18 hex nut provided. Attach
the actuator to the lower mounting bracket using
the 5/16-18" X 1-3/4" (4.45 cm) large hex head
bolt and 5/16-18" hex (.79 cm) nut provided.
Attach the lower mounting bracket to the tab with
the bolts, washers, and nylon lock nuts provided
(Kit# 4 - Part# 10000-001) (see Fig. 4).
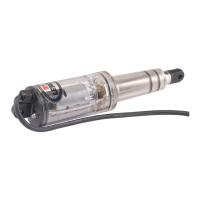
2. In order to properly position the upper mounting
bracket against the transom, you must lift the
trim tab so that the trailing edge is approximately,
5/8" (1.59 cm) for a 9" trim tab and 3/4" (1.9 cm)
for a 12" trim tab, above the straight edge when
held to the hull (see Fig. 2.1 & 2.2). When the trim
tab is at the appropriate level and the actuators
are fully retracted, transfer (trace) the outer shape
of the upper mounting bracket onto the transom.
The upper mounting bracket should be marked
where it lays naturally against the transom to
prevent binding during functioning of trim tabs.
Note: Do not adjust the upper mounting bracket
to the right or left, as this will cause binding.
Allow the bracket to come to rest at its natural
position.
Remove the upper mounting bracket from the
actuator and align to the previously marked
location to mark the upper mounting bracket
screw hole locations and cable hole location.
Using the 3/16" (.48 cm) drill bit, drill the three
previously marked screw hole locations to a
depth of 1-1/4" (3.18 cm).
Warning: With some installations, fuel, water
tanks and/or other systems may prevent the
actuator cable from entering the hull through
the upper mounting bracket. Be sure to check
inside the hull before drilling the 3/8" (.95 cm)
cable hole.
Note: When drilling out the screw hole pattern
for the upper mounting bracket, you may drill
through the transom. The screws should be
installed with 3M 5200 adhesive caulking which
will seal the holes when installed.
All supplied screws and fasteners are stainless
steel. Do not use any other type of alloy.
(Continued on page 7)
Trim Tab Installation Instructions
 Loading...