Trim Tab System Installation Instructions
Warning: The following instructions contain important safety information and should
be followed carefully. Failure to do so may result in injury and will void warranty.
Please read through the instructions in their entirety prior to beginning installation!
Trim Tab Installation Instructions
• Electric drill
• Tape measure
• 3/16" & 3/8" drill bits (.48 & .95 cm)
• 7/16" (1.11 cm) wrench
• 1/2" or 9/16" wrench socket
• Straight edge
• 4' level
• 2" (5.08 cm) hole saw
• #2 & #3 Phillips screwdrivers
• 3M 5200 adhesive caulking
• Wire crimper / cutter
Fig. 1
TOOLS AND MATERIALS LIST
Installation of Trim Tab Blades
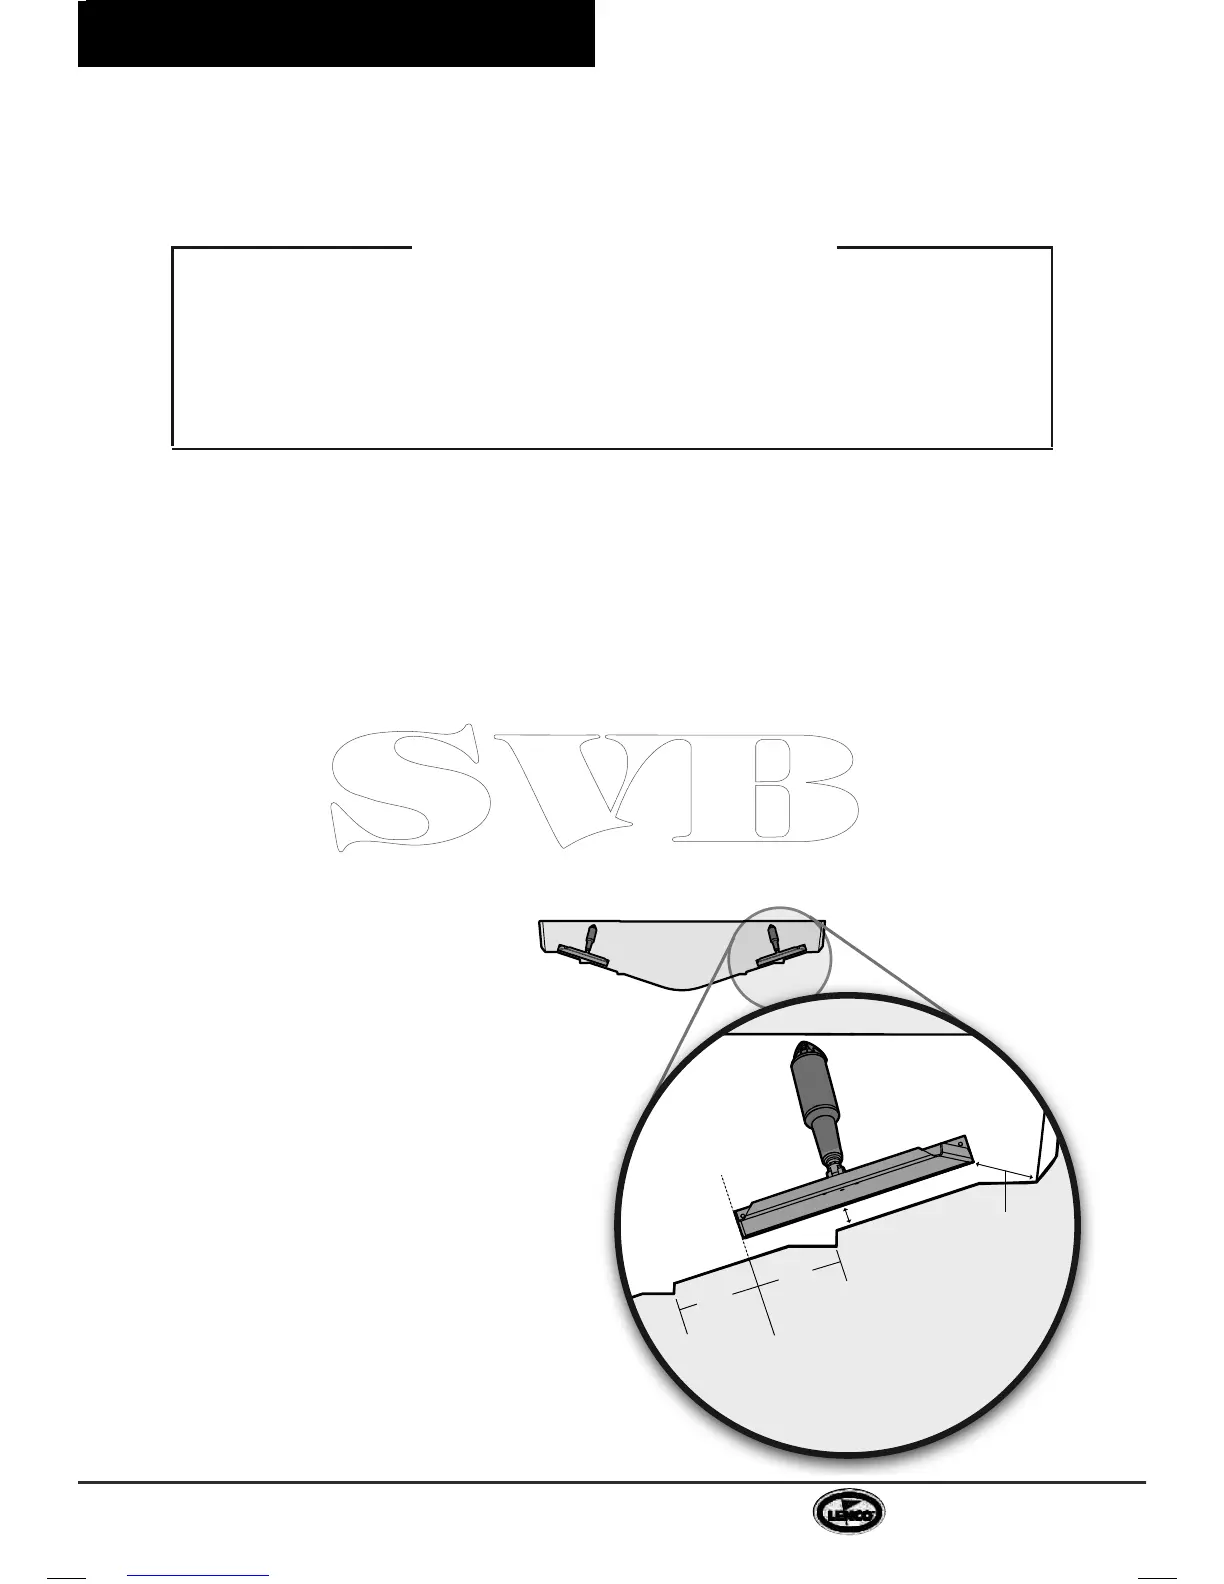
1. To begin, determine where the Lenco Trim
Tab Kit will be installed. Note: When laying
out the desired tab location, hold the tab
against the transom with the bottom of
the hinge knuckle 3/8" (.95 cm) up from
the bottom of the transom, approximately
1" to 4" (2.54 to 10.16 cm) in from the
chine, and parallel with the hull.
Note: The reason the hinge knuckle
is mounted 3/8" (.95 cm) from the
bottom of the transom is to allow water
to continue to travel freely along the
bottom of the boat past the transom
edge. Tabs are also mounted in this
manner for protection while on a boat
trailer or when being dry-stored.
When mounting the hinge to
the hull make sure that the inside
corner of the hinge knuckle is no
closer than 2" (5.08 cm) to the left or
right of any strake edge. The hinge
may overlap a strake edge as long as
the corner of the hinge knuckle is no
closer than 2" (5.08 cm) to the left or
right of the strake edge (see Fig.1).
Transfer (trace) the hinge screw hole
pattern onto the transom for drilling.
Note: All Performance Series tabs
with single-tapered blades should be
mounted with the tapered end facing
toward the center of the boat.
2. Using the 3/16" (.48 cm) drill bit, drill
the previously marked hole locations to
a depth of 1-1/4" (3.18 cm).
Note: When drilling out the screw
hole pattern for the trim tab hinge you
may drill through the transom. Hinge
screws should be installed with 3M 5200
adhesive caulking which will seal the
holes. All supplied screws and fasteners
are stainless steel. Do not use any other
type of alloy.
Mount the trim tab hinge to the transom
using provided #14 x 1-1/4" (3.18 cm)
stainless steel sheet metal screws. We
recommend using 3M 5200 adhesive
caulking to bed the hinge and screws.
DO NOT OVERTIGHTEN.
 Loading...