Page 15
7. Make sure outdoor unit has been put in place according
to the Installation Instructions and is connected to the
refrigerant lines.
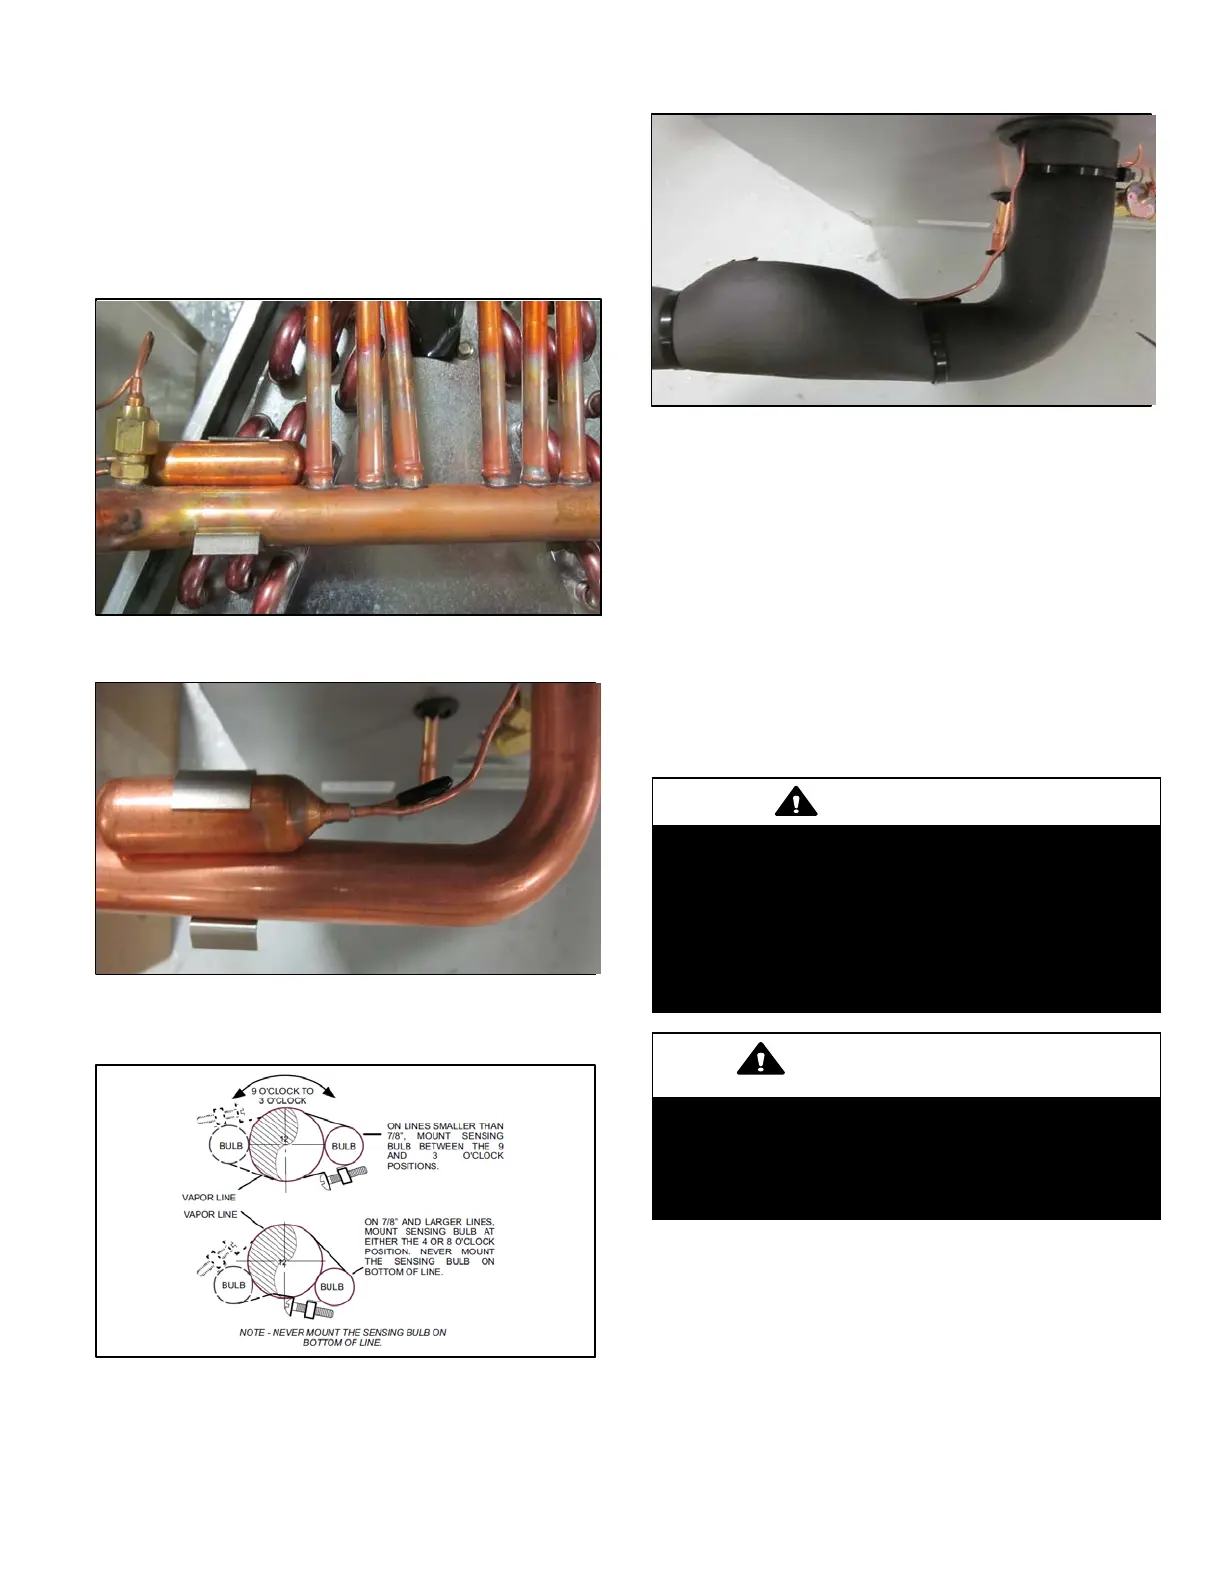
RELOCATING TXV BULB
Relocation of the TXV bulb to the exterior of the unit cabinet
is highly recommended. Use the following procedure to
perform this task.
1. Remove unit access panel.
2. Locate factory installed TXV bulb.
Figure 25. Factory Installed Location
3. Relocate TXV bulb to external suction line.
Figure 26. External Suction Line
4. Mount and fasten TXV bulb on suction line as indicated
below.
Figure 27. Sloping the Drain
5. Apply insulation over the suction line and TXV bulb and
secure with tape or cable ties..
Figure 28. Insulation
Note: Route copper away from sharp edges and make
sure that copper refrigerant tubing does not touch other
metal surfaces (end plates, brazed connections, etc.)
where damage may be caused by vibration, or by
movement of metal against metal.
SEALING THE UNIT
Seal the unit so that warm air is not allowed into the cabinet.
Warm air introduces moisture, which results in water
blow-off problems. This is especially important when the
unit is installed in an unconditioned area.
If installed in an unconditioned space, sealant should be
applied around the electrical wires, refrigerant tubing, and
condensate lines where they enter the cabinet.
WARNING
There must be an airtight seal between the bottom of the
air handler and the return air plenum. Use fiberglass
sealing strips, caulking, or equivalent sealing method
between the plenum and the air handler cabinet to ensure
a tight seal. Return air must not be drawn from a room
where this air handler or any gas-fueled appliance (i.e.,
water heater), or carbon monoxide-producing device
(i.e., wood fireplace) is installed.
IMPORTANT
When sealing the cabinet, be sure to seal closed any
space around the holes where the drain lines exit the cab
inet using duct tape and/or Permagum. Warm air must not
be allowed to enter through any gaps or holes in the cabi
net.
Make sure the liquid line and suction line entry points are
sealed with either ARMAFLEX material or with Permagum.
Permagum may also be used to seal around the main and
auxiliary drains and around open areas of electrical inlets.
 Loading...