EasyManua.ls Logo

Lennox Elite XP20-024-230 User Manual

Lennox Elite XP20-024-230
18 pages
To Next Page IconTo Next Page
Page #1 background imageLoading...
Page #1 background image
Page 1
E2018 Lennox Industries Inc.
Dallas, Texas, USA
RETAIN THESE INSTRUCTIONS
FOR FUTURE REFERENCE
General
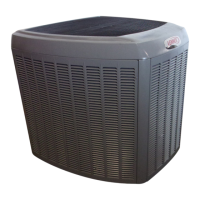
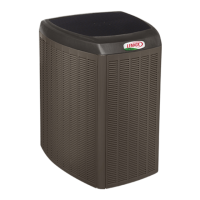
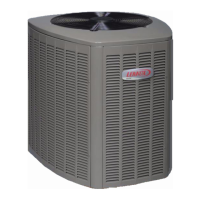
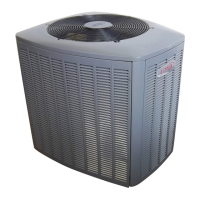
This XP20 outdoor heat pump is designed for use with
HFC-410A refrigerant only. This unit must be installed with
an approved indoor air handler or coil. See the Lennox
XP20 Product Specifications bulletin (EHB) for approved
indoor component match-ups.
These instructions are intended as a general guide and do
not supersede local codes in any way. Consult authorities
having jurisdiction before installation.
THIS UNIT IS A INTEGRAL COMPONENT OF A SYSTEM THAT
WILL REQUIRE AN iComfort Wi-Fi
®
THERMOSTAT AND
iComfort
®
-enabled AIR HANDLER OR FURNACE.
XP20
iComfort Wi-Fi
®
thermostat
IMPORTANT: BEFORE APPLYING ANY POWER (MAIN OR LOW
VOLTAGE) TO THE OUTDOOR UNIT, THE FIELD MUST CONFIRM
iComfort Wi-Fi
®
THERMOSTAT HAS VERSION 2.1 OR HIGHER
SOFTWARE. (REFER TO iComfort Wi-Fi
®
THERMOSTAT
MANUAL.)
iComfort
®
-enabled
air handler or
furnace
INSTALLATION
INSTRUCTIONS
Elite
®
Series XP20 Units
HEAT PUMP
507508-01
7/2018
PACKING LIST
OUTDOOR UNIT
WARRANTY
CERTIFICATE
RAST 6-PIN
CONNECTOR (1)
NOTICE !
For more in-depth information, consult the Installa
tion and Service Procedures manual, available as
Corp. 1408-L10 on DaveNet or through the Technical
Support department at 800-453-6669.
WARNING
Improper installation, adjustment, alteration, ser
vice or maintenance can cause property damage,
personal injury or loss of life.
Installation and service must be performed by a li
censed professional installer (or equivalent) or ser
vice agency.
STEP 1 -- SETTING THE UNIT -- Clearances
ÍÍÍÍÍÍÍÍÍÍÍÍÍ
ÍÍÍÍÍÍÍÍÍÍÍÍÍ
ÍÍÍÍÍÍÍÍÍÍÍÍÍ
ÍÍÍÍÍÍÍÍÍÍÍÍÍ
ÍÍÍÍÍÍÍÍÍÍÍÍÍ
ÍÍÍÍÍÍÍÍÍÍÍÍÍ
ÍÍÍÍÍÍÍÍÍÍÍÍÍ
ÍÍÍÍÍÍÍÍÍÍÍÍÍ
ÍÍÍÍÍÍÍÍÍÍÍÍÍ
ÍÍÍÍÍÍÍÍÍÍÍÍÍ
ÍÍÍÍÍÍÍÍÍÍÍÍÍ
ÍÍÍÍÍÍÍÍÍÍÍÍÍ
See
NOTES
See NOTES
NOTES:
Service clearance of 30 in. must be maintained on one of the sides
adjacent to the control box.
Clearance to one of the other three sides must be 36 in.
Clearance to one of the remaining two sides may be 12 in. and the
final side may be 6 in.
A clearance of 24 in. must be maintained between two units.
48 in. clearance required on top of unit.
See
NOTES
See
NOTES
Control
Box
NOTICE: Specific applications may require adjustment of the listed installation clearances to provide protection for
the unit from physical damage or to avoid conditions which limit operating efficiency. (Example: Clearances may
have to be increased to prevent snow or ice from falling on the top of the unit. Additional clearances may also be
required to prevent air recirculation when the unit is installed under a deck or in another tight space.)
FIGURE 1
Question and Answer IconNeed help?

Do you have a question about the Lennox Elite XP20-024-230 and is the answer not in the manual?

Lennox Elite XP20-024-230 Specifications

General IconGeneral
BrandLennox
ModelElite XP20-024-230
CategoryHeat Pump
LanguageEnglish

Summary

Setting the Unit - Clearances

Clearance Requirements

Specifies minimum clearances around the outdoor unit for airflow, service, and safety.

Refrigerant Piping - Flushing and System Design

Flushing Existing Lines and Coils

Guides the process of flushing existing refrigerant lines and indoor coils to remove contaminants.

Refrigerant Handling and Safety

Covers critical safety warnings and procedures for handling refrigerants.

Piping Sizing Guidelines

Provides essential guidelines for refrigerant piping sizing based on length and lift.

Refrigerant Piping - Line Set Sizing Tables

Standard Line Set Sizes (Up to 50 ft)

Lists recommended line set sizes for systems up to 50 linear feet.

Line Set Guidelines (51 to 150 ft)

Provides guidelines for line set sizing for systems between 51 and 150 linear feet.

Liquid Line Diameter Selection

Offers a table to select the correct liquid line diameter based on total length and elevation.

Refrigerant Piping - Metering Device Removal and Flushing

Existing Metering Device Removal

Details procedures for removing fixed orifice and expansion valve metering devices.

Line Set and Coil Flushing Procedure

Describes the step-by-step process for flushing the line set and indoor coil.

Refrigerant Piping - Brazing Procedures

Line Preparation for Brazing

Covers cutting, deburring refrigerant lines and preparing service valves.

Brazing Safety and Nitrogen Flow

Explains safety precautions, nitrogen flow, and proper brazing techniques.

Refrigerant Piping - Brazing Process Details

Protecting Service Valves During Brazing

Details wrapping service valves with water-saturated cloths during brazing.

Brazing and Cooling the Joint

Guides the brazing process and emphasizes cooling the joint to protect valve seals.

Indoor Expansion Valve Installation

Expansion Valve Installation Steps

Provides step-by-step instructions for installing the expansion valve into the indoor unit.

Leak Test and Evacuation - Initial Steps

Leak Test and Evacuation - Evacuation Process

Electrical - Circuit and Wire Routing

Electrical - Control Board Details

Wiring - Control and High Voltage Routing

Heat Pump Control Features

Maintenance - Outdoor Unit Checks

Maintenance - Indoor Unit Checks

System Performance Testing

Start-Up and Performance Checklist

Related product manuals