Page 10
505366M 01/08
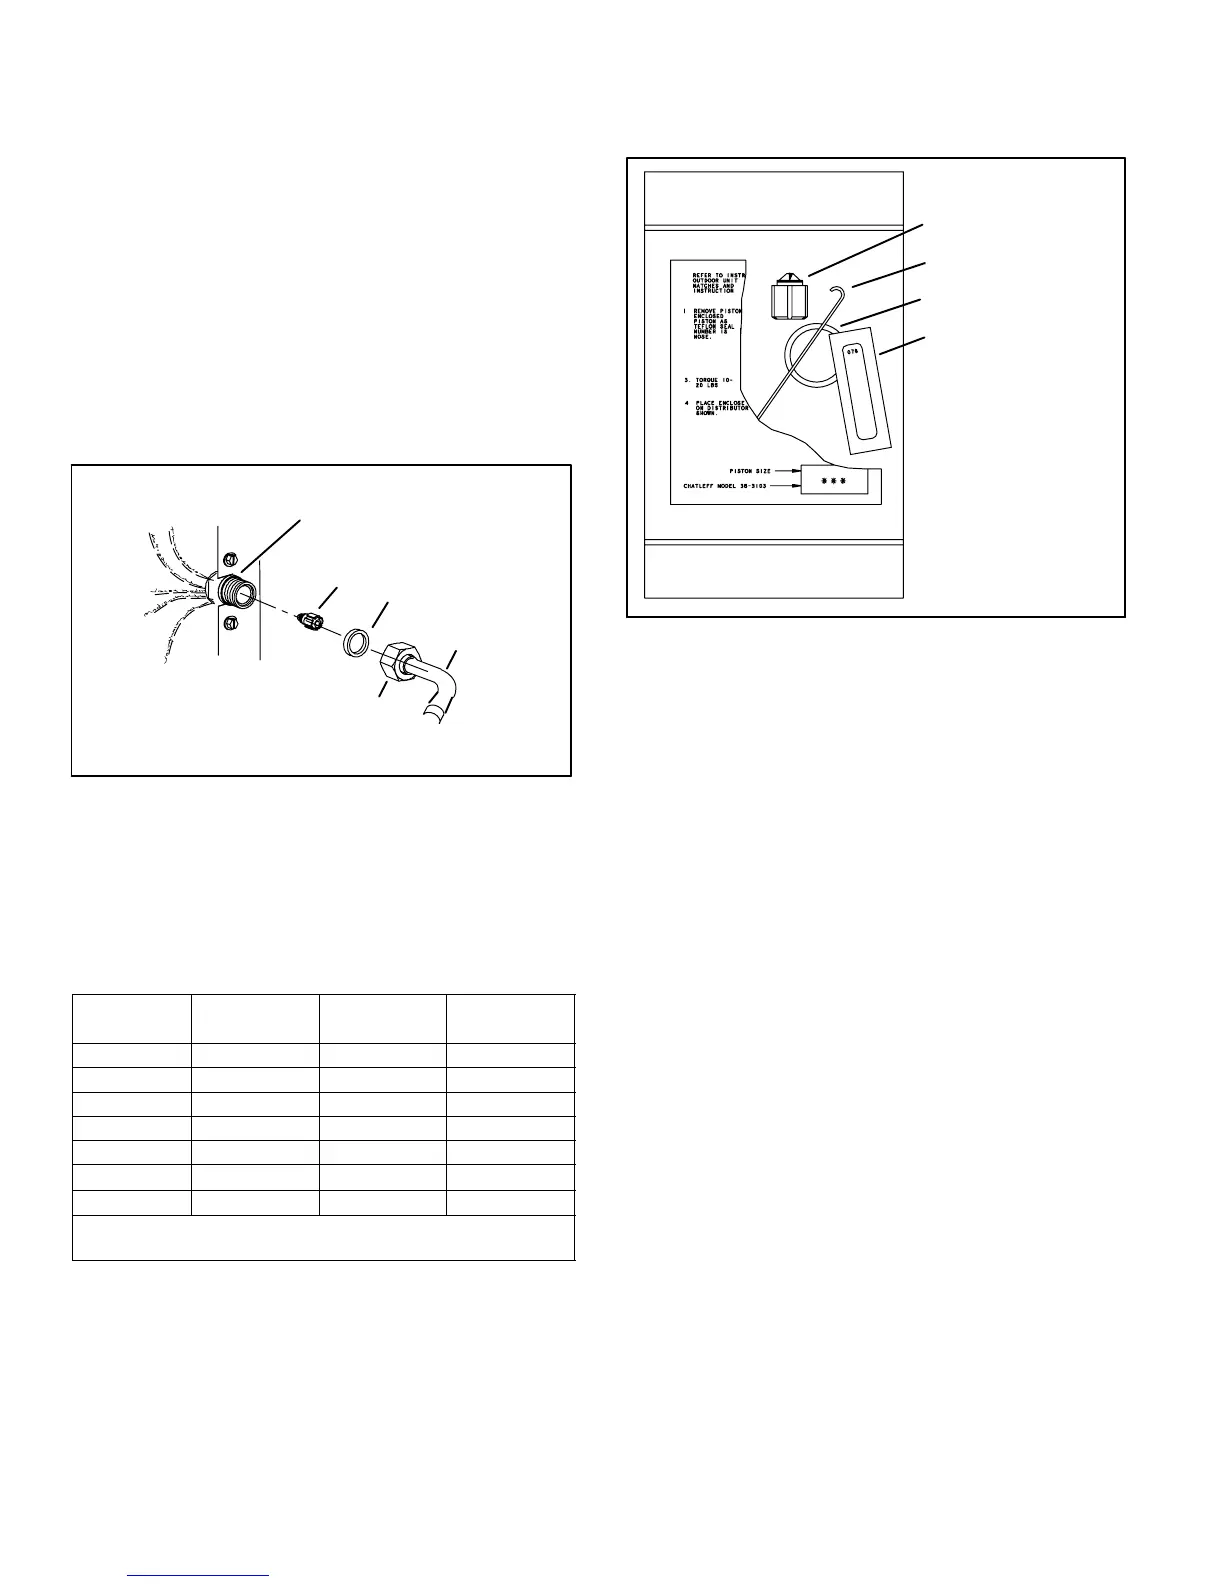
TYPICAL FIXED ORIFICE INSTALLATION
PROCEDURE
1. Installed the provided RFC orifice that was supplied
with the outdoor unit as illustrated in figure 18.
2. Ensure that the fixed orifice supplied with the outdoor
unit is installed with the nylon seat pointing toward the
liquid line orifice housing.
3. Apply a small amount of refrigerant oil on the Teflon
ring and insert securely into the liquid line orifice
housing.
4. Attach the liquid line assembly to the liquid line orifice
housing. Finger tighten and use an appropriately sized
wrench to turn an additional 1/2 turn clockwise as
illustrated in figure 17, or 20 ft−lb.
5. Place the supplied fixed orifice sticker on the indoor
cabinet after installation.
TEFLON
WASHER
LIQUID
LINE
FIXED
ORIFICE
(Uncased Coil Shown)
LIQUID LINE ASSEMBLY
WITH BRASS NUT
LIQUID LINE ORIFICE HOUSING
Figure 18. Typical Fixed Orifice Installation
See the 13ACD Engineering Handbook for approved TXV
indoor/outdoor unit match−ups and application
information. Table 4 lists both the Lennox catalog and part
numbers for the TXV kit required for each unit model.
Figure 19 illustrates the kit components and quantities.
Table 3. Indoor Fixed Orifice Kits
Model
Catalog
Number
Part Number Drill Size
018 10W95 100484−07 0.055
024 98M12 100484−12 0.062
030 11W00 100484−16 0.067
036 98M78 100484−24 0.076
042 10W86 100484−28 0.080
048 98M14 100484−36 0.089
060 98M15 100484−45 0.099
Use the Lennox catalog number to order a new or replacement fixed
orifice kit.
The kit includes:
1 Fixed orifice
1 Fixed orifice extractor
1 Teflon ring
1 Fixed orifice sticker
FIXED ORIFICE (1)
FIXED ORIFICE
EXTRACTOR (1)
TEFLON RING (1)
FIXED ORIFICE STICKER (1)
Figure 19. Fixed Orifice Kit Components
TYPICAL TXV INSTALLATION PROCEDURE
The TXV unit can be installed internal or external to the
indoor coil. In applications where an uncased coil is being
installed in a field−provided plenum, install the TXV in a
manner that will provide access for field servicing of the
TXV. Refer to Figure 20 for reference during installation of
TXV unit.
1. Install one of the provided Teflon rings around the
stubbed end of the TXV and lightly lubricate the
connector threads and expose surface of the Teflon
ring with refrigerant oil.
2. Attach the stubbed end of the kit valve to the liquid line
orifice housing. Finger tighten and use an appropriately
sized wrench to turn an additional 1/2 turn clockwise
as illustrated in figure 17, or 20 ft−lb.
3. Place the remaining Teflon washer around the other
end of the TXV. Lightly lubricate connector threads
and expose surface of the Teflon ring with refrigerant
oil.
4. Attach the liquid line assembly to the TXV. Finger
tighten and use an appropriately sized wrench to turn
an additional 1/2 turn clockwise as illustrated in figure
17, or 20 ft−lb.
5. Attach the suction line sensing bulb in the proper
orientation as illustrated in figure 21 using the clamp
an screws provided.
NOTE − Insulating the sensing bulb once installed may be
required when the bulb location is external to the coil
casing.

 Loading...