Page 10
SERVICE Menu Interface SERVICE
From the DISPLAY mode, press and then use to
scroll to SERVICE. Next, press
to enter the SERVICE
menu. Use until desired item is displayed.
Use arrows
to move
TEST
OFFLINE
IN/OUTPUTS
REPLACE
REPORT
SERVICE
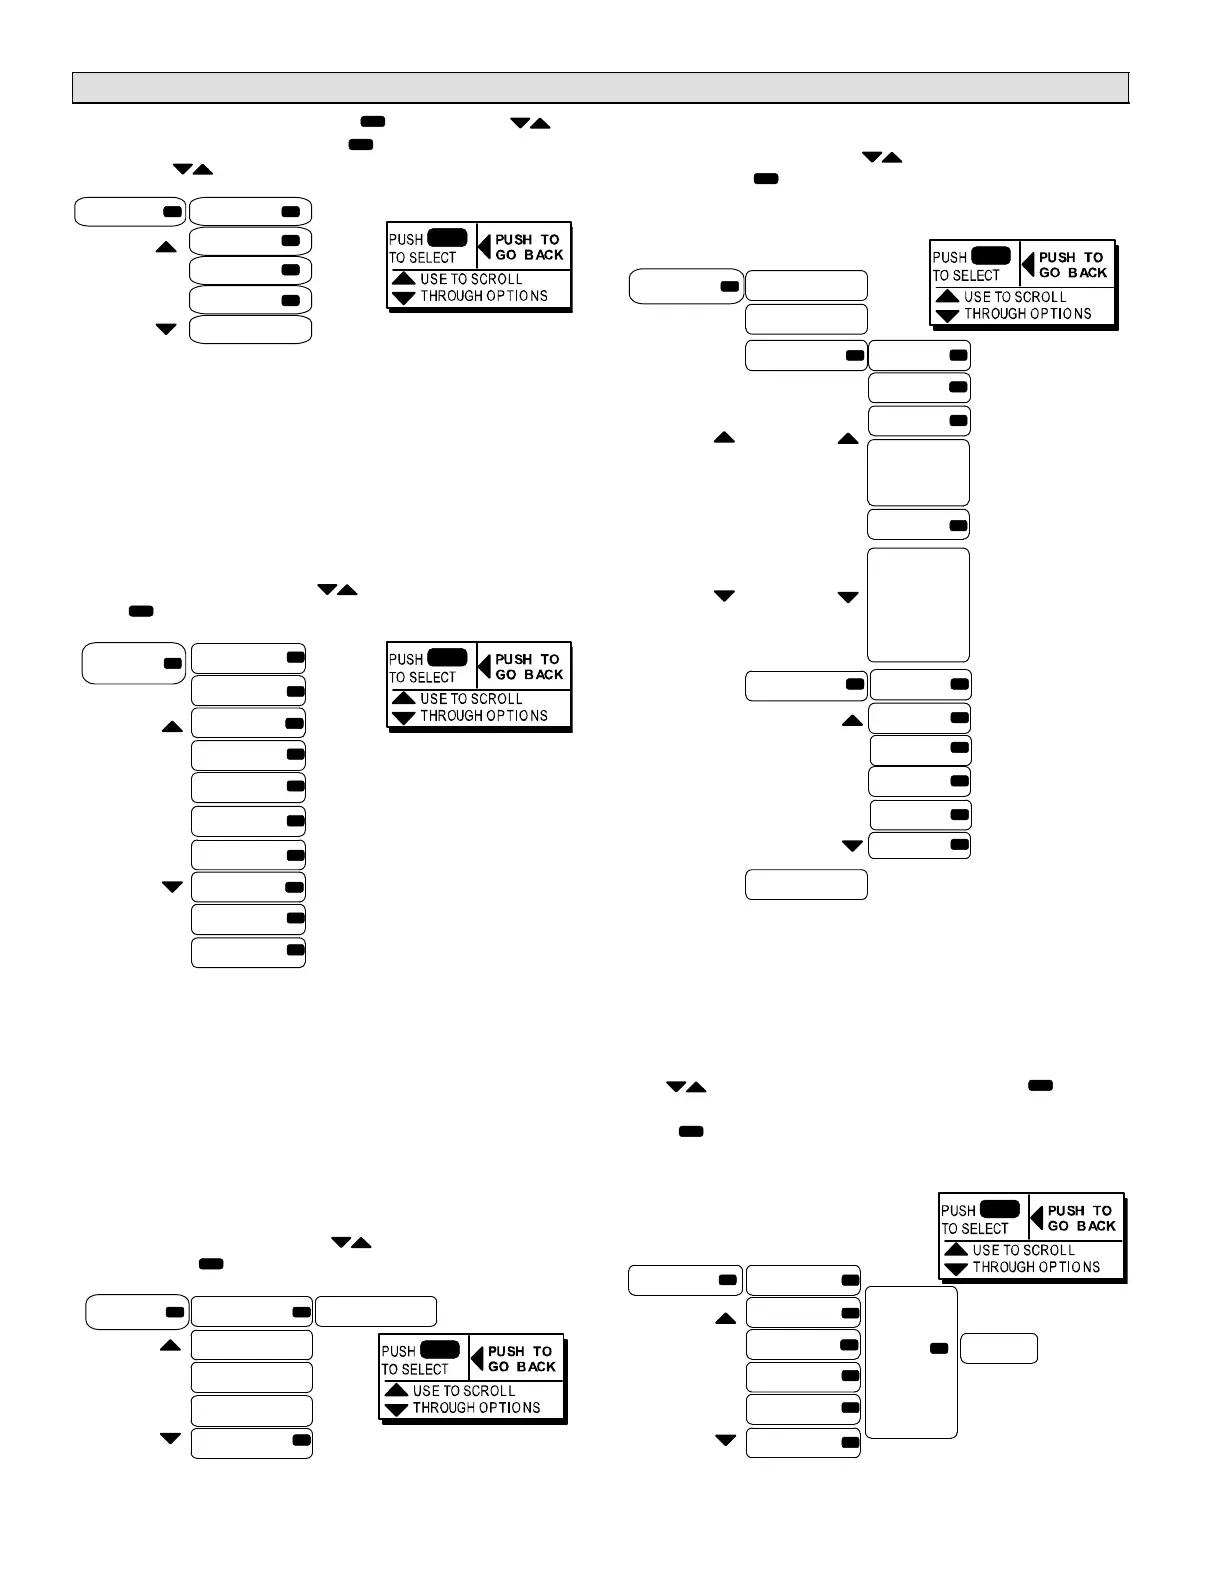
Using SERVICE, you may run tests that check a functional
operation (e.g. HEATING) or you may run tests that single
out a system component for checking. The diagram that
follow in this section show how to navigate through the sys-
tem to access service and test functions.
When the list of tests appears, use the up/down arrows un-
til the test you want to run appears. Then press the SE-
LECT BUTTON to begin running the test.
SERVICE > TEST
In the SERVICE menu, use until TEST is displayed.
Press to enter the TEST menu.
GUIDED
BLOWER
FANS
COOL
HEAT
DAMPER
REHEAT
SENSORS
OUTPUTS
CONTROLLER
See table 4
(Page 11]) for details
of TEST menu.
TEST
Use arrows to move
Using the TEST menu, the service technician may run a
sequence of tests to gather information available while that
component is turned on. The unit will return to normal
mode when leaving the TEST menu. See table 4 for de-
tails.
Any Status/Alarm codes found during testing will be logged
to the event history.
Upon exit from TEST mode, the unit will return to normal
operation if no key is pushed for 1 hour.
SERVICE > OFFLINE
In the SERVICE menu, use until OFFLINE is dis-
played. Press to enter the OFFLINE menu.
LOCKOUT UNIT LOCKED OUT
BLOWER ONLY
COOLING ONLY
HEATING ONLY
RESET M2 RESET
OFFLINE
Use arrows
to move
SERVICE > IN / OUTPUTS
In the SERVICE menu, use until IN / OUTPUTS is dis-
played. Press to enter the IN / OUTPUTS menu.
THERMOSTAT
ZONING
ON/OFF INPUT
SENSORS TSTAT FROM G, W1, W2,
Y1, Y2, OCP
BL SPEED RPM
(OPEN/CLOSED)
OAT:XXF
RAT:XXF (SENSED
DAT"XXF TEMPERATURES)
ZAT:XXF
IAQ (PPM) XXX
SMK:XXX ON/OFF
RH:XX% REL. HUM.
OE:XXMA (OUTDR. ENTH)
IE:XMA (INDR ENTH)
GLO:XXX ON OR OFF
DI2:XXX ON/OFF
DI3:XXX ON/OFF
DI4:XXX ON/OFF
RELAYS COMP C1−C4 ON/OFF
SVC RL RLY ON/OFF
HUMIDITROL RV1−RV2 ON/OFF
EXHAUST EX1−EX2 ON/OFF
BLOWER BL ON/OFF
FAN F1 − F6 ON/OFF
NETWORK
IN/OUT-
PUTS
Use arrows to move
Use arrows to move
Use arrows to move
BLOWER
SPEED
DAMPER
POS
SERVICE > REPLACE
In the SERVICE menu, use REPLACE to reset the runtime
counters for the listed device when a new hardware com-
ponent has been installed in the system.
Use until REPLACE is displayed. Press to enter
the REPLACE menu. Select one of the listed options and
press ;this will reset the runtime for the new part to zero.
FILTER
BE;T
UV LAMP
FANS
BLOWER
COMPRESSOR
REPLACE
Use arrows to move
TO RESET
XXXXX
RUNTIME
COUNTER
PRESS
WHERE
XXXXX IS
THE
SELECTED
ITEM
RESET
 Loading...