Page 57
2 - Verify that system total static pressure and airow
settings are within specic operating parameters.
3 - Clock gas meter to ensure that the unit is operating
at the specied ring rate for each stage of operation.
Check supply, manifold and signal pressures at
35, 70 and 100% capacity as outlined in the unit
Service Literature. If manifold pressure adjustment
is necessary, consult the Service Literature for unit
specic information on adjusting gas pressure.
Not all gas valves are adjustable. Verify correct
temperature rise.
NOTE - After any heavy snow, ice or frozen fog event the
furnace vent pipes may become restricted. Always check
the vent system and remove any snow or ice that may be
obstructing the plastic intake or exhaust pipes.
Winterizing and Condensate Trap Care
1 - Turn o power to the unit.
2 - Have a shallow pan ready to empty condensate
water.
3 - Remove the drain plug from the condensate trap
and empty water. Inspect the trap then reinstall the
drain plug and rell trap with water.
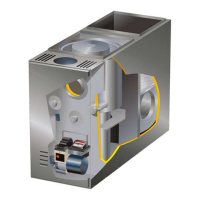
Cleaning the Burner Assembly
1 - Turn o electrical and gas power supplies to furnace.
Remove upper and lower furnace access panels.
2 - Disconnect the 2-pin plug from the gas valve.
3 - Remove the burner box cover.
4 - Disconnect the gas supply line from the gas valve.
Remove gas valve/manifold assembly.
5 - Mark and disconnect sensor wire from the sensor.
Disconnect wires from ame rollout switches.
6 - Remove four screws which secure burner box
assembly to vest panel. Remove burner box from
the unit.
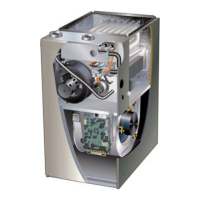
7 - Use the soft brush attachment on a vacuum cleaner
to gently clean the face of the burners. Visually
inspect the inside of the burners and crossovers for
any blockage caused by foreign matter. Remove
any blockage.
8 - Reinstall the burner box assembly using the existing
four screws. Make sure that the burners line up in
the center of the burner ports.
9 - Reconnect the sensor wire and reconnect the 2-pin
plug to the ignitor wiring harness. Reconnect wires
to ame rollout switches.
10 - Reinstall the gas valve manifold assembly.
Reconnect the gas supply line to the gas valve.
Reinstall the burner box cover.
11 - Reconnect 2-pin plug to gas valve.
12 - Replace the blower compartment access panel.
13 - Refer to instruction on verifying gas and electrical
connections when re-establishing supplies.
14 - Follow lighting instructions to light and operate
furnace for 5 minutes to ensure that heat exchanger
is clean and dry and that furnace is operating
properly.
15 - Replace heating compartment access panel.
 Loading...