EasyManua.ls Logo

Lenovo C22-10 - User Manual

Lenovo C22-10
26 pages
Print Icon
To Next Page IconTo Next Page
Loading...
Lenovo
C22-10
User Guide

Questions and Answers

  • M
    Makayla GarciaAug 13, 2025
    How to fix unacceptable image quality on Lenovo Monitor?
    • C
      costakaraAug 13, 2025
      If the image quality on your Lenovo monitor is unacceptable, ensure the video signal cable is firmly plugged into both the system and the monitor. You may also want to select another colour setting from the OSD menu, and perform automatic image setup.
  • R
    robert25Aug 17, 2025
    How to fix fuzzy lines or blurry image on Lenovo C22-10?
    • F
      Faith ElliottAug 17, 2025
      To resolve fuzzy lines in text or a blurry image on your Lenovo monitor, adjust the resolution settings on your system to match the native resolution for this monitor: 1920x1080 at 60 Hz. Also, perform automatic image setup. If automatic image setup does not help, perform manual image setup. When working in the native resolution, you may find additional improvements by adjusting the Dots Per Inch (DPI) setting on your system.
  • K
    Karina FergusonAug 21, 2025
    What to do if my Lenovo C22-10 power indicator is green, but there is no image?
    • K
      Katherine RhodesAug 21, 2025
      If your Lenovo monitor's power indicator is green but there's no image, ensure the video cable is properly connected to both the system and the monitor. Also, check the monitor brightness and contrast settings in the OSD menu and adjust them if they are at the lowest setting.
  • R
    robertchangAug 25, 2025
    What to do if my Lenovo C22-10 screen is blank and power indicator is steady amber or flashing green?
    • D
      Derrick ClarkAug 25, 2025
      If your Lenovo monitor screen is blank and the power indicator is steady amber or flashing green, press any key on the keyboard or move the mouse to restore operation. Also, check the Power options settings on your computer.
  • C
    Christopher SloanAug 28, 2025
    What to do if Lenovo Monitor shows 'Out of Range'?
    • M
      Michael BarryAug 28, 2025
      If your Lenovo monitor displays 'Out of Range' and the power indicator is flashing green, it means the system is set to a display mode not supported by the monitor. If you are replacing an old monitor, reconnect it and adjust the display mode to within the specified range for your new monitor. If using a Windows system, restart the system in safe mode, then select a supported display mode for your computer.
  • P
    Patricia BentonSep 1, 2025
    Why Lenovo Monitor power indicator is not lit?
    • D
      douglasthomasSep 1, 2025
      If the power indicator on your Lenovo monitor is not lit and there is no image, ensure the power cord is connected properly and that the outlet has power. Power on the monitor. Try using another power cord and another electrical outlet.
  • L
    Laura MooreSep 4, 2025
    Why is the image not acceptable when switching to dual mode on my Lenovo Monitor?
    • E
      Ethan CarterSep 4, 2025
      If the image is not acceptable when switching to dual mode on your Lenovo monitor, it might be because the optimum resolution for each mode has not been set. Use ThinkVision Duo software to optimize the dual screen operation. You can also adjust graphic card resolution manually.
  • T
    Thomas OrtizSep 9, 2025
    Why does my Lenovo Monitor have discoloured pixels?
    • N
      Nicole JohnsonSep 9, 2025
      The appearance of one or more discoloured pixels is a characteristic of LCD technology and not necessarily a defect. If there are more than five pixels missing, contact the Customer Support Centre.

Summary

Chapter 1 Getting Started

Shipping Contents

Lists all items included in the product package for initial setup.

Usage Precautions

Provides essential guidelines and warnings for setting up the monitor.

Product Overview

Introduces the monitor's features, controls, and connectivity options.

Monitor Adjustment Types

Describes the physical adjustments available for the monitor, such as tilt.

Monitor User Controls

Explains the physical buttons and their functions for controlling the monitor.

Cable Lock Slot

Details the location and purpose of the cable lock slot for security.

Monitor Setup Guide

Step-by-step instructions for physically setting up the monitor.

Connecting and Powering On

Instructions for connecting cables and powering up the monitor.

Product Registration

Information on how to register the product for updates and support.

Chapter 2 Adjusting and Using Your Monitor

Ergonomic Comfort and Accessibility

Guidelines for setting up a comfortable and accessible workspace.

Work Area Arrangement

Tips on organizing the workspace for optimal comfort and efficiency.

Monitor Positioning and Viewing

Guidance on optimal monitor placement for comfortable viewing.

Healthy Work Habits

Advice on maintaining comfort and productivity during computer use.

Eye Strain Prevention

Information and tips to reduce eye strain and fatigue during use.

Low Blue Light Mode

Explains the low blue light feature and how to enable it for eye comfort.

Accessibility Features

Details on how Lenovo provides access to information for people with disabilities.

Adjusting Monitor Image

Instructions for adjusting the monitor's image quality and settings.

Direct Access Controls

Explanation of how to use the monitor's physical buttons for quick adjustments.

On-Screen Display (OSD) Controls

Guide to navigating and using the OSD menu for detailed settings.

Supported Display Modes

Information on choosing the correct display modes for the monitor.

Power Management

Explains the monitor's power states and management features.

Monitor Care and Cleaning

Instructions on how to properly clean and maintain the monitor.

Detaching Monitor Stand

Steps for removing the monitor stand, often for wall mounting.

Wall Mounting

Guidance for safely mounting the monitor on a wall.

Chapter 3 Reference Information

Monitor Specifications

Detailed technical specifications of the monitor model.

Troubleshooting Common Issues

Solutions for common problems encountered with the monitor.

Manual Image Setup

Steps for manually adjusting image settings when auto-setup is insufficient.

Manual Driver Installation

Detailed steps for manually installing the monitor driver software.

Service and Support Information

Information regarding warranty, service procedures, and customer support.

Customer Responsibilities

Outlines what is not covered by the product warranty.

Getting Further Assistance

How to contact customer support for unresolved issues.

Appendix A Service and Support

Register Your Product

Instructions to register the product for service and support updates.

Online Technical Support

Information on accessing technical support via the Lenovo website.

Telephone Technical Support

Contact numbers and information for phone-based technical support.

Appendix B Notices

Recycling Information

Guidance on recycling Lenovo products and components.

Disposing of Company Equipment

Procedures for disposing of company-owned Lenovo equipment.

Disposing of Components

Guidelines for proper disposal of individual computer components.

Trademarks

Lists Lenovo and other company trademarks.

Overview

This document describes the Lenovo C22-10 Flat Panel Monitor, providing detailed instructions for setup, adjustment, and maintenance to ensure optimal performance and user comfort.

Function Description

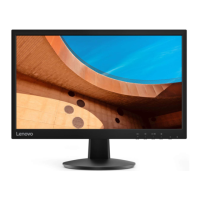
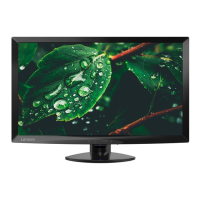
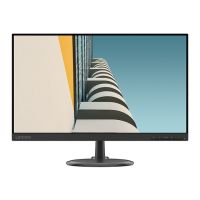
The Lenovo C22-10 is a flat panel monitor designed for general computing tasks. It serves as a visual output device for computers, displaying images and text. The monitor supports both analog (D-SUB) and digital (HDMI) input signals, allowing for flexible connectivity with various computer systems. It is equipped with an On-Screen Display (OSD) menu that provides a comprehensive set of controls for adjusting image properties, color settings, and other display parameters. The monitor also features power management capabilities to conserve energy when not in active use.

Usage Features

The monitor is designed with user comfort and accessibility in mind. It offers tilt adjustments, allowing users to position the screen for optimal viewing angles and to accommodate preferred head and neck postures. The tilt range is from -5° to 22°. For security, a cable lock slot is located on the rear of the monitor, enabling users to attach a cable lock to prevent theft.

Setting up the monitor involves connecting it to a computer using either an analog (D-SUB) or HDMI cable. Users are advised to power off their computer and attached devices before making connections. Once connected, the monitor and computer can be powered on. To ensure proper functionality and optimal display, users should install the monitor driver, which can be downloaded from the Lenovo website. The manual provides step-by-step instructions for installing the driver on Microsoft Windows 7 and Windows 10 operating systems.

The monitor features direct access controls on the front panel for quick adjustments without navigating the full OSD menu. These controls include:

  • Input change: Switches between video input sources (D-SUB, HDMI).
  • Image Setup: Activates automatic image adjustment, which optimizes the display settings.
  • Brightness: Provides direct access to brightness adjustment.
  • Low Blue Light: Pressing and holding this button for 3 seconds enables or disables the Low Blue Light mode, which reduces blue light emissions for improved eye comfort.
  • Main menu: Opens the OSD main menu for more detailed settings.

The On-Screen Display (OSD) menu offers extensive control over the monitor's settings. Users can navigate the OSD using the front panel buttons. Key OSD functions include:

  • Brightness/Contrast: Adjusts overall brightness and the difference between light and dark areas. It also includes a Dynamic Contrast Ratio (DCR) setting to enable dynamic contrast.
  • Image Position: Allows adjustment of horizontal and vertical image positions. An "Automatic" option optimizes the image automatically, while "Manual" provides controls for clock, phase, and saving settings.
  • Color: Adjusts the intensity of red, green, and blue. It offers preset modes (Neutral, sRGB, Reddish, Bluish) and a "Custom" mode for fine-tuning individual color saturation (red, green, blue) and saving custom color choices.
  • Input Signal: Allows users to select between Analog and HDMI input signals.
  • Scaling: Provides options for "Full Screen" or "Original AR" (Aspect Ratio) display.
  • Novo Vision: Offers various display modes such as "Screen Prioritization," "Text Mode," "Web pic Mode," "Video Mode," and "Low Blue Light" mode.
  • Information: Displays resolution, refresh rate, and product details.
  • Language: Sets the OSD menu language.
  • Menu Position: Adjusts the horizontal and vertical position of the OSD menu on the screen.
  • Reset: Resets the monitor to its original factory settings.
  • Accessibility: Controls button repeat rate (Off, Default, Slow) and OSD menu timeout settings.

The monitor supports various display modes, which are controlled by the connected computer. It is optimized for a native resolution of 1920x1080 at 60Hz. The document advises users to refer to their computer's documentation for details on changing display modes.

Power management features help in energy conservation. The monitor enters "Standby/Suspend" mode (indicated by a steady amber power indicator) when the computer recognizes a period of user inactivity, and the screen goes blank. Moving the mouse or pressing a key restores operation. The monitor can also be powered "Off" (no power indicator) by pressing the power key, with a slight delay before the image reappears.

Maintenance Features

Proper care and maintenance are crucial for the longevity of the monitor. Before performing any maintenance, users should turn off the monitor's power.

The document provides clear guidelines on what not to do:

  • Do not apply water or liquid directly to the monitor.
  • Do not use solvents or abrasives.
  • Do not use flammable cleaning materials.
  • Do not touch the screen with sharp or abrasive items, as this can cause permanent damage.
  • Do not use cleaners containing anti-static solutions or similar additives, as they may harm the screen coating.

Instead, users should:

  • Lightly dampen a soft cloth with water to gently wipe the covers and the screen.
  • Use a damp cloth and a little mild detergent to remove grease or finger marks.

For users who wish to wall-mount the monitor, the stand can be detached. This involves placing the monitor face down on a soft, clean surface, pressing the release button, and removing the stand and base. The monitor is VESA compatible, and instructions for attaching a wall mounting bracket are provided, emphasizing the use of a UL and GS Listed Wall Mount Bracket with a minimum weight/load bearing capacity of 6.00 kg and a shielded power cable for TCO Certification.

Troubleshooting information is included to help users resolve common issues such as "Out of Range" messages, unacceptable image quality, or no image display. Suggested actions include checking cable connections, adjusting display modes, performing automatic or manual image setup, and adjusting OSD settings. If problems persist, users are directed to contact the Customer Support Center.

Lenovo also provides information on recycling, encouraging responsible disposal of IT equipment. Programs and services are available to assist owners in recycling disused Lenovo computers and monitors, with specific instructions for Japan regarding industrial and home-used computers. The document also notes that some components may contain heavy metals and should be disposed of properly according to the described recycling methods.

Lenovo C22-10 Specifications

General IconGeneral
Panel typeTN
Pixel pitch0.2482 x 0.2482 mm
Screen shapeFlat
Pixel density102 ppi
Backlight typeW-LED
Display diagonal21.5 \
Display technologyLED
Native aspect ratio16:9
Maximum refresh rate60 Hz
NTSC coverage (typical)72 %
Viewable size, vertical268.11 mm
Viewing angle, vertical65 °
Display number of colors16.78 million colors
Viewable size, horizontal476.64 mm
Viewing angle, horizontal90 °
Display brightness (typical)200 cd/m²
Supported graphics resolutions1920 x 1080 (HD 1080)
Power consumption (standby)- W
Power consumption (typical)12 W
Color nameRaven Black
CertificationCCC, Tier 2, TÜV Low Blue Light
Product colorBlack
Market positioning-
Stand includedYes
Cables includedAC, VGA
Tilt angle range-5 - 22 °
Cable lock slot typeKensington
Number of OSD languages8
Panel mounting interface100 x 100 mm
HDMI version1.4
DisplayPorts quantity0
Package depth126 mm
Package width567 mm
Package height401 mm
Package weight4460 g
Operating temperature (T-T)0 - 50 °C
Weight and Dimensions IconWeight and Dimensions
Bezel width (top)18.48 mm
Bezel width (side)15.58 mm
Depth (with stand)190 mm
Height (with stand)399.05 mm
Weight (with stand)3110 g
Bezel width (bottom)30.08 mm
Depth (without stand)45.4 mm
Width (without stand)509.22 mm
Height (without stand)319.25 mm
Weight (without stand)2800 g

Related product manuals