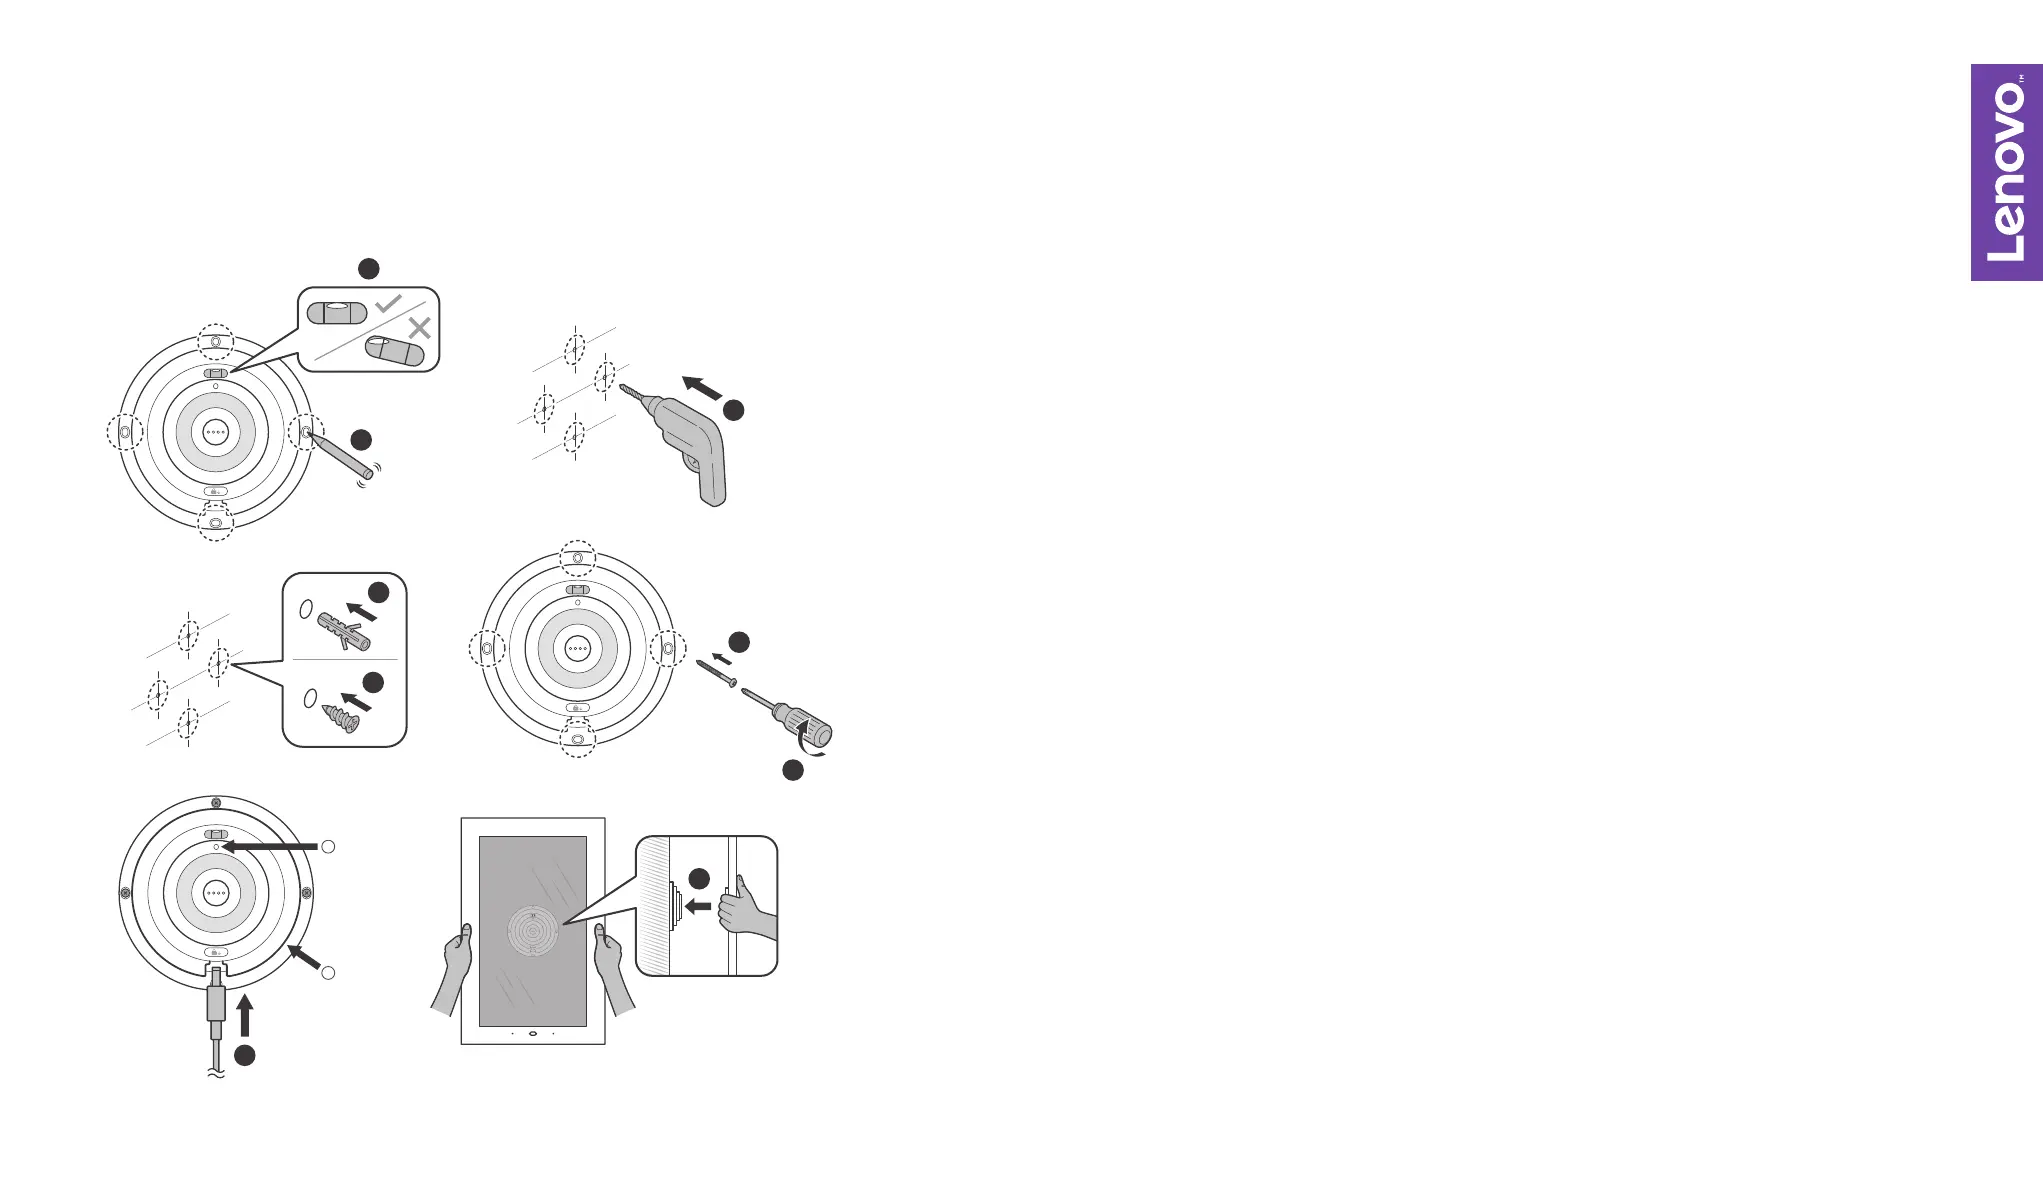
WALL MOUNTING INSTALLATION
Ensure that the level is at the top and the bubble is centered between the guide
lines in a horizontal position
Mark the 4 drill positions of the mount in the wall with a pencil
Use a power drill with a ¼ (6mm) diameter drill bit to drill four holes into the wall
Hammer the wall plugs* into the four newly drilled holes, align the mounting bracket,
and use a screwdriver to screw in all four strong screws to mount the plate in place
*For brick walls, use brick wall plugs and strong screws (4A, 5)
*For drywalls, use drywall plugs and strong screws (4B, 5)
Plug the power adapter into the mounting bracket
Mount the main frame onto the mounting bracket – ensure the Lenovo Smart Frame
pogo pins are aligned with the mounting bracket pogo pins. A clicking sound indicates
it has been installed correctly. The wall mounting bracket has a built-in reel, which you
can wind the cord around for cord management.
1.
2.
3.
4-6.
7.
8.
3
4A
4B
1
2
5
6
7
1
2