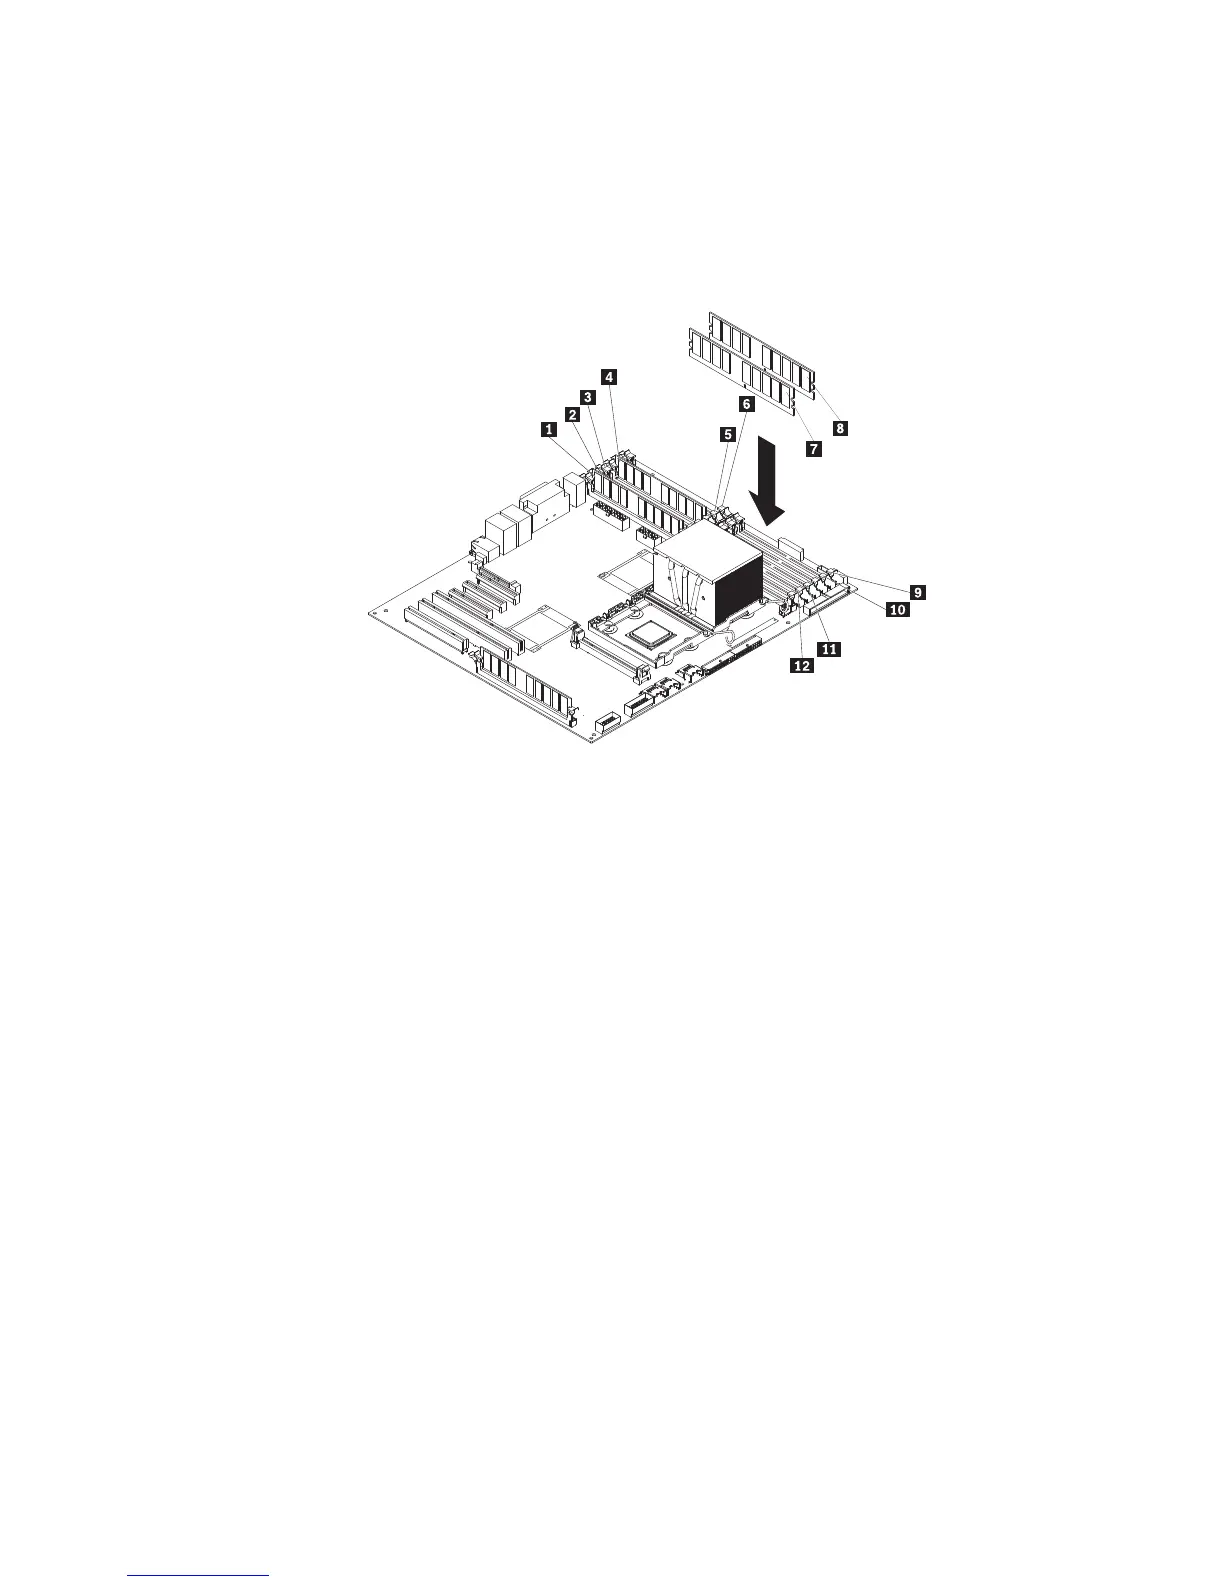
9. Insert the DIMM into the connector by aligning the edges of the DIMM with the
slots at the ends of the DIMM connector1 and 2. Firmly press the DIMM
straight down into the connector by applying pressure on both ends of the
DIMM simultaneously. The retaining clips snap into the locked position when
the DIMM is firmly seated in the connector. If there is a gap between the DIMM
and the retaining clips, the DIMM has not been correctly installed. Open the
retaining clips, remove the DIMM, and then reinsert it.
1 DIMM 1 connector 7 DIMM 7
2 DIMM 2 connector 8 DIMM 10
3 DIMM 3 connector 9 DIMM 12 connector
4 DIMM 4 connector 10 DIMM 11 connector
5 DIMM 5 connector 11 DIMM 9 connector
6 DIMM 6 connector 12 DIMM 8 connector
10. Rotate the power-supply cage assembly back into the server. Press the
power-supply cage release tab 1 and rotate the power-supply cage assembly
into the chassis.
102 ThinkServer TD100 and TD100x: Hardware Maintenance Manual
 Loading...