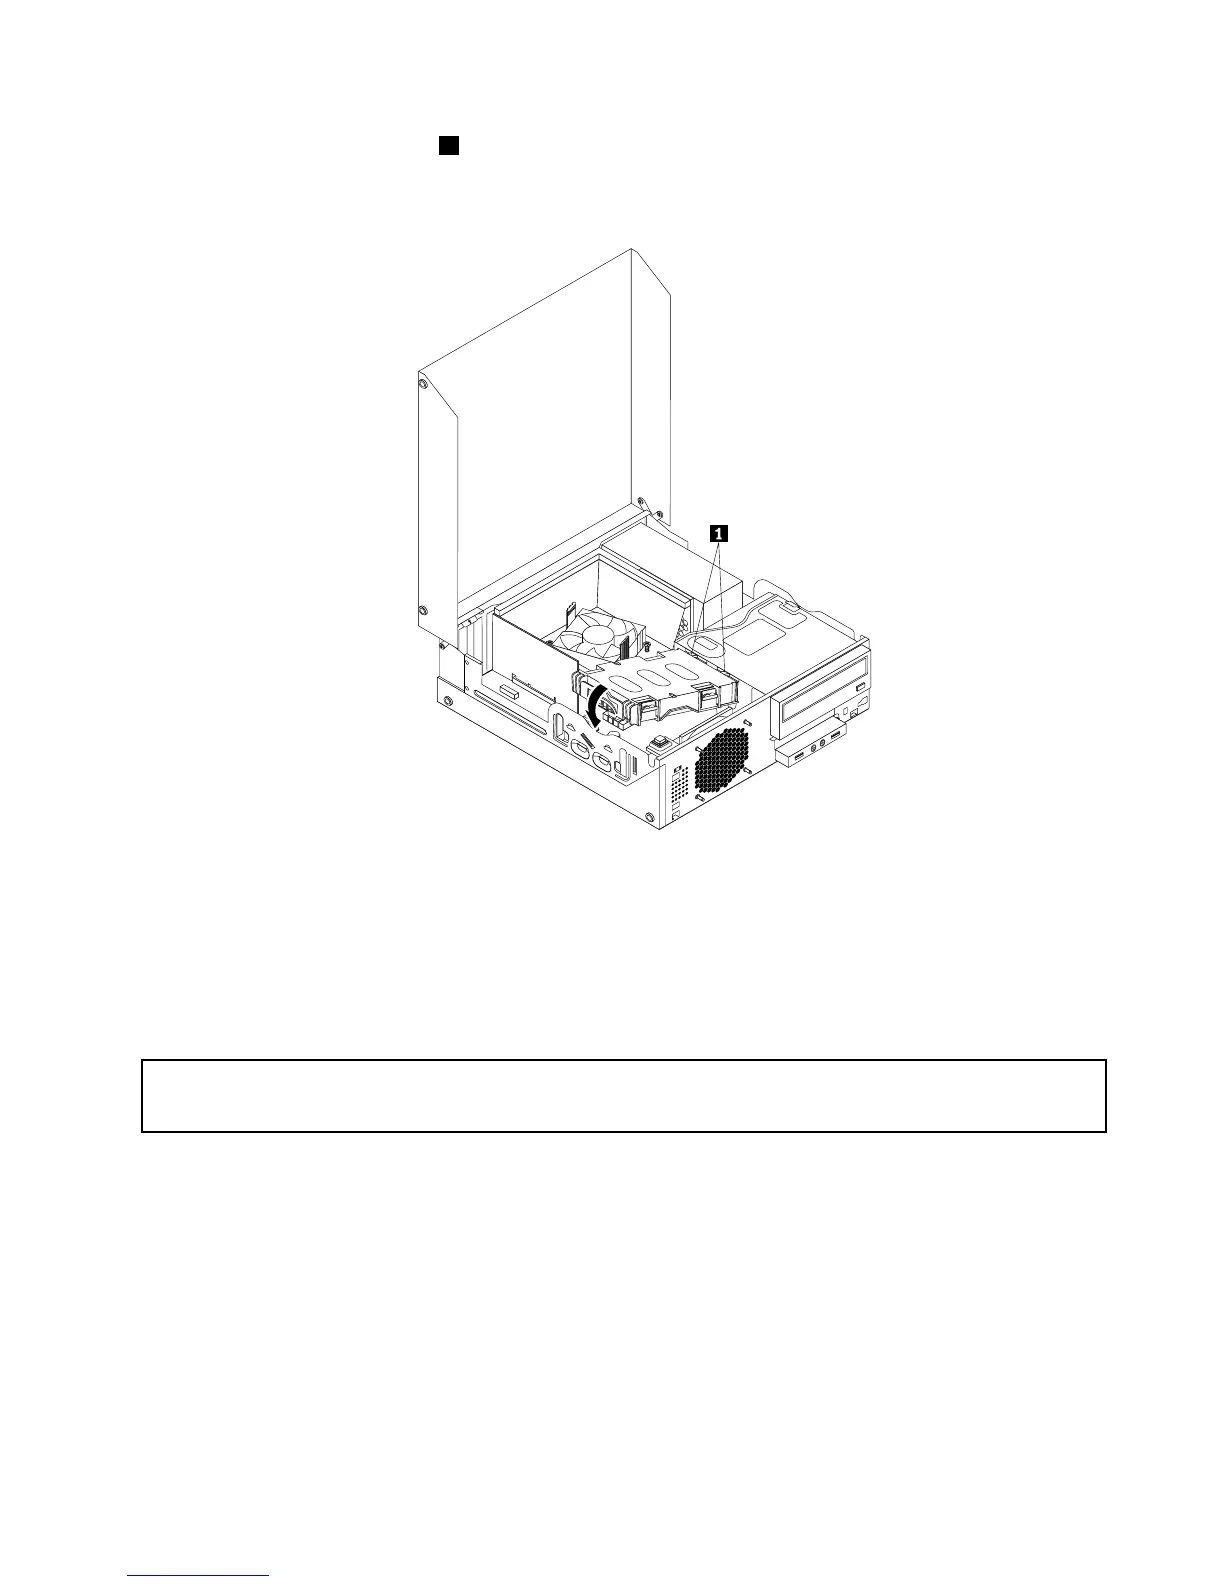
9.Insertthetworetainingclips 1 oftheharddiskdrivebracketintothecorrespondingholesintheside
oftheopticaldrivebay,andthenpivottheharddiskdriveandbracketdownwardsuntilthehard
diskdrivebracketsnapsintoposition.
Figure74.Installingtheharddiskdrive
Whattodonext:
•Toworkwithanotherpieceofhardware,gototheappropriatesection.
•Tocompletetheinstallationorreplacement,goto“Completingthepartsreplacement”onpage165.
Replacingtheopticaldrive
Attention:
Donotopenyourcomputerorattemptanyrepairbeforereadingandunderstanding“ImportantSafetyInformation”
onpage1.
Thissectionprovidesinstructionsonhowtoreplacetheopticaldrive.
Toreplaceanopticaldrive,dothefollowing:
1.Turnoffthecomputeranddisconnectallpowercordsfromelectricaloutlets.
2.Openthecomputercover.See“Openingthecomputercover”onpage120.
3.Removethefrontbezel.See“Removingandreinstallingthefrontbezel”onpage120.
4.Removetheharddiskdrive.See“Replacingtheharddiskdrive”onpage135
Chapter11.ReplacingFRUs(formachinetypes:3688,3690,3691,3693,and3695)137