www.lerdge.com
4
4. Check the function of endstops
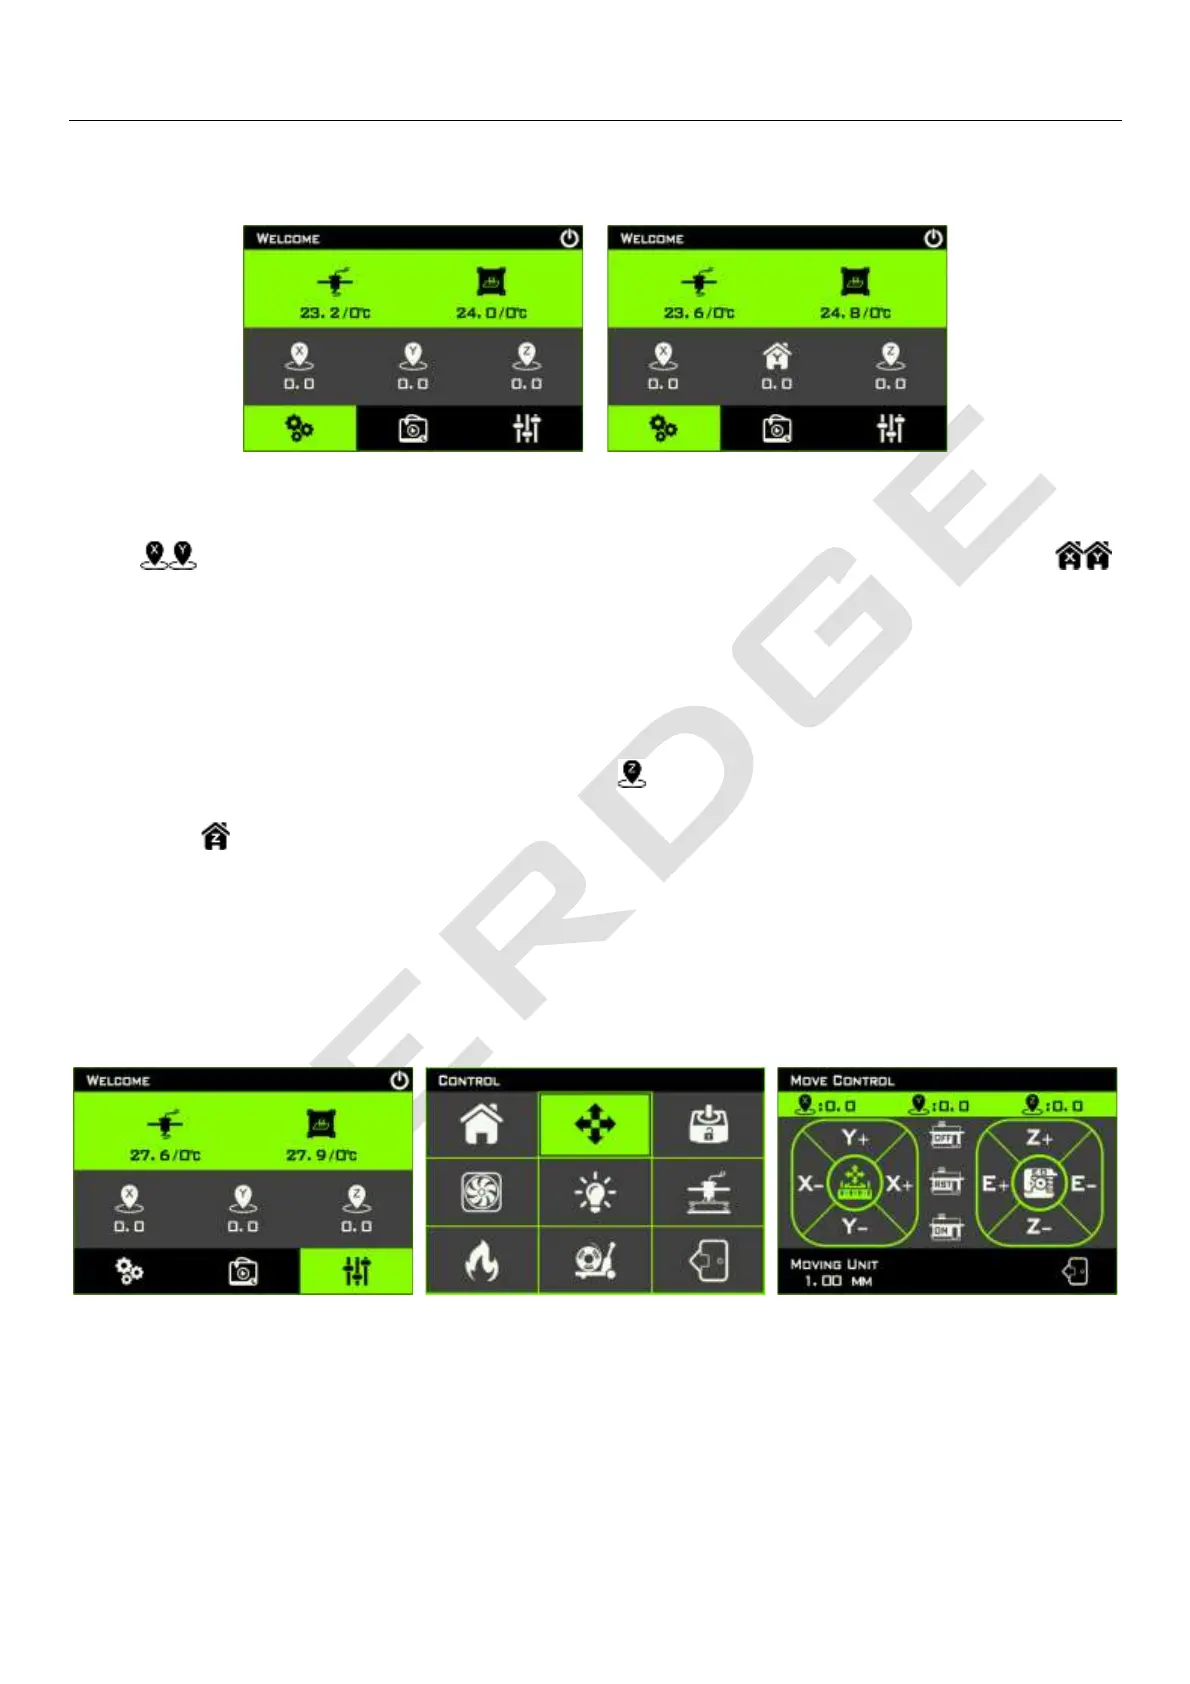
Press the endstops of the X-axis and Y-axis respectively by hand, and observe whether the position
icons of the X and Y axes in the main interface have changed to the small house icon ;
Release the endstops of the X and Y axes, and the small house icon will return to the position icon,
which means that the function of endstops of the X and Y axes is normal.
For Z-axis optical endstop, find a small piece of opaque paper, insert it into the photoelectric slot of
the Z-axis optical endstop, observe whether the green indicator light on the optical endstop is on,
and then observe whether the Z-axis position icon in the main interface has become the small
house icon ; remove the small piece of paper from the photoelectric slot, the green indicator is
off, and the small house icon of the Z axis has changed to the position icon, which proves that the
function of Z-axis endstop is normal.
5. Check the function of motors
Move the print head and the hot bed to the middle of the X and Y axes by hand respectively; manually
rotate the lead screw to lift the X-axis cantilever, and ensure that the nozzle is at least 10mm away
from the print platform. Then enter the move control interface, click X+, X-, Y+, Y-, Z+, Z-, E+, E- in
turn.
Note that you need to click “+” and then “-” for any axis:



 To Next Page