INSTALLATION AND OPERATING INSTRUCTIONS ENGLISH
PK-93406-10-00-5AAR2243
(35I00-1)
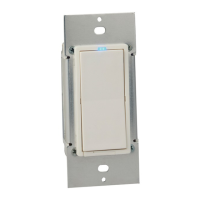
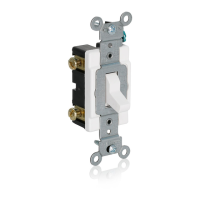
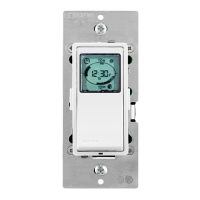
Figure 1 - Leviton UPB™ Wall Switch
WARNINGS AND CAUTIONS
• TO AVOID FIRE, SHOCK, OR DEATH; TURN OFF POWERatcircuitbreakerorfuseandtestthatpowerisoffbeforewiring!
• To beinstalledand/orusedinaccordancewithappropriateelectricalcodesandregulations.
• Ifyouareunsureaboutanypartoftheseinstructions,consultanelectrician.
• SAVETHESEINSTRUCTIONS.
WARNINGS AND CAUTIONS
• To reducetheriskofoverheatingandpossibledamagetootherequipment,whenconguredasdimming-capable,DONOT
installtocontrolareceptacle,amotor-operatedappliance,oratransformer-suppliedappliance.
• Usethisdevicewithcopper or copper-clad wire only.
• Forindooruseonly.
For the following Models:
35A00-1Leviton600WDimmerSwitch,35A00-1CFL600WCFL/LEDDimmer,35A00-3Leviton600WNon-Dimming
Switch(collectivelyreferredtoasLevitonUPB™WallSwitch,inthisdocument),and37A00-1LevitonAuxiliarySwitch
NOTE:AllLevitonUPB™WallSwitchesrequireaneutral(white)connectionwire.
Leviton UPB™ Wall Switch Overview
TheLevitonUPB™WallSwitch(Figure 1)allowsforlocalcontroloflightingbyusingtherockerswitch.Italso
incorporatestheUPB™two-waypowerlinecommunicationtechnologythatgivesittheabilitytoberemotelycontrolledby
UPB™compatiblecontrollers.TheLevitonUPB™WallSwitchisalsocapableoftransmittingUPB™messages(including
currentlightlevel)whentherockerswitchisturnedon,turnedoff,brightened,ordimmed.
Eachswitchcanbeconguredtocustomtanindividual’slifestyleanddesires.TheLevitonDimmerSwitchiscapableof
storingupto16presetlightlevelsandfaderatestocreatepowerfullightingscenes.TheLevitonNon-DimmingSwitchis
usedtocontrolsuchloadsasuorescentlightsandceilingfans.
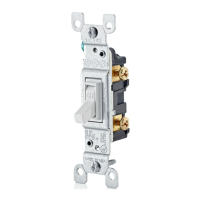
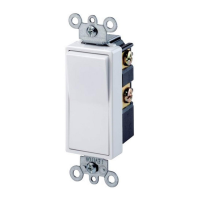
Leviton Auxiliary Switch Overview
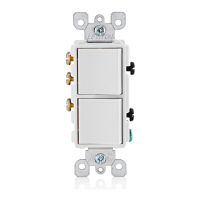
The37A00-1LevitonAuxiliarySwitch(Figure2)isanoptionalcompaniondeviceusedwiththeLevitonUPB™Wall
Switchformulti-waycircuits.TheLevitonAuxiliarySwitchhasarockerswitchthatcontrolsthelightingloadintheexact
samemannerastherockerswitchontheLevitonUPB™WallSwitch.
Figure 2 – Leviton Auxiliary Switch
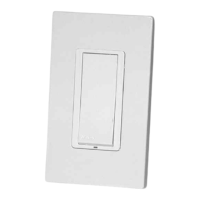
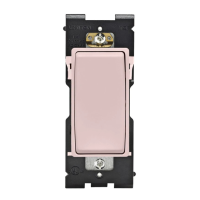
Changing Switch Color
ThecoloroftheLevitonUPB™WallSwitchandAuxiliarySwitchmaybechangedtocomplementtheinteriordécor.The
LevitonUPB™WallSwitchandAuxiliarySwitchissuppliedwithawhiteswitchplate.Additionalcolorsareavailable;
contactyourLevitondistributorformoreinformation.Whenchangingtheswitchplate,makesurethattheswitchis
disconnectedfromallpower,andproceedasfollows:
Figure 3 – Changing Switch Color
Figure 4 – Air-Gap Switch Lever
TheswitchplateattachestotheLevitonUPB™WallSwitchandAuxiliarySwitchwithtwolatchesontherightandtwoon
theleft.Usingasmall-bladedscrewdriver,gentlydepresstheupperandlowerlatchononesidewhileliftinguponthe
plate.Oncethelatchesarereleasedononeside,removetheswitchplatefromtheotherside.
1. Alignthelatchesofthenewswitchplatetotheopeningsonthemountingplateandgentlysnapintoplace.
INSTALLATION INSTRUCTIONS
TheLevitonUPB™WallSwitchiswireddirectlytothelightingcircuitandcanbecontrolledbyaddingoneormoreoptional
LevitonAuxiliarySwitchesproducingmulti-waycircuits.Multi-waycircuitsmakeitpossibleforagroupofswitchesto
controlthesamelightorsetoflights.Thissectionwillillustratehowtomaketheconnections.
NOTES:
1. RefertoFigures 1 and 2todeterminethewirecolorsforeachconnection.
2. AllLevitonUPB™WallSwitchesrequireaneutral(white)connection.
3. TheLine(black)wiremustbeaccessiblefortheinstallationofallLevitonAuxiliarySwitches.Thiswiremaybe
connectedtoeitherphaseofthe120/240Vsupply.Theblueand/orgraywireontheLevitonAuxiliarySwitchcanbe
connectedtoeitherearthgroundorneutral.Theblueand/orgraywireisonlyusedtolighttheLEDontheswitch.This
LEDonlyindicatesthatpowerisappliedandservesasanight-light.ConnectthebluewireonlytolighttheLEDblue.
ConnectthegraywireonlytolighttheLEDred.ConnectboththebluewireandthegraywiretolighttheLEDmagenta.
Air-Gap Switch Lever
TheLevitonUPB™WallSwitchhasanair-gapswitchleverthatwillremoveallpowerfromtheloadforsafeswitch
installationandlightbulbreplacement.Toactivatetheair-gapswitch,usingyourngernail,pryopentheleveratthe
groove
(Figure 1).Swingtheleverfullyopensothatitisperpendiculartothebottomrim(Figure 4).Afterservicing,pushthe
leverfullyclosedsothatitisparalleltothebottomrim.Thelevermustbepushedfullyclosedfornormaloperation.
Installation Procedure
1. Besurethatallpowertotheloadhasbeendisconnectedbyturningoffthecircuitbreaker.
2.
Ifapplicable,removethefaceplatefromtheexistingwallswitch,removetheexistingwallswitchfromthewallbox,and
disconnectthewiresfromtheexistingwallswitch.Identifythe"Line","Neutral","Load"and"Traveler"(ifapplicable)wires.
3. Besurethattheair-gapswitchleverontheLevitonUPB™WallSwitchisfullyopen.
4. Remove3/4"ofinsulationfromeachofthewiresontheLevitonUPB™WallSwitch.InstalltheLevitonUPB™Wall
SwitchbyconnectingwiresperwiringcongurationshowninFigure 5.
5. InstallanyoptionalLevitonAuxiliarySwitchperwiringcongurationshowninFigure 5.
6. Afterallconnectionshavebeenmade,becertainthatallwireconnectorsarermlyattachedandthereisnoexposed
copper.
7. GentlyplacethewiresandLevitonUPB™WallSwitchintothewallboxwiththeLEDatthetopofdevice.Usingthe
suppliedscrews,attachtheLevitonUPB™WallSwitchtothewallbox.
8. Beforeinstallingthefaceplate,restorepowertothecircuit,andthenfullyclosetheair-gapswitchlever.
9. AftertestingtheLevitonUPB™WallSwitchandAuxiliarySwitchforproperlocaloperation(see Table 2 and Table 3),
installaDecora
®
faceplateovereachswitch.
(ON/BRIGHT)
LEVER GROOVE
AIR-GAP SWITCH
(OFF/DIM)
BOTTOM
LED
INDICATOR
TOP
GROUND
GREEN
RED
YELLOW
WHITE
LOAD
CONTROL
NEUTRAL
BLACK
LINE
YELLOW
BLUE
GRAY
CONTROL
*NEUTRAL
*NEUTRAL
BLACK
LINE
BOTTOM
(OFF/DIM)
(ON/BRIGHT)
TOP
(FOR RED INDICATOR)
(FOR BLUE INDICATOR)
INDICATOR
LED
Model Device Maximum Load Next to One Dimmer Next to Two Dimmers
35A00-1 600W 600W 500W
35A00-1CFL 600W 600W 500W
35A00-3 600W 600W 500W
Leviton UPB™ Wall Switch De-Rating
Intwo-ganginstallations,thereisnoneedtode-ratethe35A00-1,35A00-1CFL,or35A00-3.Inthree-ganginstallations,
eachswitchmustbede-ratedfrom600Wto500W.
Table 1 – Leviton Wall Switch De-Rating
Leviton DIMMER SWITCH OPERATION
TheLevitonDimmerSwitchhasmanycongurableitemsthatcanbesetusingtheUPB™UPStartcongurationsoftware.
ThefollowingdescribestheoperationoftheLevitonDimmerSwitchinitsfactorydefaultconguration.
Local Rocker Switch Operation
TheLevitonDimmerSwitchhasarockerswitchthatcanbeusedtocontrolthelightingloadasfollows.
Rocker Event Top Rocker Bottom Rocker
Single-Tap Brightensthelightto100%(on)at
defaultfaderateandrestartsauto
shut-offtimer(ifapplicable).
Fadethelightto0%(off)atdefault
faderate.
Double-Tap Snapsthelightto100%(on)and
overridesautoshut-off.
Snapsthelightto0%(off).
Hold Startsfading(brightening)thelight
towards100%atdefaultfaderate
andrestartsautoshut-offtimer(if
applicable).
Startsfading(dimming)thelight
towards0%atdefaultfaderate.
Release Stopsbrighteningthelightand
restartsautoshut-offtimer(if
applicable).
Stopsdimmingthelight.
Table 2 - Leviton UPB™ Dimmer Switch Local Operation
Leviton NON-DIMMING SWITCH OPERATION
TheLevitonNon-DimmingSwitchhasmanycongurableitemsthatcanbesetusingtheUPB™UPStartconguration
software.ThefollowingdescribestheoperationoftheLevitonNon-DimmingSwitchinitsfactorydefaultconguration.
Local Rocker Switch Operation
TheLevitonNon-DimmingSwitchhasarockerswitchthatcanbeusedtocontroltheloadasfollows.
Table 3 – Leviton Non-Dimming Switch Local Operation
RockerEvent To p Rocker BottomRocker
Single-Tap Turnstheloadonandstartsauto
shut-offtimer(ifapplicable).
Turnstheloadoff.
LEVITON UPB™ WALL SWITCH AND AUXILIARY SWITCH
Cat.No.35A00-1
Installation Instructions and User’s Guide