9
CARE & MAINTENANCE
Charging the Vacuum
Your vacuum uses a DC 22.2V, 2200mAh Li-ion
battery and on a full charge, lasts 20 minutes
on Stage II and 40 minutes on Stage I. Use the
included charger to charge the vacuum.
Cleaning the Dust Bin
1. Turn the vacuum o.
2. To empty the dust bin, remove the stick
by pressing the vacuum body release
button.
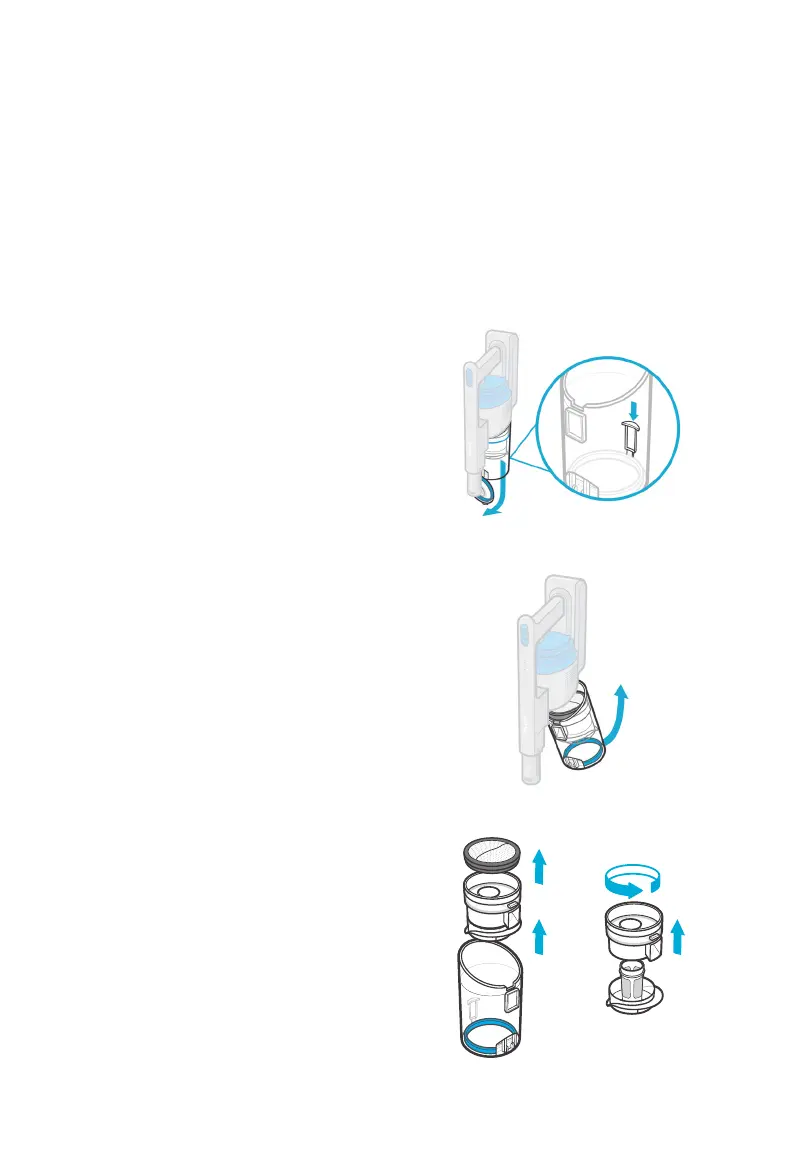
3. Hold the dust bin over a trash can and
press the dust door release button
[Figure 3.1]. Use caution, as the dust
door will automatically open when the
release button is pushed. Empty out
debris and dirt. Then, close the dust
door until you hear it click shut.
4. To wash the dust bin, remove the bin by
pulling it outward [Figure 3.2].
1. Insert the charger into the charging port.
2. Plug the charger into an outlet. The
indicator lights will blink while charging.
Note: Make sure the vacuum is turned
o before charging.
Figure 3.1
Figure 3.3
Figure 3.2
Note:
• Charging time is about 5 hours.
• The charger may be warm during
charging. This is normal.
3. When the vacuum has fully charged,
the indicator lights will stay on for 3–5
minutes. They will then turn o to save
power.
5. Remove the inner chamber from the
dust bin. Twist the top part of the inner
chamber to the right, then pull up to
take the chamber apart [Figure 3.3].
Empty out any remaining dirt.
6. Rinse the dust bin and inner chamber
with water and dry thoroughly.
Reassemble and place all parts back on
the vacuum body.