6
4.3-64.3-5
4.3-7
GB
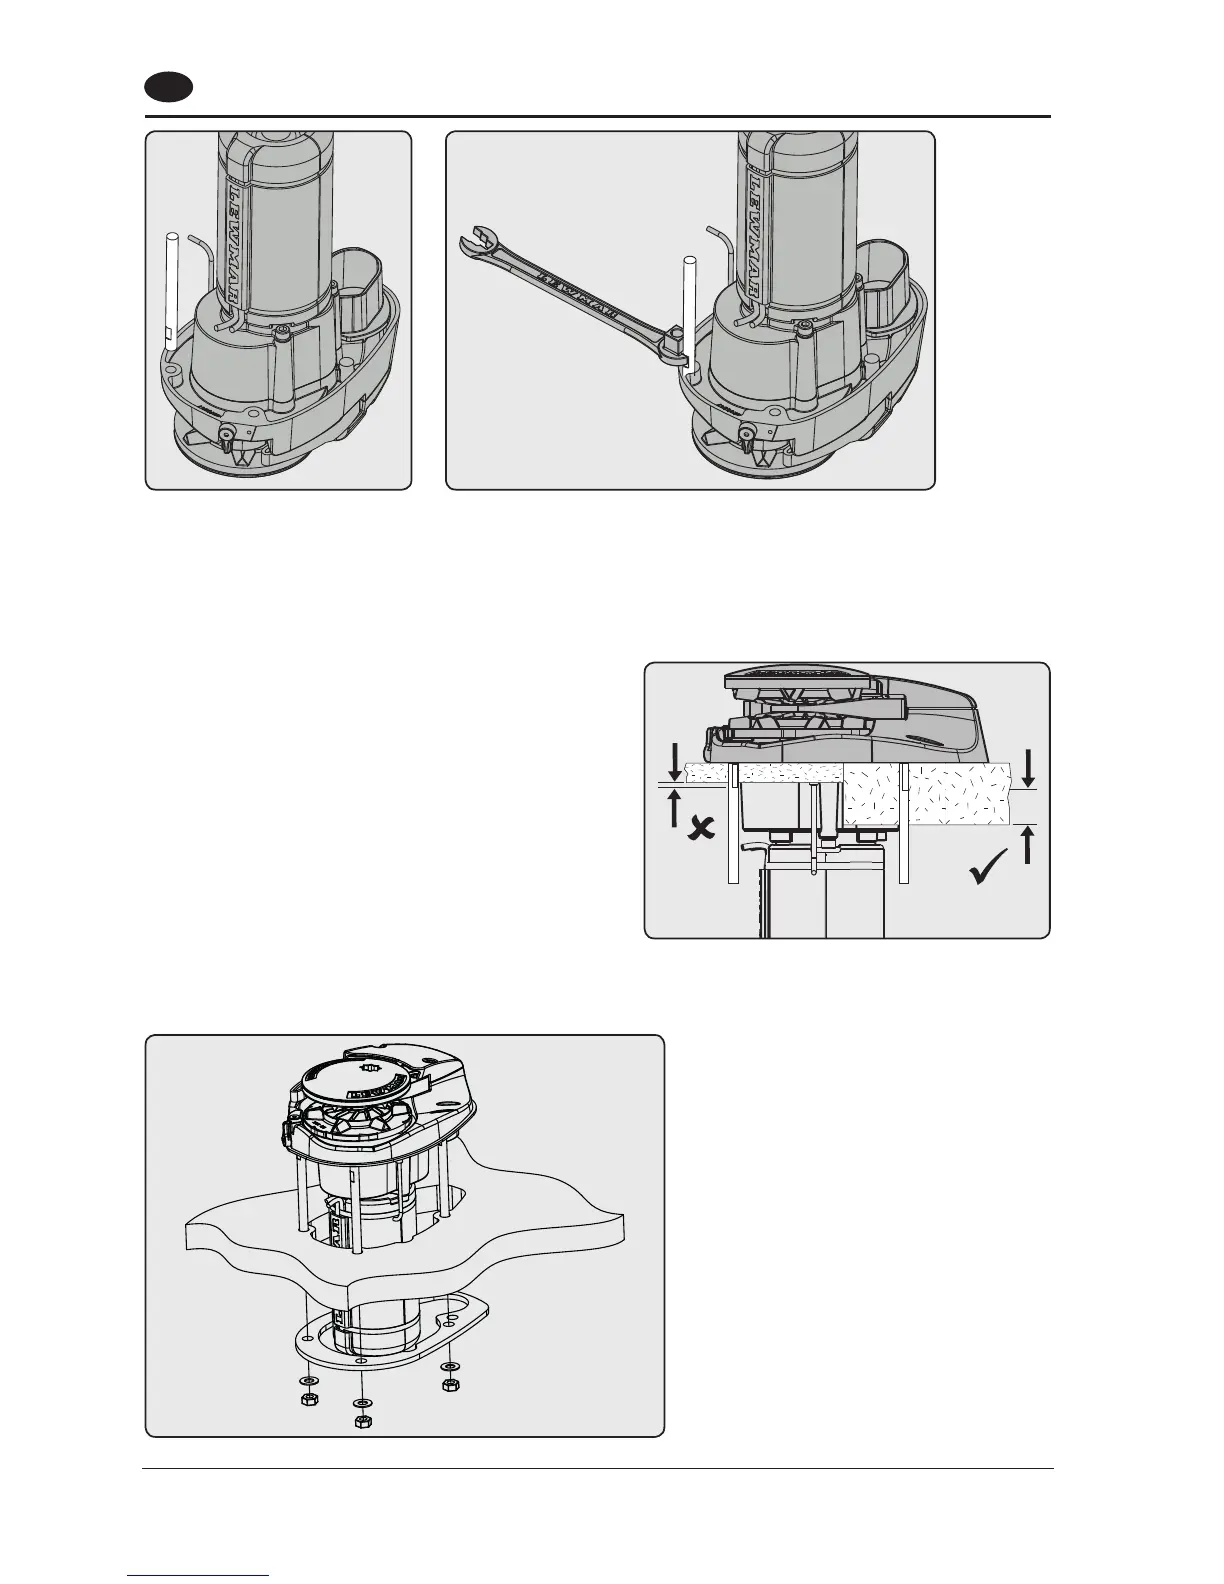
5. Fully screw the three mounting studs into the base of the windlass. This can be done, quite simply, using the
multi-tool wrench supplied. Screw the studs into the base finger tight, with the flats towards the base as
shown (Fig 4.3-5).
6. Next, using the wrench on the flats, tighten the studs until they bottom out in their holes.
Do this to each of the studs in turn.
7. Place the base mat in position on the deck, optionally,
apply a suitable sealant to the base of the windlass,
any mounting pad or around the studs.
As a rule of thumb, if the flats on the studs are visible
below deck, the deck and/or any packing is likely to be
too thin to offer adequate support when the windlass
is under load.
NOTE: If using silicone or other rubbery type sealant, it
is advisable to allow curing of the sealant before final
tightening of the mounting nuts. Trim the studs back to
6 mm (¼”) below the fully tightened nuts.
Pass all the studs through the deck and fit
the metal clamping plate to the underside of
the deck and secure the unit with the fixings
provided.