Setup Lexicon
3-36
CONNECTING THE MICROPHONES
CAUTION!
• The microphones included in the Lexicon Microphone Kit
require careful handling. Dropping or otherwise physically
abusing the microphones might cause errors during use or
irreparable damage to the microphones.
• The microphone wires also require careful handling. Do not
sharply bend the wires or place objects on them.
• Never make or break microphone input connections unless
the MC-8 is powered off with the rear-panel power switch,
OR standby mode is activated with the front-panel or
remote control standby button.
Note the following:
• Automatic calibration requires the microphones included in the
Lexicon Microphone Kit, available at authorized Lexicon dealers.
Performing automatic calibration with microphones other than
those in the kit will produce unpredictable results. A separate kit
includes a microphone board assembly which is installed in one
of the available card slots.
• Proper microphone placement is essential to achieving the
desired automatic calibration results. Pay particular attention to
the microphone placement instructions and illustrations included
in this section.
• It is important to read and observe the care and handling
documentation included with the Lexicon Microphone Kit to
ensure optimal microphone performance.
• If power is lost during automatic calibration of speaker levels or
speaker distances, previous settings may be lost and recali-
bration of speaker levels and speaker distances is required.
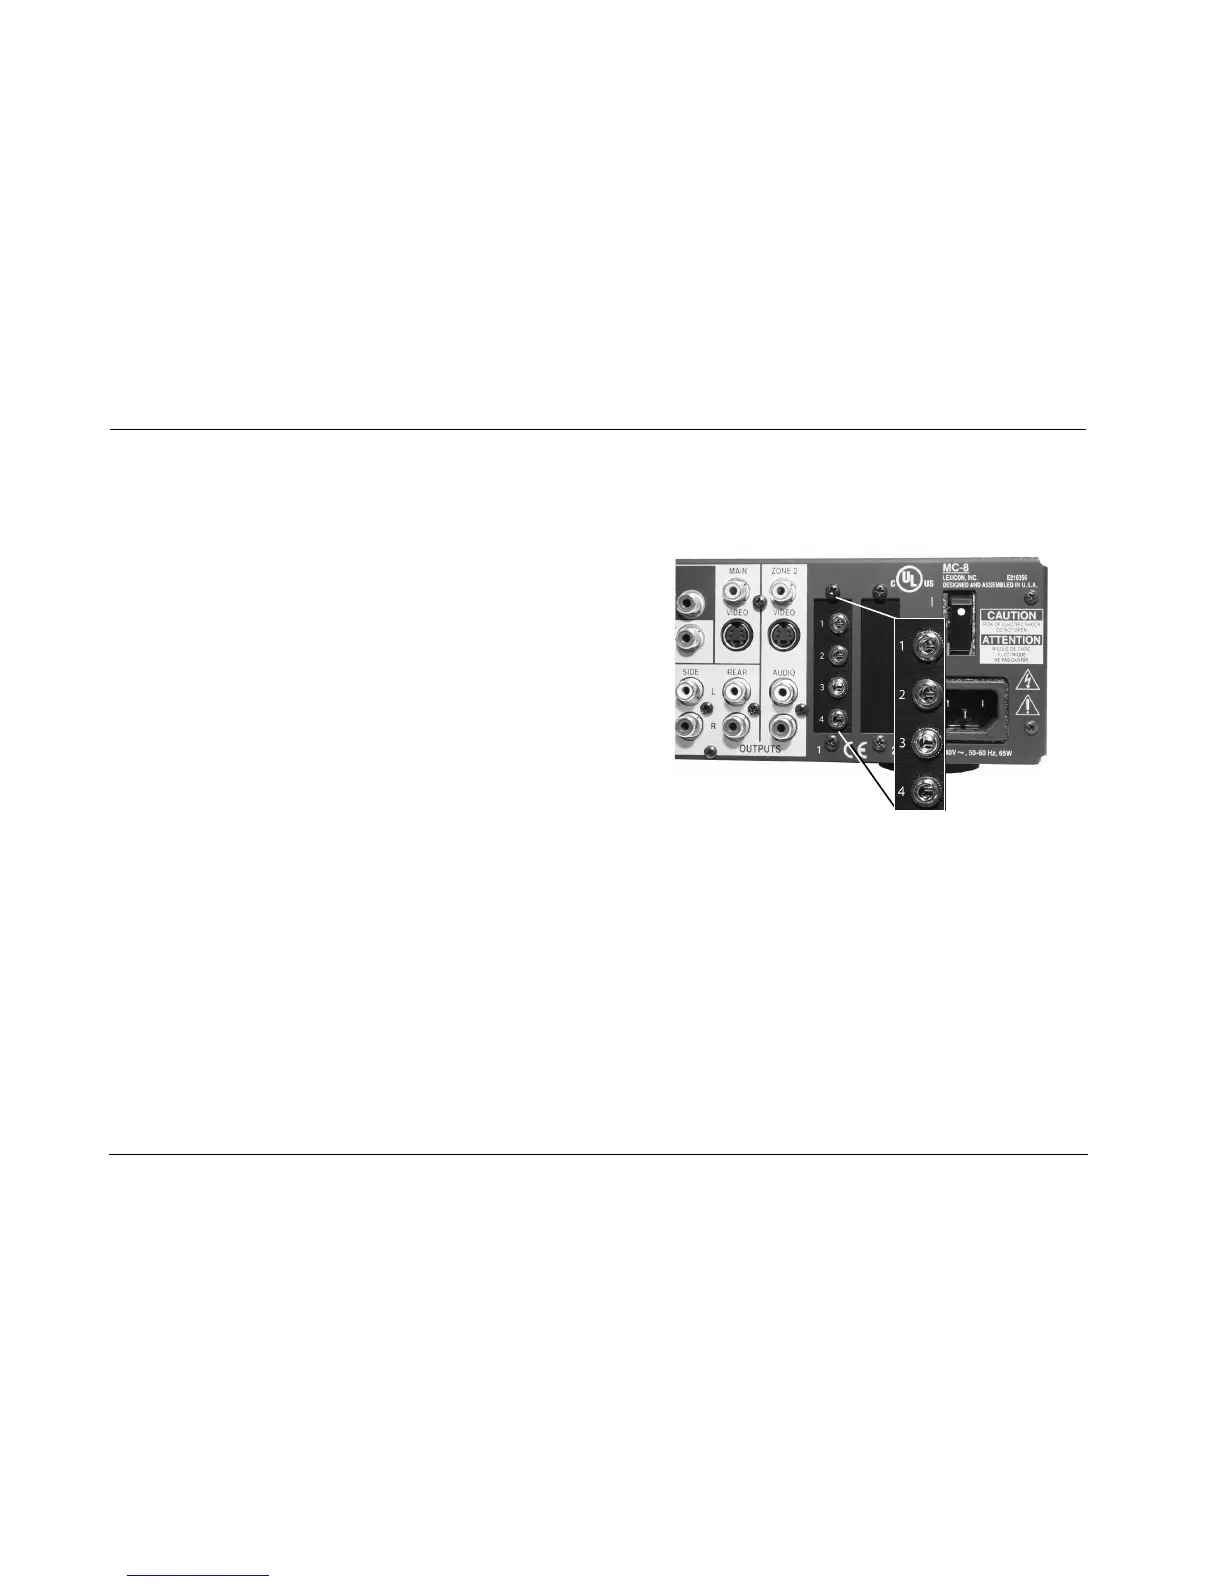
MC-8 rear panel with optional microphone board location
1. Make sure the MC-8 is powered off OR in standby mode.
2. Connect the microphones included in the Lexicon Microphone Kit
to the microphone input connectors on the MC-8 rear panel, as
shown above. Make sure the microphone cable plug is fully
inserted for a solid connection.
During the microphone check, the microphones will be
referred to as 1, 2, 3 and 4, based on the input connector to
which the microphone is connected. You should label the
microphones for troubleshooting purposes.
3. Power on the MC-8 or deactivate standby mode.